Follow Me On Social Media!
Chocolate chip cookies (gift-packaged) — Recipe & Packaging Ideas
Make big, soft chocolate chip cookies and package them as thoughtful gifts. Recipe includes baking tips, packaging steps, storage, variations, and presentation ideas for cookie gift boxes.

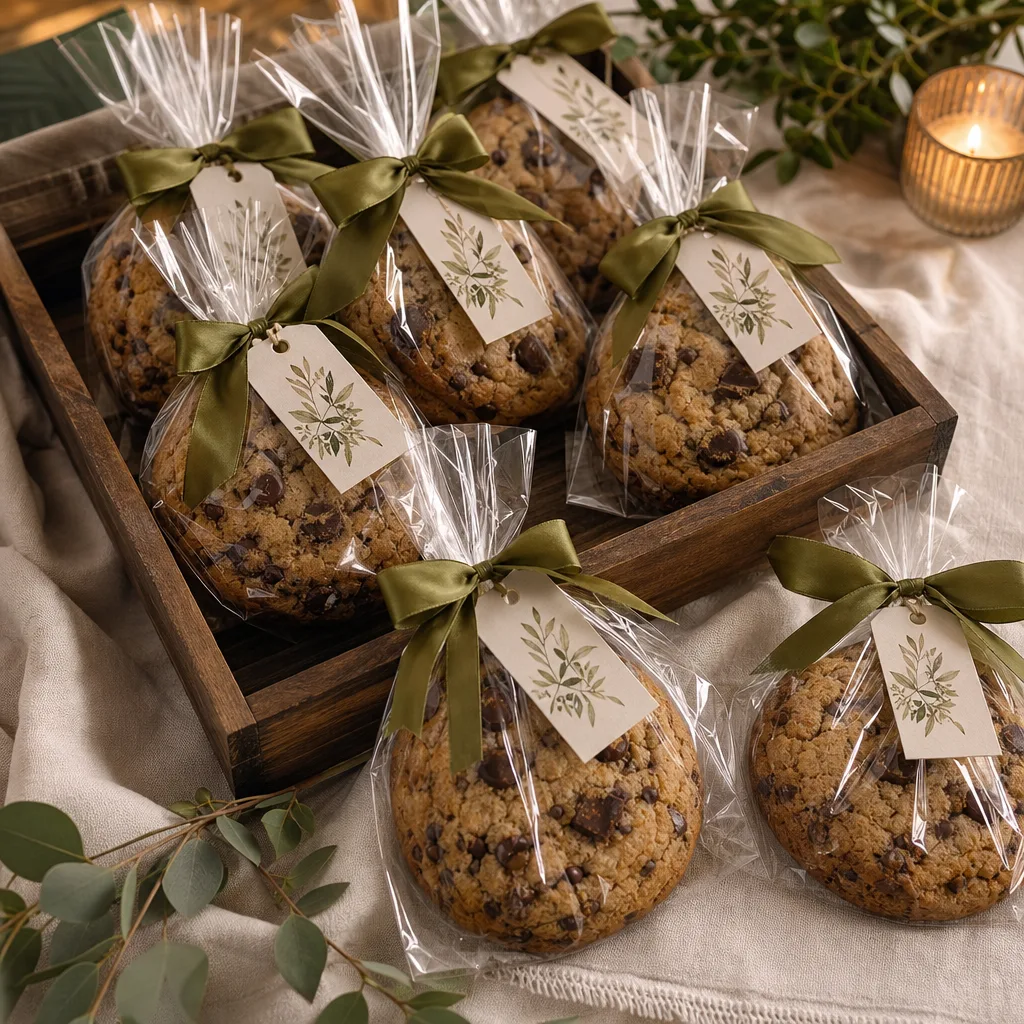
There’s something universally joyful about a perfectly baked chocolate chip cookie, especially when it arrives wrapped up like a little edible present. This recipe is built for both crowd-pleasing flavor and attractive gift presentation: big, slightly crackled cookies studded with dark chocolate, baked until the edges are gently crisp and the centers are tender. After the cookies cool, straightforward packaging steps transform them into thoughtful favors for holidays, neighbor gifts, bridal showers, teacher presents, or anytime you want to deliver comfort in a handcrafted bundle.
In these instructions you’ll find a dependable cookie dough formula, timing and temperature recommendations for consistent results, simple options for mix-ins, and clear directions for assembling an attractive gift package. The guidance balances ease and polish: I include shortcuts if you’re making a large batch, tips for avoiding common mistakes like overbaking or greasy bottoms, and suggestions for affordable packaging that nonetheless looks elegant. Whether you’re a confident baker trying to scale up for gifting or a beginner who wants a fail-safe crowd-pleaser, this recipe will help you deliver cookies that look as lovely as they taste.
Beyond the dough itself, presentation matters. The final section walks through packaging choices — cellophane bags, ribbon types, and tag ideas — and shows how small styling touches (a sprig of greenery, consistent tags, or a simple sticker) make a big difference. I also cover how to store and transport the cookies so they stay fresh and arrive looking as inviting as when you boxed them. Read on for step-by-step directions, ingredient notes, troubleshooting tips, and creative variations to match different occasions.
Why this recipe works
This cookie formula balances texture and flavor through a combination of brown sugar for moisture and chew, granulated sugar for crisp edges, and a touch of cornstarch to tenderize the crumb. The cornstarch is a small but effective addition that helps produce cookies with soft, melt-in-the-mouth centers while still allowing for a nicely browned perimeter.
The ratio of butter to flour and the addition of eggs provide structure without making the cookie cakey. Using a mix of chocolate chips and chopped chocolate ensures both pockets of creamy melted chocolate and rustic, studded surfaces that look attractive when packaged. Finishing each cookie with a few visible chips and optionally a sprinkle of coarse sea salt increases visual appeal and flavor contrast.
Ingredient notes and substitutions
All-purpose flour gives these cookies the right balance of tenderness and chew. If you prefer a lighter crumb, you can substitute up to 1/2 cup of the flour with pastry flour; for a heartier texture, replace 1/4 cup with bread flour. When weighing is not possible, spoon and level the flour into the measuring cup rather than scooping directly to avoid packing.
Unsalted butter is recommended so you control salt levels. If you must use salted butter, reduce the additional fine sea salt in the dough by about half. For a dairy-free version, use a firm plant-based butter and dairy-free chocolate chips; results will be slightly different in texture but still delicious.
Packaging and presentation tips
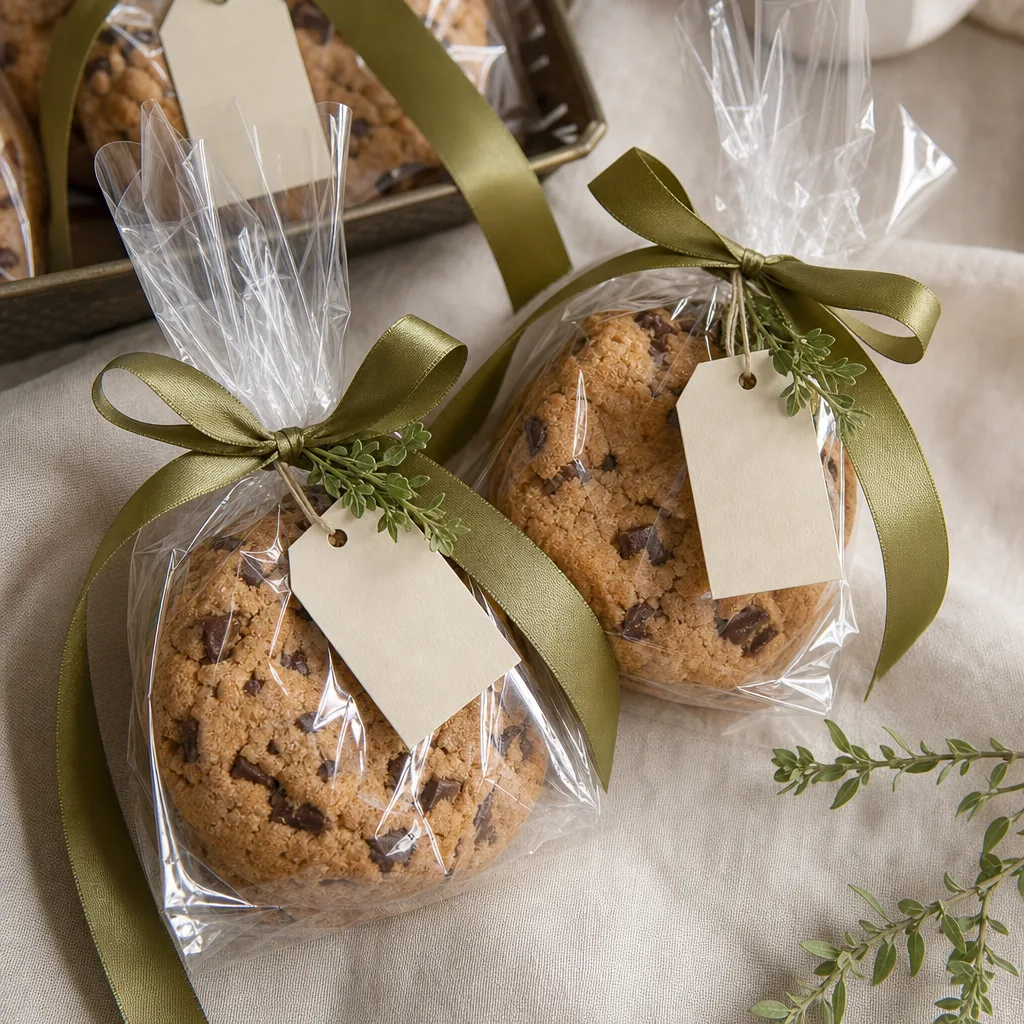
Choose clear cellophane bags that are food-safe and sized so cookies fit without crumpling. Olive-green satin ribbon gives a festive, earthy look but pick a color that suits your event or brand. Printed tags with consistent typography create a cohesive set; hand-stamped or handwritten tags add personal charm.
To create an elevated grouped gift, line a shallow wooden tray or kraft gift box with natural raffia or shredded tissue. Lay the bagged cookies neatly in rows, tuck a few sprigs of greenery into corners, and place a simple card on top with reheating instructions and a short note. This keeps presentation tidy and makes the act of gifting feel intentionally curated.
Ingredients
- all-purpose flour — 2 1/4 cups (280 g)
- baking soda — 1 teaspoon
- fine sea salt — 1 teaspoon
- unsalted butter — 1 cup (226 g), softened
- granulated sugar — 3/4 cup (150 g)
- packed light brown sugar — 3/4 cup (165 g)
- large eggs — 2
- pure vanilla extract — 2 teaspoons
- semisweet or dark chocolate chips/chunks — 2 cups (340 g)
- optional mix-in: chopped toasted pecans or walnuts — 1 cup (120 g)
- cornstarch — 1 tablespoon
- instant or quick oats (optional for texture) — 1/2 cup (45 g)
- cold water — 1 tablespoon (if needed to adjust dough consistency)
- neutral oil (optional, for shiny cellophane) — to taste
- cellophane gift bags — quantity as needed
- satin ribbon (olive green suggested) — length as needed
- printed gift tags or cardstock tags — quantity as needed
- parchment paper or silicone baking mat — as needed
- baking sheets — as needed
- nonstick spray or butter — to grease baking sheets (if not using parchment)
- cooled small sprig of decorative greenery — optional, to garnish package
- coarse sea salt (optional, for finishing) — to taste
Instructions
- Preheat the oven to 350°F (175°C). Line two baking sheets with parchment paper or silicone baking mats and set them aside. (ingredients used: parchment paper or silicone baking mat)
- In a large bowl whisk together the all-purpose flour, baking soda, fine sea salt, and cornstarch until evenly combined. If using oats, stir them into this dry mixture. This dry mix will give structure and a soft center to the cookies. (ingredients used: all-purpose flour — 2 1/4 cups (280 g); baking soda — 1 teaspoon; fine sea salt — 1 teaspoon; cornstarch — 1 tablespoon; instant or quick oats (optional for texture) — 1/2 cup (45 g))
- In the bowl of a stand mixer fitted with a paddle or in a large mixing bowl with an electric hand mixer, beat the softened unsalted butter, granulated sugar, and packed light brown sugar on medium speed until the mixture is light, creamy, and slightly fluffy — about 2 to 3 minutes. Proper creaming incorporates air and helps create a tender cookie with lift. (ingredients used: unsalted butter — 1 cup (226 g), softened; granulated sugar — 3/4 cup (150 g); packed light brown sugar — 3/4 cup (165 g))
- Add the large eggs one at a time, mixing briefly after each addition so each egg is fully incorporated. Scrape down the bowl as needed to ensure even mixing. Add the vanilla extract and mix until combined. (ingredients used: large eggs — 2; pure vanilla extract — 2 teaspoons)
- Reduce mixer speed to low and gradually add the dry mixture to the butter-sugar mixture, mixing just until no dry streaks remain. Do not overmix; you want a cohesive dough but not too much gluten development. If the dough seems excessively stiff, add up to 1 tablespoon cold water to reach a slightly tacky but scoopable consistency. (ingredients used: cold water — 1 tablespoon (if needed to adjust dough consistency))
- Fold in the chocolate chips or chunks by hand with a sturdy spatula, reserving a small handful to press on top of dough rounds before baking for a bakery-style look. If using nuts, fold them in with the chocolate. (ingredients used: semisweet or dark chocolate chips/chunks — 2 cups (340 g); optional mix-in: chopped toasted pecans or walnuts — 1 cup (120 g))
- Portion the dough into large cookie rounds: use a 2 1/2-tablespoon cookie scoop or a heaping 1/4-cup measure to create generous discs. Place them on the prepared baking sheets with at least 2 inches of space between rounds to allow for spreading. For uniformly round cookies, chill the scooped dough on the baking sheet for 10–15 minutes before baking. (ingredients used: baking sheets)
- If desired, gently press a few extra chips onto the top center of each dough ball and sprinkle a pinch of coarse sea salt for contrast. This finishing touch enhances visual appeal and balances sweetness. (ingredients used: coarse sea salt (optional, for finishing) — to taste)
- Bake one sheet at a time in the center of the preheated oven for 10 to 13 minutes, rotating halfway through if your oven has hot spots. Aim for edges that are lightly golden and centers that still look slightly soft; cookies will continue to set as they cool. (ingredients used: baking sheets)
- Remove the baking sheet from the oven and let cookies cool on the sheet for 5 minutes, then transfer them to a wire rack to finish cooling completely. This step prevents breakage and keeps the bottoms from becoming soggy. (ingredients used: wire rack — implied as equipment if available)
- Once cookies are fully cool, prepare packaging materials. If using cellophane bags, make sure the bags are clean and dry. For a polished presentation, lightly brush a small amount of neutral oil on the inside top of bags to create a subtle glossy finish that enhances the cookies’ visual appeal when photographed or displayed. (ingredients used: cellophane gift bags — quantity as needed; neutral oil (optional, for shiny cellophane) — to taste)
- Place one or two cookies (or the quantity you prefer) into each cellophane bag. For fragile cookies or long-distance shipping, nestle cookies between small squares of parchment to prevent sticking and cushion them. (ingredients used: parchment paper or silicone baking mat — as needed; cellophane gift bags — quantity as needed)
- Cut ribbons into lengths that will tie neatly around the bag neck with enough tail to form a bow. Thread ribbons through a printed gift tag hole or tie the tag to the ribbon. Attach a small sprig of decorative greenery under the knot for a natural accent. Secure the ribbon with a bow and trim tails evenly. (ingredients used: satin ribbon (olive green suggested) — length as needed; printed gift tags or cardstock tags — quantity as needed; cooled small sprig of decorative greenery — optional, to garnish package)
- Arrange the finished, gift-packaged cookies in a wooden tray or gift box for group presentation. If stacking bags in a box, place a thin layer of tissue or shredded paper at the bottom to cushion cookies, and avoid compressing the bags so bows and tags remain intact. (ingredients used: wooden tray / gift box used for grouping — implied as presentation item)
- Store packaged cookies at room temperature for up to 4 days in a cool, dry place away from direct sunlight. For longer storage, freeze unwrapped cooled cookies in a single layer on a tray until firm, then transfer to a freezer-safe container or bag; package from frozen and allow recipients to thaw at room temperature for a few hours. (ingredients used: cellophane gift bags — quantity as needed)
- If shipping, choose a sturdy box with insulation or add padding and an ice pack for warm weather. Include a label indicating ‘perishable’ and instruct the recipient to open promptly. (ingredients used: cellophane gift bags — quantity as needed)
Pro Tips
- Chill scooped dough for 10–15 minutes before baking when you want taller, less-spread cookies; this is especially helpful in warm kitchens.
- Use a combination of semisweet chips and chopped dark chocolate for a mix of melty pockets and rustic chocolate chunks.
- Weighing flour delivers consistent results—fluff the flour, spoon it into the cup, and level when weighing is not an option.
- If your butter is too soft, pop the mixed dough in the fridge for 20 minutes before scooping to make handling easier.
- For a bakery-style appearance, press a few reserved chocolate chips gently into the surface immediately after cookies come out of the oven so they melt slightly onto the top.
Variations
- Browned-butter chocolate chip: Brown the butter over medium heat until nutty and golden, cool slightly, then proceed with the recipe for a warm caramelized flavor.
- Double-chocolate: Replace 1/4 cup of flour with 1/4 cup unsweetened cocoa powder and use mini chocolate chips for a rich cocoa cookie.
- Oat-studded: Add the optional 1/2 cup quick oats plus 1/2 cup chopped toasted walnuts for a chewier texture and nutty flavor.
- Salted toffee: Fold in 1 cup crushed toffee bits and finish each cookie with a small sprinkle of flaky sea salt right after baking.
Serving Suggestions
- Package one large cookie per cellophane bag, tied with an olive-green satin bow and a handwritten ‘thank you’ tag for showers or party favors.
- Create a gift set with three cookies tucked into a kraft box layered with tissue, accented with a sprig of rosemary and a printed tag for neighbor gifts.
- Serve warm cookies on a wooden tray with small bowls of hot chocolate and whipped cream at a casual gathering; allow guests to pick and pack their own to-go bag.
- Include a note card with reheating instructions and suggested pairings like coffee, tea, or a cold glass of milk when gifting.
Make-ahead and batch scaling
This dough scales well for large batches. For multiple dozens, consider using an industrial paddle or mixing in two large batches to maintain even mixing. Keep chilled dough balls on baking sheets in the refrigerator while you bake subsequent sheets to ensure consistent shape and height.
For make-ahead gifting, bake cookies and freeze them fully cooled in a single layer. When preparing gift bags, place frozen cookies into bags; they’ll thaw during transit or by the time the recipient opens them. This approach is convenient for holiday preparation and ensures cookies retain their freshly-baked texture when eaten.
Storage and Reheating
Store cookies in an airtight container at room temperature for up to four days. To refresh slightly stale cookies, warm them in a 300°F (150°C) oven for 4–6 minutes, or microwave one cookie on a microwave-safe plate for 10–12 seconds to regain softness. For longer storage, freeze baked, cooled cookies in a single layer, then transfer them to a freezer-safe bag for up to 3 months. Thaw at room temperature or warm gently before gifting.
Chocolate chip cookies (gift-packaged)
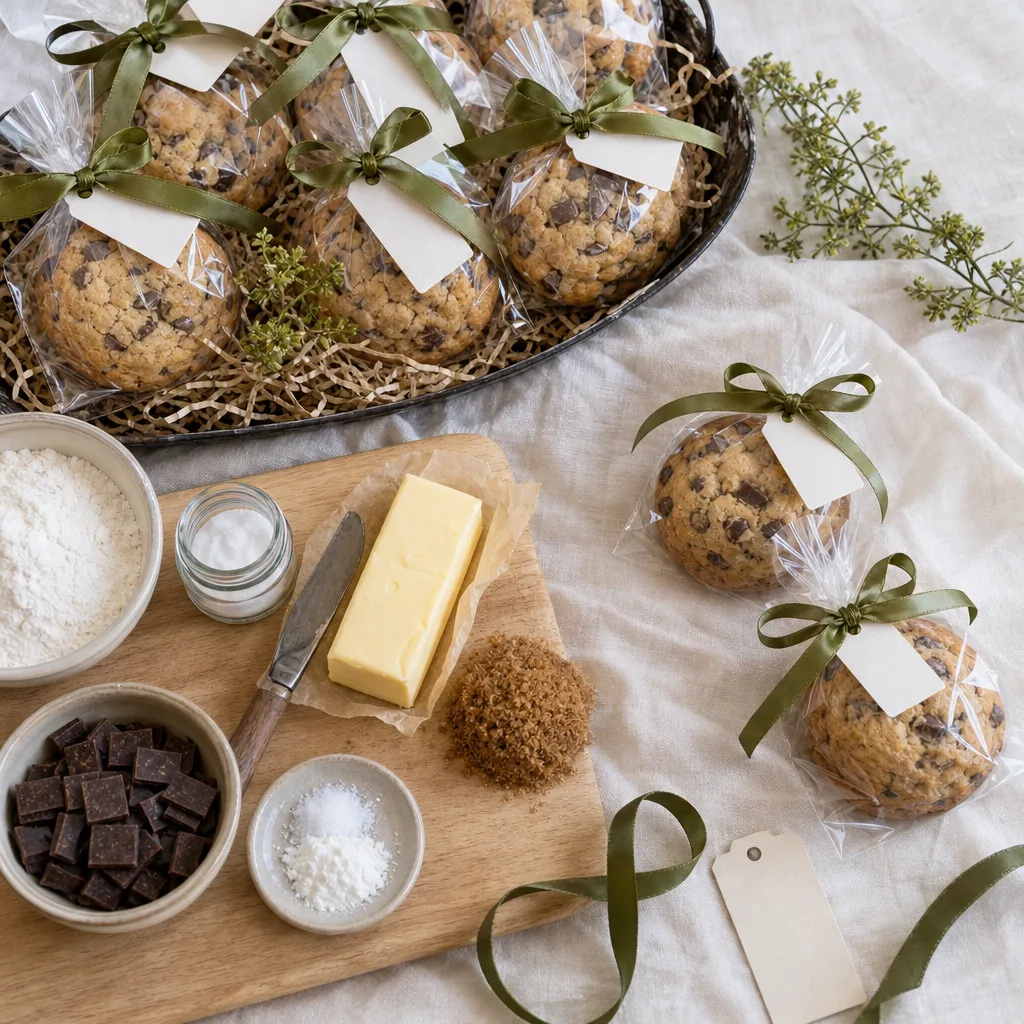
Large, slightly crackled chocolate chip cookies baked with a soft center and crisp edge, finished with visible chips and optionally a sprinkle of coarse salt. Packaged in clear cellophane bags with ribbon and tags for gifting.
Ingredients
Equipment
Method
- Preheat the oven to 350°F (175°C) and line two baking sheets with parchment paper or silicone baking mats.
- Whisk together the all-purpose flour, baking soda, fine sea salt, and cornstarch in a large bowl; add oats if using.
- Cream the softened unsalted butter with granulated sugar and packed light brown sugar until light and fluffy, about 2–3 minutes.
- Beat in the eggs one at a time, then add the vanilla extract and mix until combined.
- Gradually add the dry mixture to the wet ingredients on low speed, mixing until just combined; add up to 1 tablespoon cold water if dough is too stiff.
- Fold in the chocolate chips or chunks and any optional chopped nuts, reserving some chips to press on cookie tops later.
- Scoop dough into large rounds (about 2 1/2 tablespoons or a heaping 1/4 cup each) and place them on the prepared baking sheets with at least 2 inches between them; chill scooped dough 10–15 minutes for taller cookies.
- If desired, press a few reserved chocolate chips onto each dough ball and sprinkle a pinch of coarse sea salt on top.
- Bake for 10–13 minutes until edges are lightly golden and centers remain slightly soft; remove from the oven and allow cookies to cool on the baking sheet for 5 minutes before transferring to a wire rack to cool completely.
- When cookies are fully cool, place one or two cookies into each clean, dry cellophane gift bag; add parchment squares between cookies if shipping or stacking to prevent sticking.
- If desired, lightly brush a small amount of neutral oil inside the bag top to create a subtle glossy effect, then tie the bag with a length of ribbon threaded through a printed tag, and tuck a small sprig of greenery under the knot.
- Arrange packaged cookies in a wooden tray or kraft box with tissue or shredded paper for presentation, making sure not to compress bows or tags.
- Store packaged cookies at room temperature for up to 4 days; for longer storage freeze cooled cookies in a single layer and transfer to a freezer-safe container for up to 3 months.
Notes
Adjust bake time slightly for different oven calibrations and cookie sizes.
Weighing ingredients increases consistency, especially for flour and chocolate.
Always cool cookies completely before sealing in cellophane to avoid condensation.
Frequently Asked Questions
Can I make the dough ahead and bake later?
Yes. The dough can be refrigerated for up to 72 hours tightly wrapped or in an airtight container; allow it to warm slightly on the counter for 10–15 minutes before scooping. For longer storage, freeze dough balls on a tray until solid, then transfer them to a freezer bag for up to 3 months and bake from frozen, adding an extra 1–2 minutes to the bake time.
How do I prevent cookies from spreading too much?
Ensure your butter isn’t overly melted when creaming and chill scooped dough for 10–15 minutes before baking. Use properly measured flour: too little flour causes excess spread. Finally, check your baking soda quantity — too much leavening can increase spreading and cracking.
What kind of chocolate is best for these cookies?
Use a mix of semisweet or dark chocolate chips and chopped chocolate chunks for textural contrast. Higher-quality chocolate with a cocoa percentage of 55–70% delivers more complex flavor. Mini chips produce small pockets of chocolate, while larger chunks create dramatic molten centers.
Can I make smaller cookies for packaging multiple in a box?
Absolutely. Reduce the scoop size to 1 tablespoon or use a small cookie scoop; bake for 8–10 minutes depending on size and desired chewiness. Smaller cookies are convenient for gift boxes and easier to stack without breaking.
How should I label allergen information when gifting cookies?
Clearly list potential allergens such as nuts, dairy, eggs, and wheat on a small card included with the package. If cookies were made in a kitchen that handles other allergens, note that cross-contamination is possible. This is especially important for events where guests may have severe allergies.