Follow Me On Social Media!
Turtle-shaped mini pizzas (novelty pizza buns)
Make whimsical turtle-shaped mini pizzas—soft enriched dough shaped into shells and legs, topped with sauce, melted mozzarella and pepperoni spots. Perfect for parties and kid-friendly lunches.

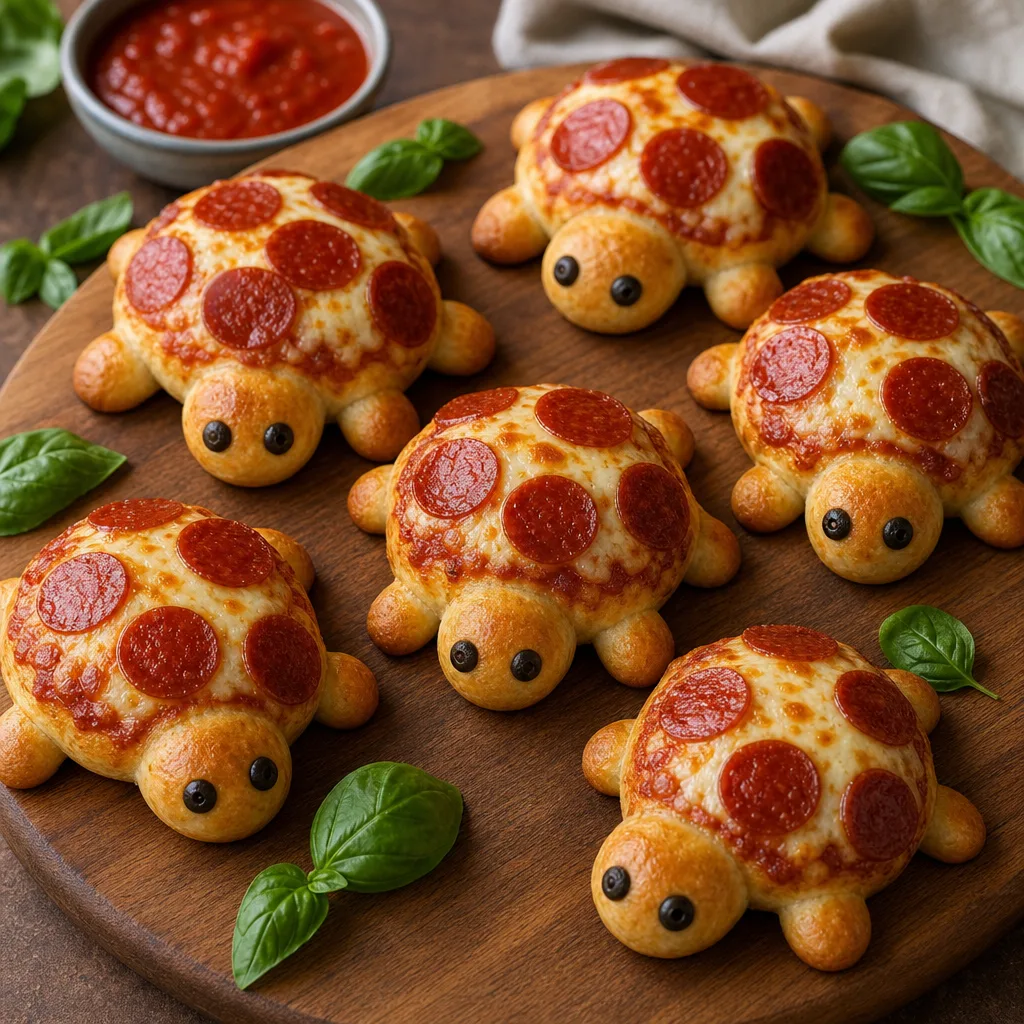
Turtle-shaped mini pizzas are a playful, crowd-pleasing snack that turn familiar pizza flavors into individual, whimsical buns. These novelty pizza buns combine soft, enriched dough formed into a round "shell" with smaller dough balls for legs and a head, finished with sauce, melted cheese and pepperoni "spots." They bake to a golden-brown crust with gooey cheese and crisp edges where the dough meets the sheet, making them an ideal party finger food, kid-friendly lunchbox treat, or cozy snack for movie night.
This recipe walks you through making the enriched dough from scratch, shaping each turtle, assembling toppings, and baking them to an appealing golden sheen. Along the way you'll learn small techniques—like using an egg wash for extra shine, how to arrange the little dough appendages so they stay attached, and which fillings or toppings hold up best during baking. The result is both decorative and delicious: a little personal pizza with a lot of personality.
Beyond the fun factor, these mini pizzas are practical. Dough can be made ahead and chilled or frozen, fillings customized to dietary needs, and the buns are sturdy enough for transport to potlucks or school lunches. The following instructions include full ingredient quantities and step-by-step tips to help you make a batch of whimsical turtle pizzas that look as good as they taste.
Why this recipe works
This turtle-shaped mini pizza recipe balances structure and flavor by using an enriched dough that stays soft yet holds its novelty shape. The combination of milk and butter in the dough adds tenderness and a golden crust, while a brief proof and correct oven temperature give the buns a good oven spring without collapsing.
Toppings are kept light and strategically placed: a modest amount of sauce prevents a soggy interior, while a measured sprinkling of mozzarella melts evenly across the shell. Pepperoni slices both flavor the turtle and serve as visual elements, so they’re arranged rather than piled. Small garnish details, like olive eyes, provide contrast and help the turtles read as playful characters.
Ingredient notes and substitutions
Flour: All-purpose flour works well for these soft rolls; if you prefer a chewier result, swap half the flour for bread flour. Whole wheat can be used for part of the flour, but expect denser texture and a nuttier flavor.
Cheese and toppings: Mozzarella gives the classic stretchy texture. For more flavor, mix in a 25/75 blend of mozzarella and provolone or add a sprinkling of Parmesan before baking. For dairy-free needs, use a plant-based shredded cheese designed for melting, and choose toppings that also meet dietary restrictions.
Safety and serving temperature
Serve these mini pizzas warm for the best eating experience; cheese reaches optimal texture just after removal from the oven. If serving to young children, allow turtles to cool until the cheese and interior are comfortably warm to the touch.
If storing leftovers at room temperature for a party, keep turtles out for no more than two hours. Refrigerate any leftovers promptly and reheat thoroughly before serving again to ensure food safety and flavor.
Ingredients
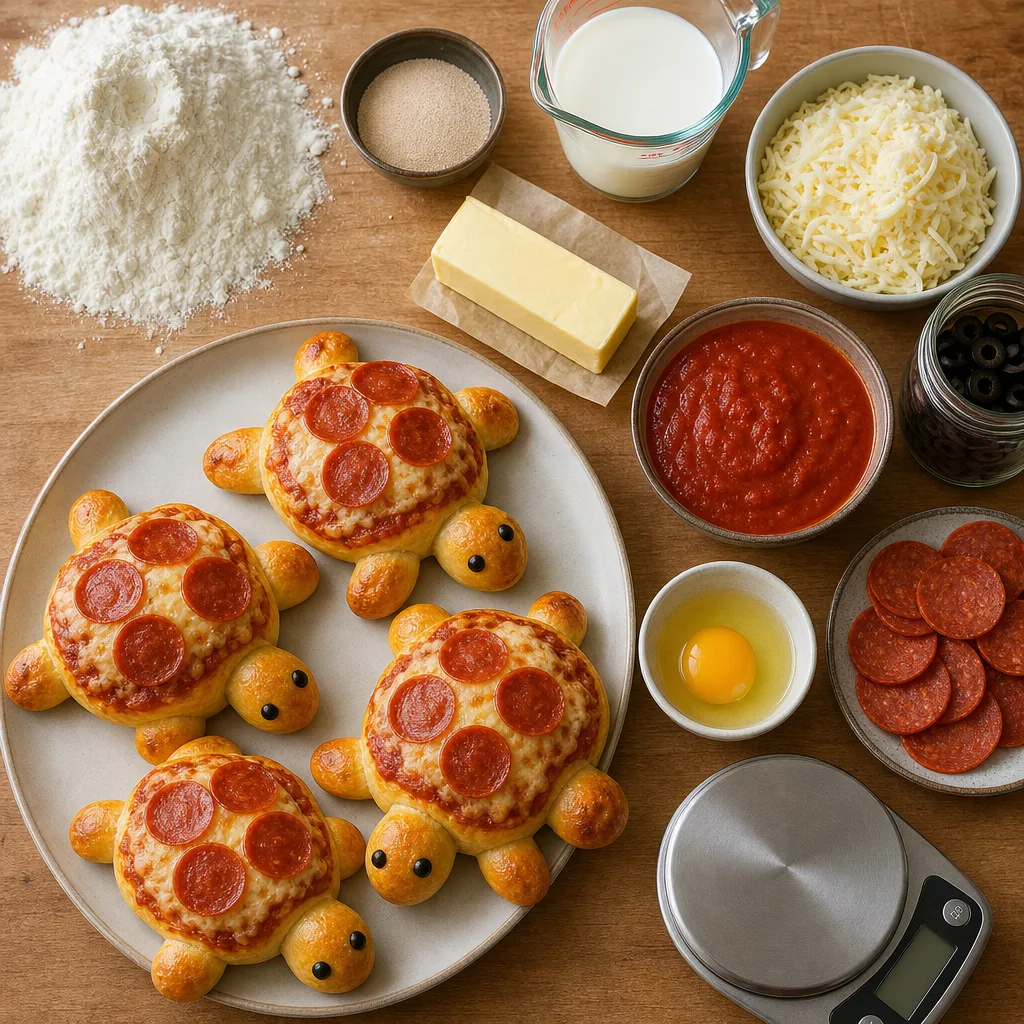
- All-purpose flour — 3 1/2 cups (420 g)
- Instant yeast — 2 1/4 teaspoons (1 packet)
- Granulated sugar — 1 tablespoon
- Salt — 1 1/2 teaspoons, plus more to taste
- Warm water (about 105–115°F / 40–46°C) — 1 cup (240 ml)
- Whole milk, warmed slightly — 1/2 cup (120 ml)
- Unsalted butter, softened — 3 tablespoons (42 g)
- Large egg — 1 (for dough)
- Extra large egg — 1 (for egg wash, optional)
- Olive oil — 1 tablespoon (for bowl and brushing)
- Tomato pizza sauce (store-bought or homemade) — 1 to 1 1/2 cups
- Shredded mozzarella cheese — 3 cups (300 g)
- Sliced pepperoni (or mini pepperoni) — 24 to 36 slices
- Black olives, pitted and sliced (for eyes) — about 24 small slices or 12 halves
- Dried oregano — 1 teaspoon
- Grated Parmesan cheese — 2 tablespoons (optional)
- Cornmeal or extra flour for dusting — as needed
- Water — to adjust dough consistency or for egg wash thinning (if needed)
- Butter, melted — 1 tablespoon (optional, for finishing)
Instructions
- Prepare the dough: In the bowl of a stand mixer fitted with a dough hook (or in a large mixing bowl for hand kneading), combine 2 cups (240 g) of the flour, the instant yeast, granulated sugar and 1 1/2 teaspoons salt. Whisk briefly to distribute dry ingredients evenly. (ingredient_ids: ["flour","instant_yeast","sugar","salt"])
- Add liquids and mix: Pour in the warm water, warmed milk, softened butter and 1 large egg. Start the mixer on low and gradually incorporate the dry ingredients. If hand mixing, stir with a wooden spoon until a shaggy dough forms. (ingredient_ids: ["warm_water","milk","butter","egg"])
- Knead and add remaining flour: With the mixer on medium-low, add the remaining 1 1/2 cups (180 g) of flour a little at a time until the dough pulls away from the bowl and becomes smooth and elastic, about 6–8 minutes in a mixer or 10–12 minutes by hand. The dough should be slightly tacky but not sticky; add a teaspoon of water or flour if necessary to adjust. (ingredient_ids: ["flour"])
- First rise: Lightly oil a clean bowl with olive oil, transfer the dough to the bowl and turn it so all surfaces are lightly coated. Cover with plastic wrap or a damp towel and let it rise in a warm draft-free place until doubled in size, about 60 to 75 minutes. (ingredient_ids: ["olive_oil"])
- Divide the dough: Gently deflate the risen dough and turn it onto a lightly floured surface. Divide the dough into 8 equal portions for turtle bases (about 80–90 g each). From each portion, set aside about 1/3 of the dough to form the four small limbs and head (you’ll make 5 small balls per turtle). Roll each larger portion into a smooth round for the shell and the reserved piece into five smaller balls: four legs and one head. (ingredient_ids: ["flour"])
- Shape the turtles: Arrange each turtle on a parchment-lined baking sheet or silicone mat. Press the larger round gently to flatten slightly into a disc about 3–3.5 inches (7.5–9 cm). Position four smaller balls around the lower half as legs and one small ball at the front as a head. Press each small ball gently to stick, but keep them distinct. Space turtles about 2 inches apart to allow for expansion. (ingredient_ids: [])
- Second rise: Cover the shaped turtles loosely with plastic wrap or a damp cloth and let them proof for 20–30 minutes until puffy but not overproofed. Meanwhile preheat the oven to 400°F (200°C). (ingredient_ids: [])
- Prep toppings and egg wash: If using an egg wash, beat the extra large egg with 1 tablespoon water. Have the tomato sauce, shredded mozzarella, pepperoni and olive slices ready. (ingredient_ids: ["egg","water","tomato_sauce","mozzarella","pepperoni","black_olives"])
- Apply egg wash and parbake (optional): For extra sheen on the dough, lightly brush the turtle shells and appendages with egg wash. If you prefer slightly crisper bases, parbake the shaped dough for 5 minutes at 400°F before topping; this step is optional. (ingredient_ids: ["egg","water"])
- Top the shells: Spoon about 1 to 2 tablespoons of tomato sauce onto each larger disc and spread gently, leaving a thin rim of exposed dough. Sprinkle about 1/4 cup (30–40 g) shredded mozzarella evenly over the sauce. Place pepperoni slices across the shell to create spot patterns. Add two tiny olive pieces as eyes on the head ball. Sprinkle a pinch of dried oregano and, if using, a little grated Parmesan. (ingredient_ids: ["tomato_sauce","mozzarella","pepperoni","black_olives","oregano","parmesan"])
- Bake the turtles: Bake the prepared tray(s) in the preheated oven for 12–16 minutes, rotating the pan halfway through, until the dough is golden brown and the cheese is melted and just starting to brown. If you parbaked, the final bake may take 8–12 minutes. (ingredient_ids: [])
- Finish and glaze: Remove from the oven and, if you like, brush the exposed crust lightly with melted butter for extra flavor and shine. Allow turtles to cool on the tray for 5 minutes, then transfer to a wire rack for another 5–10 minutes so the cheese sets slightly before serving. (ingredient_ids: ["butter"])
- Serve warm or cool: These mini pizzas taste best warm but hold well at room temperature for parties. Reheat in a 350°F (175°C) oven for 8–10 minutes to regain crispness. (ingredient_ids: [])
Pro Tips
- Room temperature ingredients: For best dough texture, bring the milk and egg to room temperature before mixing; warm milk helps activate the yeast without killing it.
- Use a scale: Weighing dough portions produces the most uniform turtles so they bake evenly; aim for consistent sizes for both shells and limbs.
- Tightly attach appendages: To prevent legs and heads from detaching during baking, press small pieces of dough firmly to the shell and, if needed, moisten connection points with a touch of water.
- Parbake for crispier bottoms: A short parbake of 4–6 minutes before topping helps prevent soggy centers, especially if you use wetter sauces or heavy toppings.
- Control cheese runoff: Leave a small margin of exposed dough around the shell to contain the cheese; overloading can cause cheese to ooze and glue turtles to the pan.
- Egg wash alternatives: If you prefer not to use egg wash, brush with olive oil for a softer, matte crust or a thin layer of milk for gentle browning.
- Make-ahead dough: Dough can be chilled in the refrigerator overnight for more flavor and easier shaping in the morning; allow it to come to room temperature and proof before shaping.
- Avoid overproofing: Proof until puffy but still springy. Overproofed dough will collapse and spread, diminishing the turtle shape.
- Kid-friendly assembly: Lay out toppings in small bowls and let children press on pepperoni spots and olives for a fun interactive activity.
- Salt to taste: Adjust salt levels in the sauce and dough if using salted butter or heavily seasoned toppings.
Variations
- Vegetarian: Replace pepperoni with thinly sliced cherry tomatoes and roasted red pepper strips; add small basil leaves as decorative accents instead of olive eyes.
- Mini calzone turtles: Place a teaspoon of ricotta mixed with chopped spinach in the center disc, seal edges lightly with a fork, then top lightly with sauce and cheese so the turtle still reads as a pizza-bun hybrid.
- Spicy sausage turtles: Use cooked, crumbled Italian sausage mixed with a little marinara as the shell filling and top with pepper jack or a sharp cheddar-mozzarella blend for heat.
- Pesto and sundried tomato: Swap tomato sauce for a thin layer of basil pesto and top with shredded mozzarella and finely chopped sundried tomatoes for an herb-forward version.
Serving Suggestions
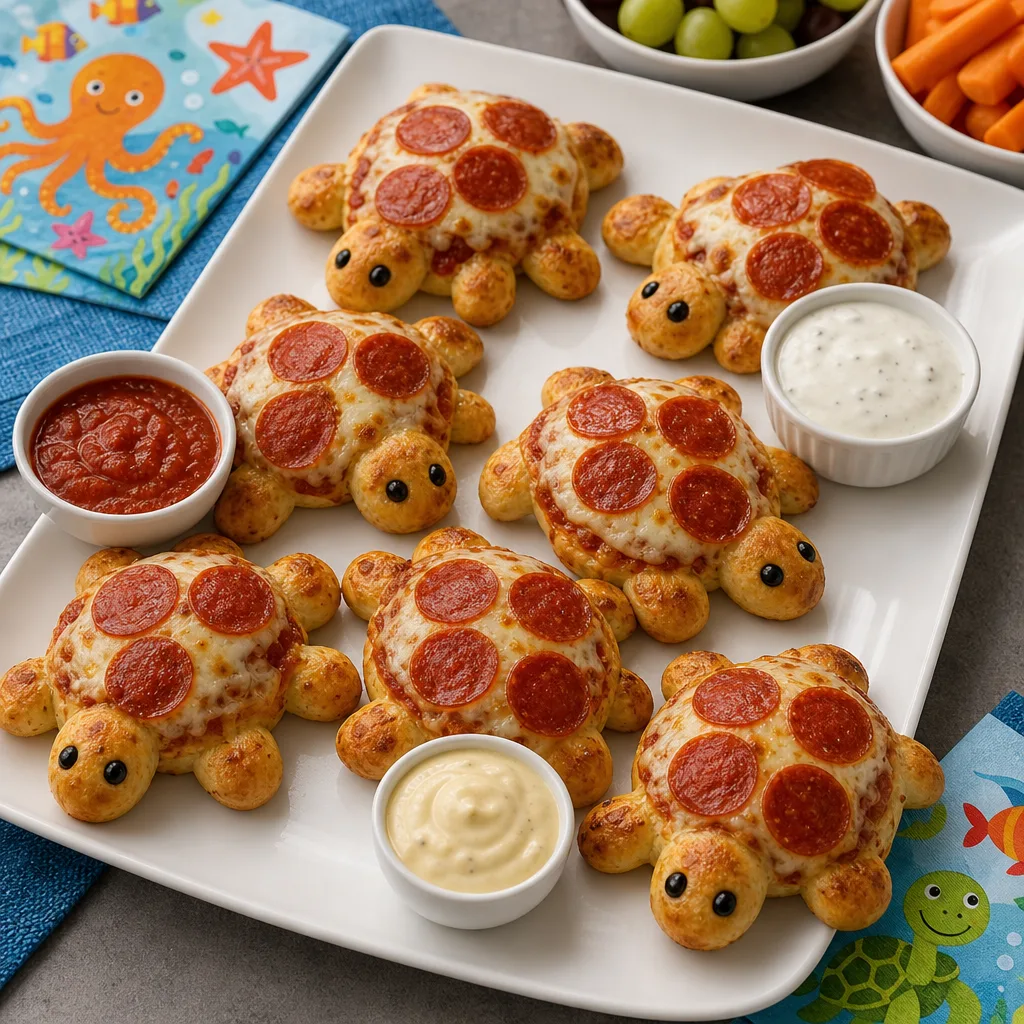
- Party platter: Arrange turtles on a large wooden board with bowls of marinara, ranch and garlic aioli for dipping; garnish with fresh basil sprigs.
- Lunchbox option: Pack two turtles with a small container of chilled marinara and a side of carrot sticks and grapes for a balanced meal.
- Movie night snack: Serve a warm stack of turtles on a platter with napkins; pair with crisp beer or a sparkling soda for a casual crowd.
- Kid’s birthday: Make half the batch plain cheese turtles and half with pepperoni; top some shells with colorful bell pepper slices to create 'patterned' shells for variety.
Make-ahead and freezing strategy
Dough can be made the day before and refrigerated overnight to develop flavor and make shaping easier. Cold dough is firmer and simpler to portion into uniform shells and limbs. Allow chilled dough to come closer to room temperature before shaping so it’s pliable.
For freezing, bake the turtles fully or freeze unbaked, shaped turtles on a tray until solid. Transfer frozen turtles to a heavy-duty freezer bag. Bake from frozen for a slightly longer time, or thaw in the refrigerator overnight and bake as fresh; either method preserves shape and texture well.
Storage and Reheating
Store cooled turtle pizzas in an airtight container in the refrigerator for up to 3 days. To reheat, preheat the oven to 350°F (175°C) and place turtles on a baking sheet for 8–10 minutes until warmed through and crust recrisped. Reheating in a toaster oven or air fryer at 330–350°F for shorter times (4–6 minutes) also works—watch carefully to avoid burning. For longer storage, freeze fully cooled turtles on a tray until firm, then transfer to a sealed freezer bag for up to 2 months. Reheat from frozen at 350°F for 12–18 minutes, or thaw overnight in the fridge and reheat as above.
Turtle-shaped mini pizzas (novelty pizza buns)
Soft, enriched dough is shaped into individual turtle-shaped mini pizzas, topped with tomato sauce, melted mozzarella and pepperoni spots. These novelty pizza buns are ideal for parties, kids and casual snacks.
Ingredients
Equipment
Method
- Prepare the dough: In the bowl of a stand mixer fitted with a dough hook (or in a large mixing bowl for hand kneading), combine 2 cups (240 g) of the flour, the instant yeast, granulated sugar and 1 1/2 teaspoons salt. Whisk briefly to distribute dry ingredients evenly.
- Add liquids and mix: Pour in the warm water, warmed milk, softened butter and 1 large egg. Start the mixer on low and gradually incorporate the dry ingredients. If hand mixing, stir with a wooden spoon until a shaggy dough forms.
- Knead and add remaining flour: With the mixer on medium-low, add the remaining 1 1/2 cups (180 g) of flour a little at a time until the dough pulls away from the bowl and becomes smooth and elastic, about 6–8 minutes in a mixer or 10–12 minutes by hand. The dough should be slightly tacky but not sticky; add a teaspoon of water or flour if necessary to adjust.
- First rise: Lightly oil a clean bowl with olive oil, transfer the dough to the bowl and turn it so all surfaces are lightly coated. Cover with plastic wrap or a damp towel and let it rise in a warm draft-free place until doubled in size, about 60 to 75 minutes.
- Divide the dough: Gently deflate the risen dough and turn it onto a lightly floured surface. Divide the dough into 8 equal portions for turtle bases (about 80–90 g each). From each portion, set aside about 1/3 of the dough to form the four small limbs and head (you’ll make 5 small balls per turtle). Roll each larger portion into a smooth round for the shell and the reserved piece into five smaller balls: four legs and one head.
- Shape the turtles: Arrange each turtle on a parchment-lined baking sheet or silicone mat. Press the larger round gently to flatten slightly into a disc about 3–3.5 inches (7.5–9 cm). Position four smaller balls around the lower half as legs and one small ball at the front as a head. Press each small ball gently to stick, but keep them distinct. Space turtles about 2 inches apart to allow for expansion.
- Second rise: Cover the shaped turtles loosely with plastic wrap or a damp cloth and let them proof for 20–30 minutes until puffy but not overproofed. Meanwhile preheat the oven to 400°F (200°C).
- Prep toppings and egg wash: If using an egg wash, beat the extra large egg with 1 tablespoon water. Have the tomato sauce, shredded mozzarella, pepperoni and olive slices ready.
- Apply egg wash and parbake (optional): For extra sheen on the dough, lightly brush the turtle shells and appendages with egg wash. If you prefer slightly crisper bases, parbake the shaped dough for 5 minutes at 400°F before topping; this step is optional.
- Top the shells: Spoon about 1 to 2 tablespoons of tomato sauce onto each larger disc and spread gently, leaving a thin rim of exposed dough. Sprinkle about 1/4 cup (30–40 g) shredded mozzarella evenly over the sauce. Place pepperoni slices across the shell to create spot patterns. Add two tiny olive pieces as eyes on the head ball. Sprinkle a pinch of dried oregano and, if using, a little grated Parmesan.
- Bake the turtles: Bake the prepared tray(s) in the preheated oven for 12–16 minutes, rotating the pan halfway through, until the dough is golden brown and the cheese is melted and just starting to brown. If you parbaked, the final bake may take 8–12 minutes.
- Finish and glaze: Remove from the oven and, if you like, brush the exposed crust lightly with melted butter for extra flavor and shine. Allow turtles to cool on the tray for 5 minutes, then transfer to a wire rack for another 5–10 minutes so the cheese sets slightly before serving.
- Serve warm or cool: These mini pizzas taste best warm but hold well at room temperature for parties. Reheat in a 350°F (175°C) oven for 8–10 minutes to regain crispness.
Notes
Quantities and times are provided as a tested approach for an average home oven and standard ingredient brands. Adjust proofing and bake times for high-altitude or variable ovens.
This recipe intentionally uses common pantry ingredients and straightforward shaping techniques so bakers at beginner to intermediate levels can achieve consistent results.
Frequently Asked Questions
Can I make the dough in a bread machine?
Yes. Use your bread machine’s dough setting and follow the machine’s order for liquids and dry ingredients. Remove the dough when the cycle finishes and proceed with dividing, shaping and proofing as directed. Bread machine cycles vary, so check that the dough reaches a smooth, elastic stage before stopping.
What can I use instead of pepperoni for a nut-allergic or halal-friendly option?
Swap pepperoni for turkey pepperoni, halal-certified sausage slices, or thinly sliced mushrooms for a vegetarian-friendly spot effect. For nut allergies, avoid any toppings with pesto containing pine nuts; substitute with a nut-free basil spread or extra tomato sauce.
How do I keep the small dough pieces from burning before the shell is done?
If the appendages brown too quickly, tent the pan loosely with foil halfway through baking. Alternatively, make the legs slightly larger so they bake at a similar rate as the shell, or parbake the shells and then attach and bake with toppings for a shorter final bake time.
Can I prepare the turtles entirely ahead of time and bake later?
Yes. Shape the turtles, place them on lined trays and cover lightly; refrigerate overnight. Allow them to proof and come to room temperature for 20–30 minutes before baking. For longer storage, freeze the shaped turtles on trays until firm, then transfer to bags and bake from frozen with a slightly extended time.
My turtles spread and lost their shape—what went wrong?
The most common causes are overproofing or dough that’s too warm and slack. Ensure the dough is well-kneaded to develop gluten, proof just until puffy, and chill briefly if the dough becomes too soft to handle. Also check oven temperature with an oven thermometer; an underpowered oven can allow dough to relax and spread.