Follow Me On Social Media!
Loaf-pan Burnt Basque-style Cheesecake (loaf cheesecake)
Make a dramatic Loaf-pan Burnt Basque-style Cheesecake with a deeply caramelized top and custardy interior. Step-by-step guide, tips, variations, storage, and FAQs for perfect slices every time.

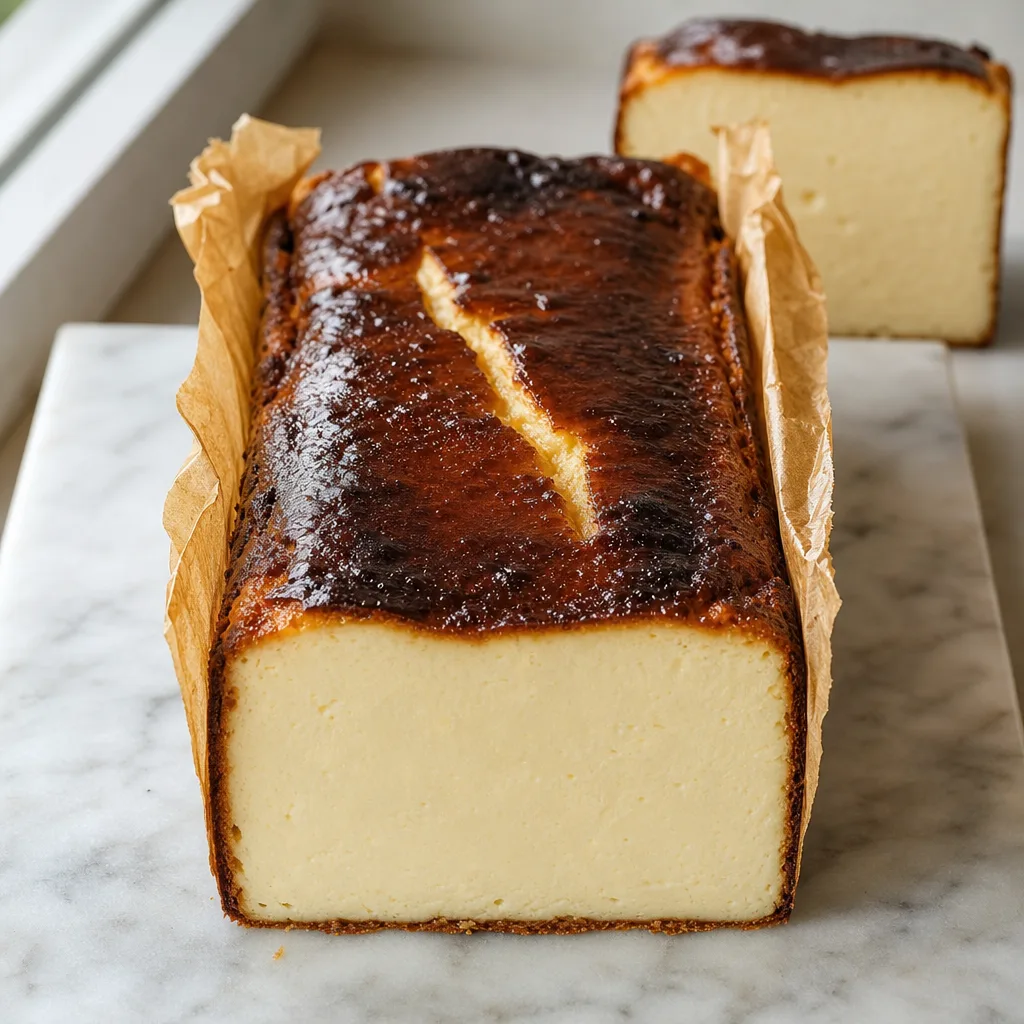
There is something electric about a deeply caramelized, almost-black top hiding a whisper-soft, dense cream interior. This Loaf-pan Burnt Basque-style Cheesecake takes the celebrated rustic silhouette of the classic Basque cake and translates it into a rectangular loaf: it slices neatly, stores easily, and has a theatrical browned crust that announces richness with every bite. The result is a custardy, slightly tangy cheesecake whose thin, blistered exterior adds a bittersweet contrast to the velvet center. Because it’s baked in a loaf pan, it’s especially well suited to making ahead, gifting, or slicing for dessert platters without the fuss of removing a round springform.
Why this method works
Baking at an initial high temperature creates rapid Maillard reactions and caramelization on the exposed surface of the batter, producing the dark, glossy, blistered top that distinguishes Burnt Basque-style cheesecakes. Because the batter itself is dense and contains a high proportion of fat and sugar, the interior sets slowly and remains custard-like rather than developing an open crumb.
Using a loaf pan concentrates heat along the short dimension and encourages the tall, caramelized ridges that form where the batter meets the lined parchment. The tall paper collar shields the batter from the pan’s metal edges and allows for dramatic oven-sculpted sides that look rustic and elegant without any decoration.
Ingredient notes and sensible substitutions
Full-fat cream cheese gives this loaf its signature mouthfeel. If you substitute a lower-fat product, expect a thinner, less velvety result. Heavy cream and sour cream both add richness and slight tang; crème fraîche is an excellent substitute for sour cream if you prefer a silkier finish.
A small amount of flour helps the cheesecake hold together and slice cleanly. If you need a gluten-free version, replace the all-purpose flour with the same weight of rice flour or a 1:1 gluten-free baking blend.
Vanilla and a touch of lemon juice are small flavor enhancers that brighten and deepen the cheese notes. If you omit lemon juice, consider increasing the vanilla slightly or adding a teaspoon of distilled white vinegar to help balance the sweet richness.
Presentation and trimming
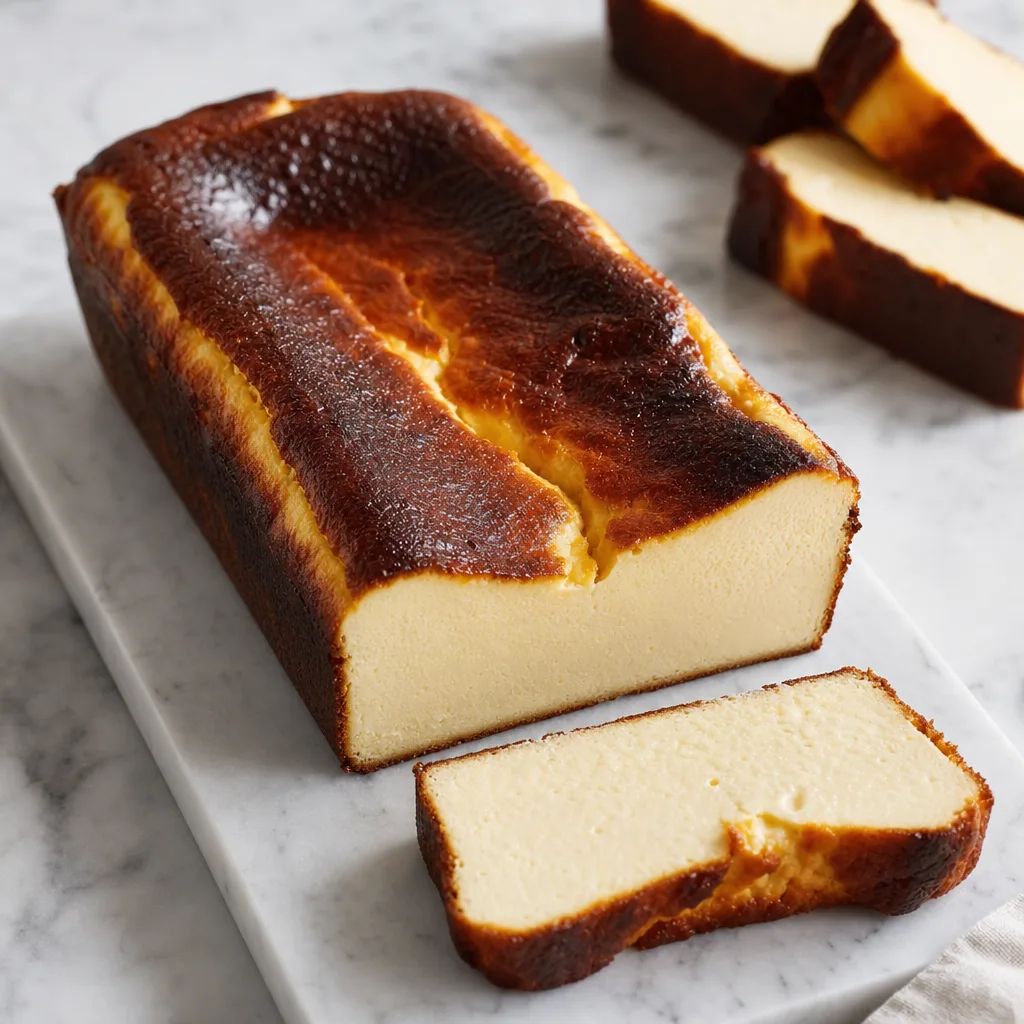
The most attractive baked loaves often have an intentionally imperfect edge: resist trimming away every browned ridge. Trim only if the top tastes unpleasantly bitter. For the cleanest slices, warm your knife under hot water and dry between cuts; wiping the blade prevents residue from dragging and smearing the pale interior.
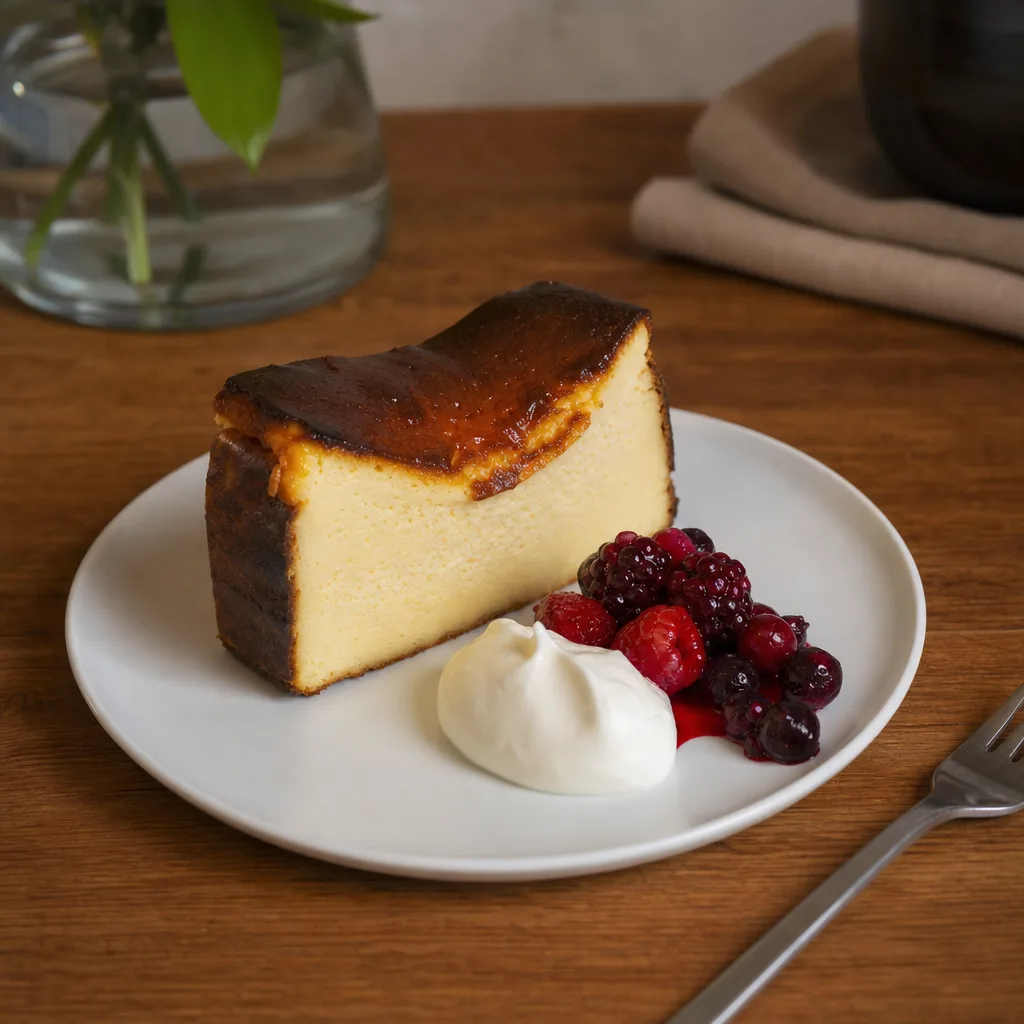
Because the exterior is dramatic, simple plating usually works best. A light dusting of powdered sugar, a scattering of fresh berries, or a small quenelle of crème fraîche are all elegant finishes that let the loaf’s contrasts shine.
Ingredients
- 680 g (24 oz) full-fat cream cheese, room temperature
- 150 g (3/4 cup) granulated sugar
- 3 large eggs, room temperature
- 240 ml (1 cup) heavy cream
- 120 g (1/2 cup) sour cream or crème fraîche
- 15 g (1 tablespoon) all-purpose flour
- 1 teaspoon vanilla extract
- 1 teaspoon fresh lemon juice (optional, brightens flavor)
- 1/4 teaspoon fine salt
- unsalted butter or neutral oil for greasing (to taste)
- parchment paper for lining the pan (quantity as needed)
- powdered sugar for dusting (optional, to taste)
- berries or fruit for serving (optional, to taste)
Instructions
- Preheat your oven to 230°C (450°F). Position a rack in the lower third of the oven to minimize direct top heat on the loaf while still encouraging a deep caramelized top. (i1, i2)
- Prepare a 9 x 5-inch loaf pan by brushing the interior lightly with butter or neutral oil, then line it with parchment paper. The paper should extend at least 2–3 inches above the pan on the long sides to contain the batter and create a high, crinkled edge that will brown attractively. (i11)
- Beat the room-temperature cream cheese in a large bowl with an electric mixer on medium speed until utterly smooth and free of lumps, about 2–3 minutes. Scrape down the sides of the bowl so the mixture is uniform. (i1)
- With the mixer running on low, gradually add the granulated sugar and beat until combined and slightly glossy, about 1 minute. Do not over-whip—aim to just dissolve the sugar into the cheese. (i2)
- Add the eggs one at a time, mixing briefly after each addition until incorporated. Keep the speed low to avoid incorporating excess air; this helps achieve a dense, custardy interior rather than a bubbly cake. (i3)
- Pour in the heavy cream and sour cream (or crème fraîche) and mix on low until the batter is smooth and silky, scraping the bowl as needed. (i4, i5)
- Sprinkle the flour and the salt over the batter and fold or mix on low just until the flour disappears. Add the vanilla extract and lemon juice, if using, and mix briefly to combine. The batter should be pourable and uniform with no dry streaks. (i6, i8, i9)
- Pour the batter into the prepared, parchment-lined loaf pan. Tap the pan gently on the counter two or three times to release any large air bubbles. Smooth the top with an offset spatula if needed. (i1)
- Place the loaf pan on a rimmed baking sheet (this helps catch any overflow and makes it easier to transfer). Bake at 230°C (450°F) for 15 minutes. After 15 minutes, reduce the oven temperature to 200°C (400°F) without opening the door and continue baking for 25–30 minutes more, or until the top has developed a deeply caramelized, nearly blackened color in places and the center still jiggles slightly when you gently shake the pan. (i2)
- If the top is browning very quickly and the center is still underdone, move the pan to a lower shelf and continue at the reduced temperature; conversely, if the surface isn’t darkening enough, allow a final 3–5 minutes at the higher temperature but watch carefully to avoid a burnt, acrid flavor. Visual cues matter more than an exact time. (i2)
- When the cheesecake is done, remove the pan from the oven and let it cool completely on a wire rack for at least 2 hours. A central crack will likely appear as the cake settles—this is characteristic and attractive. After it reaches room temperature, refrigerate the loaf, still in its pan, for at least 4 hours and preferably overnight; chilling firms the interior and makes clean slicing easier. (i1)
- To serve, lift the cheesecake from the pan using the parchment overhang and place it on a cutting board. Trim any excessively dark or bitter edges if you prefer, then slice with a sharp knife warmed briefly under hot water and wiped dry between cuts for the cleanest edges. Dust with powdered sugar and add berries or fruit if desired. (i12, i13)
Pro Tips
- Room temperature ingredients are essential: soften the cream cheese and bring eggs and cream to room temperature to prevent lumps and ensure a silky batter.
- Don’t overmix once the eggs are added: overwhipping incorporates air that will create an unwanted cake-like crumb instead of the desired custard density.
- Use a tall parchment collar: the extra paper creates the dramatic crinkled sides and protects the exterior from burning against the pan walls.
- Watch the oven visually during the final minutes: oven temperatures vary, and the characteristic burnt top forms quickly. Aim for deep mahogany with tiny blackened spots, not an ashy layer.
- Chill thoroughly before slicing: though it’s tempting to dig in warm, refrigeration is what gives the loaf its clean, dense slices and best texture.
Variations
- Lemon-curve Basque: stir in 1–2 teaspoons finely grated lemon zest into the batter and omit the optional lemon juice for an aromatic citrus lift.
- Vanilla bean upgrade: split one vanilla bean, scrape the seeds into the batter and use 1/2 teaspoon vanilla extract for a more intense vanilla profile.
- Chocolate swirl: fold in 50 g melted dark chocolate folded through half the batter, then ripple the remaining plain batter on top before baking for a marbled loaf.
- Caramelized top with sea salt: after baking and chilling, brush a thin layer of homemade or store-bought caramel over the browned top and finish with a tiny pinch of flaky sea salt for a sweet-salty contrast.
Serving Suggestions
- Serve thin slices at room temperature alongside a small scoop of plain yogurt or crème fraîche to cut richness.
- Plate slices with macerated berries and a drizzle of their juices for a bright, tart counterpoint.
- Offer small coffee or espresso cups after a slice for an elegant dessert pairing.
- Create a dessert board with varied textures: slices of loaf cheesecake, caramelized nuts, shortbread cookies, and fresh figs.
Make-ahead and transportation
This loaf stores exceptionally well: make it a day in advance and refrigerate for firm slices and consolidated flavor. Chilling overnight is ideal because it allows the interior to finish setting and the flavors to meld.
For transport, keep the loaf chilled in an insulated cooler with ice packs. If you need to move the cake hot from the oven to a destination, let it cool for at least an hour first; however, cooling completely and transporting chilled slices reduces the chance of the top picking up condensation or scuff marks.
Storage and Reheating
Store the chilled loaf cheesecake tightly wrapped in plastic wrap or in an airtight container in the refrigerator for up to 5 days. For longer storage, double-wrap slices in plastic and freeze for up to 2 months; thaw in the refrigerator overnight. To refresh chilled slices, let them sit at room temperature for 20–30 minutes before serving or warm briefly in a 90°C (200°F) oven for 5-7 minutes, watching carefully so the top doesn't darken further.
Loaf-pan Burnt Basque-style Cheesecake (loaf cheesecake)
A rustic Burnt Basque-style cheesecake baked in a loaf pan for easy slicing and dramatic caramelized top. Dense, custardy interior with a blistered, bittersweet exterior.
Ingredients
Equipment
Method
- Preheat your oven to 230°C (450°F). Position a rack in the lower third of the oven to minimize direct top heat on the loaf while still encouraging a deep caramelized top.
- Prepare a 9 x 5-inch loaf pan by brushing the interior lightly with butter or neutral oil, then line it with parchment paper. The paper should extend at least 2–3 inches above the pan on the long sides to contain the batter and create a high, crinkled edge that will brown attractively.
- Beat the room-temperature cream cheese in a large bowl with an electric mixer on medium speed until utterly smooth and free of lumps, about 2–3 minutes. Scrape down the sides of the bowl so the mixture is uniform.
- With the mixer running on low, gradually add the granulated sugar and beat until combined and slightly glossy, about 1 minute. Do not over-whip—aim to just dissolve the sugar into the cheese.
- Add the eggs one at a time, mixing briefly after each addition until incorporated. Keep the speed low to avoid incorporating excess air; this helps achieve a dense, custardy interior rather than a bubbly cake.
- Pour in the heavy cream and sour cream (or crème fraîche) and mix on low until the batter is smooth and silky, scraping the bowl as needed.
- Sprinkle the flour and the salt over the batter and fold or mix on low just until the flour disappears. Add the vanilla extract and lemon juice, if using, and mix briefly to combine. The batter should be pourable and uniform with no dry streaks.
- Pour the batter into the prepared, parchment-lined loaf pan. Tap the pan gently on the counter two or three times to release any large air bubbles. Smooth the top with an offset spatula if needed.
- Place the loaf pan on a rimmed baking sheet (this helps catch any overflow and makes it easier to transfer). Bake at 230°C (450°F) for 15 minutes. After 15 minutes, reduce the oven temperature to 200°C (400°F) without opening the door and continue baking for 25–30 minutes more, or until the top has developed a deeply caramelized, nearly blackened color in places and the center still jiggles slightly when you gently shake the pan.
- If the top is browning very quickly and the center is still underdone, move the pan to a lower shelf and continue at the reduced temperature; conversely, if the surface isn’t darkening enough, allow a final 3–5 minutes at the higher temperature but watch carefully to avoid a burnt, acrid flavor. Visual cues matter more than an exact time.
- When the cheesecake is done, remove the pan from the oven and let it cool completely on a wire rack for at least 2 hours. A central crack will likely appear as the cake settles—this is characteristic and attractive. After it reaches room temperature, refrigerate the loaf, still in its pan, for at least 4 hours and preferably overnight; chilling firms the interior and makes clean slicing easier.
- To serve, lift the cheesecake from the pan using the parchment overhang and place it on a cutting board. Trim any excessively dark or bitter edges if you prefer, then slice with a sharp knife warmed briefly under hot water and wiped dry between cuts for the cleanest edges. Dust with powdered sugar and add berries or fruit if desired.
Notes
Baking times are approximate; oven performance varies. Use visual cues: deep caramelization on the surface and slight jiggle in the center.
This recipe intentionally omits a biscuit crust to replicate the pure, skin-to-soft interior contrast typical of Basque cheesecakes.
Frequently Asked Questions
Why is the top so dark and does it taste burnt?
The signature dark top comes from high heat caramelization of sugars and milk proteins at the surface; when done correctly it delivers a bittersweet, slightly smoky layer that complements the rich interior. If it tastes acrid or bitter beyond pleasant complexity, the surface was likely overcooked—trim that portion if desired.
Can I bake this in a round pan instead of a loaf pan?
Yes. Baking times will change: a 6- to 8-inch springform or cake pan usually requires slightly longer at the lower temperature after the initial high-heat blast. The burnt Basque character works in many shapes, though the loaf pan produces convenient slices and a dramatic vertical edge.
Do I need a water bath for this cheesecake?
No. Burnt Basque-style cheesecakes are traditionally baked without a water bath. The high initial temperature and direct dry heat are what create the deeply browned top and slightly set, custardy center. A water bath would soften the exterior browning and prevent the desired blistered top.
My cheesecake cracked a lot—did I do something wrong?
A central crack is normal for this style and often unavoidable as the cake rises in a hot oven and then settles. The crack is part of the aesthetic and does not affect flavor. To minimize excessive cracking, avoid overbeating and try a gentler reduction in oven temperature rather than a sharp drop.
Can I reduce the sugar or use a sugar substitute?
You can reduce the sugar slightly (for example, by 10–20 percent) without ruining structure, but sugar contributes to both sweetness and browning. Using non-sugar substitutes will change browning behavior and texture; if trying alternatives, expect a different surface color and possibly less caramelization.