Follow Me On Social Media!
Spicy Salmon Sushi Bake — Broiled Spicy Salmon Over Sushi Rice
Make a shareable Spicy Salmon Sushi Bake with seasoned sushi rice, rich spicy salmon, and a broiled mayo topping. Step-by-step recipe, tips, variations, and serving ideas.

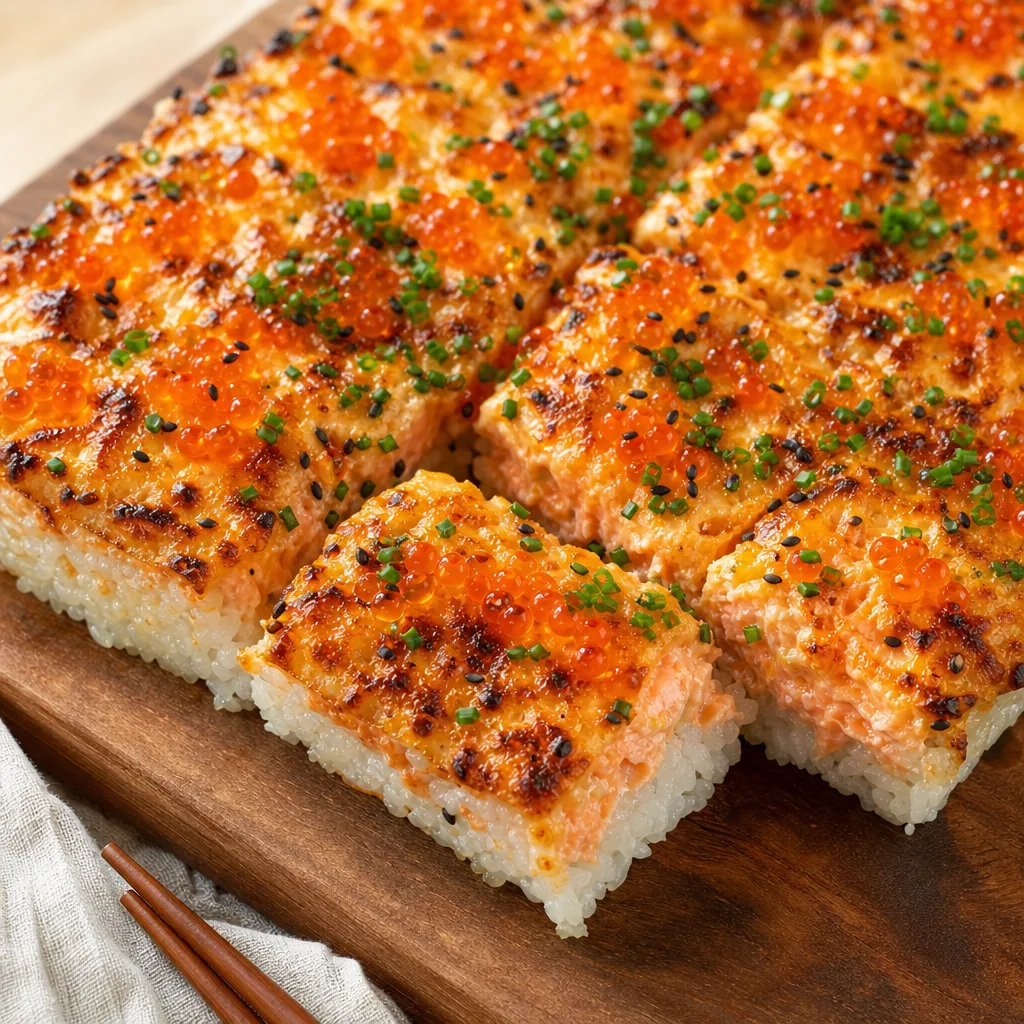
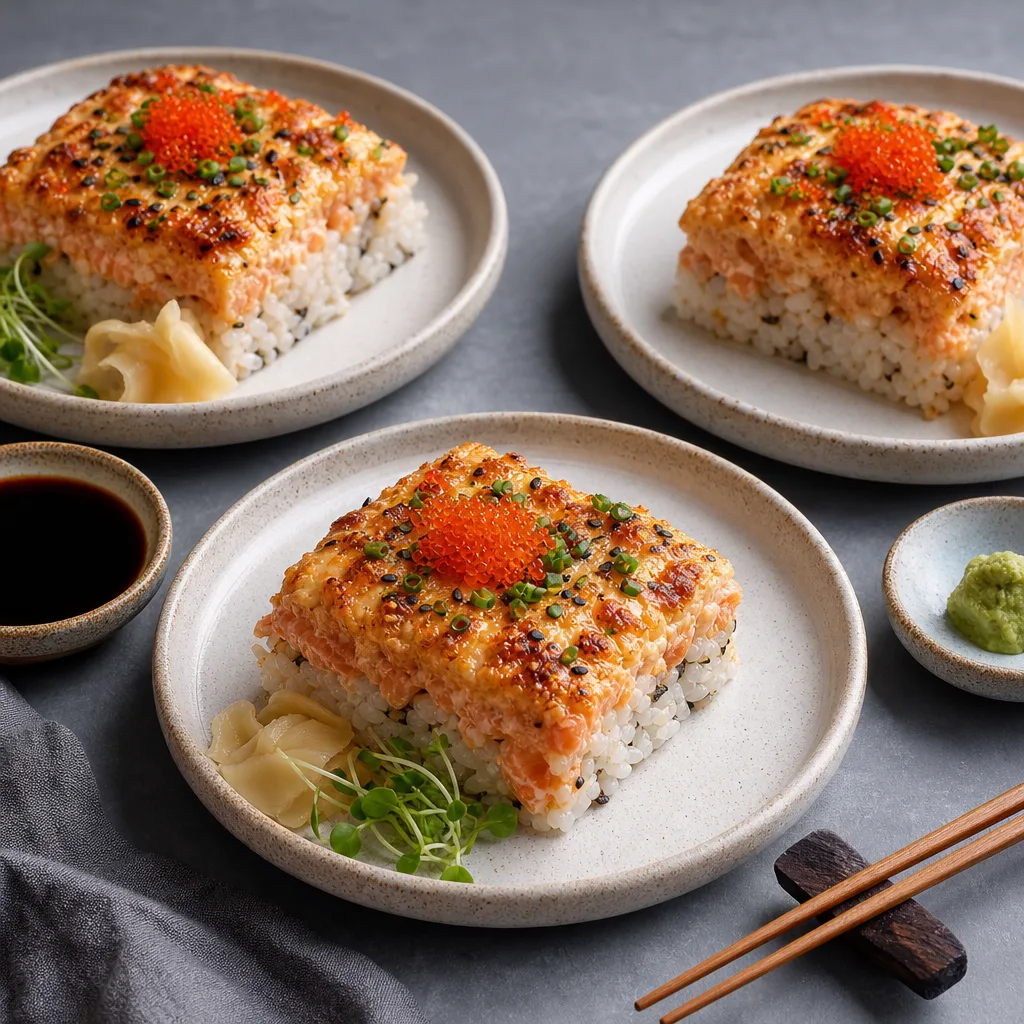
Spicy Salmon Sushi Bake takes the spirit of hand-rolled spicy salmon and turns it into a shareable, sliceable casserole that’s perfect for weeknight dinners, potlucks, or casual dinner parties. Instead of individually rolled sushi, this version layers seasoned sushi rice with a rich, spicy salmon mixture and a creamy, broiled topping that caramelizes to golden-brown perfection. The finished pan is cut into squares and served family-style; each bite delivers sticky rice, tender salmon, umami-forward sauce, and pops of bright roe and verdant garnish.
This recipe is approachable even if you’ve never made sushi rice or worked with raw fish in a kitchen setting. I take a food-safe approach here: the salmon is seared or briefly baked, then mixed with the spicy mayo-style sauce before a final broil to give the top that signature blistered look. If you want to serve this closer to a traditional sushi experience, I note how to adapt the timing and ingredients in the variations and FAQ below.
The flavors balance: sweet-and-sharp seasoned rice, a savory soy-mirin backbone, a buttery-sweet mayonnaise heat hit, and textural contrast from fish roe and green onion. It’s indulgent without being fussy and a wonderful way to convert sushi cravings into a tray-baked dish that feeds a crowd. Below you’ll find a detailed ingredient list, step-by-step instructions, tips, variations, serving ideas, storage notes, and a thorough FAQ so you can make this confidently at home.
Why this method works
Layering the dish converts the hand-rolled sushi experience into something communal and forgiving. The compact rice base delivers the same comforting sticky texture as a hand roll while providing a stable foundation for a richer, saucier salmon topping. Pressing the rice helps every slice maintain shape for neat servings at the table.
Cooking the salmon first and then combining it with the spicy-sweet sauce stabilizes the seafood, reduces potential food-safety concerns, and allows the flavors to meld before a final broil. The broiled mayonnaise topping creates concentrated savory-sweet notes and those coveted golden spots that contrast visually and texturally with the soft interior.
Ingredient notes and substitutions
Short-grain sushi rice is essential to achieve the sticky texture that makes slices hold together; medium- or long-grain rice won’t compact the same way. If sushi rice is not available, a high-starch short-grain variety from your local market is the next best choice.
Japanese mayonnaise (Kewpie) is richer and slightly tangier than standard mayonnaise due to its use of egg yolks and rice vinegar. If you can’t find it, regular mayonnaise plus a teaspoon of rice vinegar works. For a gluten-free version, choose tamari instead of soy sauce and verify that the mirin is gluten-free.
Ingredients
- 2 cups short-grain sushi rice, rinsed
- 2 1/4 cups water
- 5 tablespoons rice vinegar
- 2 tablespoons granulated sugar
- 1 1/2 teaspoons kosher salt
- 1 lb (450 g) salmon fillet, skin removed
- 1 tablespoon neutral oil (vegetable or canola)
- 1/4 cup low-sodium soy sauce
- 1 tablespoon mirin (or 1 tsp sugar + 1 tbsp water if unavailable)
- 1/4 cup Japanese mayonnaise (or regular mayo)
- 3 tablespoons Sriracha (adjust to taste)
- 1 tablespoon toasted sesame oil
- 1 teaspoon grated fresh ginger
- 1 garlic clove, minced
- 1 tablespoon lemon juice
- 2 tablespoons chopped scallions (green parts), plus extra for garnish
- 2 tablespoons mayonnaise (for broil topping)
- 1 tablespoon Japanese mayonnaise (for broil topping)
- 1 teaspoon soy sauce (for broil topping)
- 1/2 cup tobiko or masago (fish roe) or substitute salmon roe if preferred
- 2 teaspoons toasted sesame seeds
- 1 sheet nori, finely shredded (optional)
- Pickled ginger, for serving (optional)
- Wasabi, for serving (optional)
- Soy sauce, for serving
- Salt, to taste
- Black pepper, to taste
- Neutral oil or nonstick spray, for pan
Instructions
- Prepare the sushi rice: rinse the short-grain rice under cold water until the rinse water runs mostly clear, then drain. Combine the rinsed rice and 2 1/4 cups water in a medium saucepan with a tight-fitting lid and bring to a boil over medium-high heat. Once boiling, reduce heat to low, cover, and simmer 12–15 minutes until the water is absorbed and rice is tender. Remove from heat and let stand, covered, for 10 minutes to steam. [ingredient_ids: ["ing_rice","ing_water"]]
- Make sushi seasoning: while the rice is cooking, whisk together 5 tablespoons rice vinegar, 2 tablespoons sugar, and 1 1/2 teaspoons kosher salt in a small bowl until dissolved. Gently fold the seasoning into the hot rice with a rice paddle or wooden spoon, using slicing motions. Fan or let the rice cool slightly to room temperature. [ingredient_ids: ["ing_rice_vinegar","ing_sugar","ing_kosher_salt"]]
- Preheat oven and prepare pan: heat the oven to 400°F (200°C). Lightly oil a 9×13-inch (or equivalent) rimmed baking dish or line it with parchment. This will be the form for the rice base and salmon layer. [ingredient_ids: ["ing_neutral_oil"]]
- Form rice base: transfer the seasoned sushi rice into the prepared baking dish. Wet your hands or use a piece of plastic wrap to press the rice evenly into a compact layer about 1 to 1 1/2 inches thick. Set aside while you prepare the salmon. [ingredient_ids: ["ing_rice"]]
- Cook the salmon: pat the salmon fillet dry and season lightly with salt and pepper. Heat 1 tablespoon neutral oil in a nonstick skillet over medium-high heat. Sear the salmon skinless side down for 2–3 minutes until it builds color, then flip and cook an additional 3–4 minutes until just cooked through and flaky. Alternatively, you can bake the salmon at 400°F (200°C) for 10–12 minutes until opaque. Remove from heat and let cool slightly. Flake the salmon into large chunks, discarding any bones. [ingredient_ids: ["ing_salmon","ing_neutral_oil","ing_salt","ing_black_pepper"]]
- Build the spicy salmon mixture: in a medium bowl combine 1/4 cup low-sodium soy sauce, 1 tablespoon mirin, 1/4 cup Japanese mayonnaise, 3 tablespoons Sriracha (more or less to taste), 1 tablespoon toasted sesame oil, 1 teaspoon grated fresh ginger, 1 minced garlic clove, 1 tablespoon lemon juice, and 2 tablespoons chopped scallions. Stir until smooth, then gently fold in the flaked salmon so the flakes remain chunky but evenly coated. Taste and adjust seasoning with salt, pepper, or extra Sriracha. [ingredient_ids: ["ing_soy_sauce","ing_mirin","ing_japanese_mayo","ing_sriracha","ing_toasted_sesame_oil","ing_ginger","ing_garlic","ing_lemon_juice","ing_scallions","ing_salt","ing_black_pepper"]]
- Assemble the bake: spread the salmon mixture evenly over the packed rice layer, leaving a 1/8-inch border if you like cleaner slices. In a small bowl whisk together 2 tablespoons mayonnaise, 1 tablespoon Japanese mayonnaise, and 1 teaspoon soy sauce for the broil topping. Dot or spread this creamy topping across the salmon layer in an even film that will brown under the broiler. [ingredient_ids: ["ing_salmon","ing_mayonnaise","ing_japanese_mayo","ing_soy_sauce"]]
- Broil to finish: place the baking dish on the middle rack of the preheated oven and broil on high for 3–6 minutes, watching carefully. The top should blister and take on golden-brown spots but not burn. Alternatively, use a kitchen torch to achieve even browning. Remove from oven when the surface looks caramelized and bubbling. [ingredient_ids: []]
- Garnish and rest: immediately after broiling, sprinkle 1/2 cup tobiko or masago evenly across the top and scatter 2 teaspoons toasted sesame seeds and extra chopped scallions. If using shredded nori, sprinkle it now. Let the bake rest 5–10 minutes to set; this helps with clean slicing. [ingredient_ids: ["ing_tobiko","ing_toasted_sesame_seeds","ing_scallions","ing_nori"]]
- Slice and serve: using a sharp knife dipped in warm water for clean cuts, slice into squares and transfer to plates. Serve with pickled ginger, wasabi, and extra soy sauce on the side. [ingredient_ids: ["ing_pickled_ginger","ing_wasabi","ing_soy_sauce"]]
- Storage and reheating: refrigerate leftovers in an airtight container for up to 2 days. To reheat, cover with foil and warm in a 325°F (160°C) oven until heated through, or microwave single portions briefly before giving the top a quick zap under a broiler or with a kitchen torch to refresh the caramelized layer. [ingredient_ids: []]
Pro Tips
- Rinse sushi rice thoroughly until the water runs mostly clear to remove surface starch — this prevents gummy rice once cooked.
- Press the rice firmly into the pan so slices hold together, but avoid packing it so tightly that it becomes dense.
- If you don’t have a broiler or want even browning, a handheld torch gives great control and avoids overcooking the interior.
- Taste the salmon mixture before spreading: the sauce should be assertive because it mellows when baked and spread over rice.
- Use Japanese mayonnaise (Kewpie) for a richer, slightly tangy top note; if unavailable, regular mayo plus a teaspoon of rice vinegar is a good stand-in.
Variations
- Vegetarian version: replace cooked salmon with roasted king oyster mushrooms or firm tofu, chopped and tossed in the same spicy mayo mixture. Add a sprinkle of furikake for umami.
- Raw-style (sushi-grade) version: use sushi-grade salmon and combine with the spicy mayo raw, skip the searing step, and instead briefly broil only the mayo topping to preserve the texture of the fish — see the FAQ for safety tips.
- Crab-and-shrimp: substitute half the salmon with flaked cooked crab or chopped cooked shrimp for a lighter seafood mash-up.
- Teriyaki twist: fold 2 tablespoons of thick teriyaki sauce into the salmon mixture and reduce the soy in the base to keep balance; garnish with microgreens.
Serving Suggestions
- Serve slices atop nori sheets or with toasted sesame crackers for an on-the-go party bite.
- Pair with a crisp cucumber salad tossed in rice vinegar and sesame oil to cut the richness.
- Offer small bowls of soy sauce, pickled ginger, and wasabi so each guest customizes each bite.
- For a chilled contrast, serve with a side of cold soba noodles dressed in a light sesame-soy vinaigrette.
Make-ahead and entertaining tips
For a party, cook rice and salmon earlier in the day and keep components chilled. Assemble the bake about 30–45 minutes before guests arrive so it can come to near room temperature and then broil for a warm, freshly caramelized finish just before serving.
Cut portions into small two-bite squares for grazing, and set up a toppings station with extra tobiko, sliced scallions, nori strips, and condiments so guests can customize each piece. This turns a single pan into an interactive centerpiece.
Storage and Reheating
Store leftovers refrigerated in an airtight container for up to 2 days. Reheat portions in a 325°F (160°C) oven, covered with foil, until warmed through (about 10–15 minutes). To revive the broiled top, finish under a hot broiler for 1–2 minutes or use a kitchen torch. Microwaving works in a pinch — microwave 60–90 seconds on medium power, then finish under the broiler briefly to re-crisp the surface.
Spicy Salmon Sushi Bake
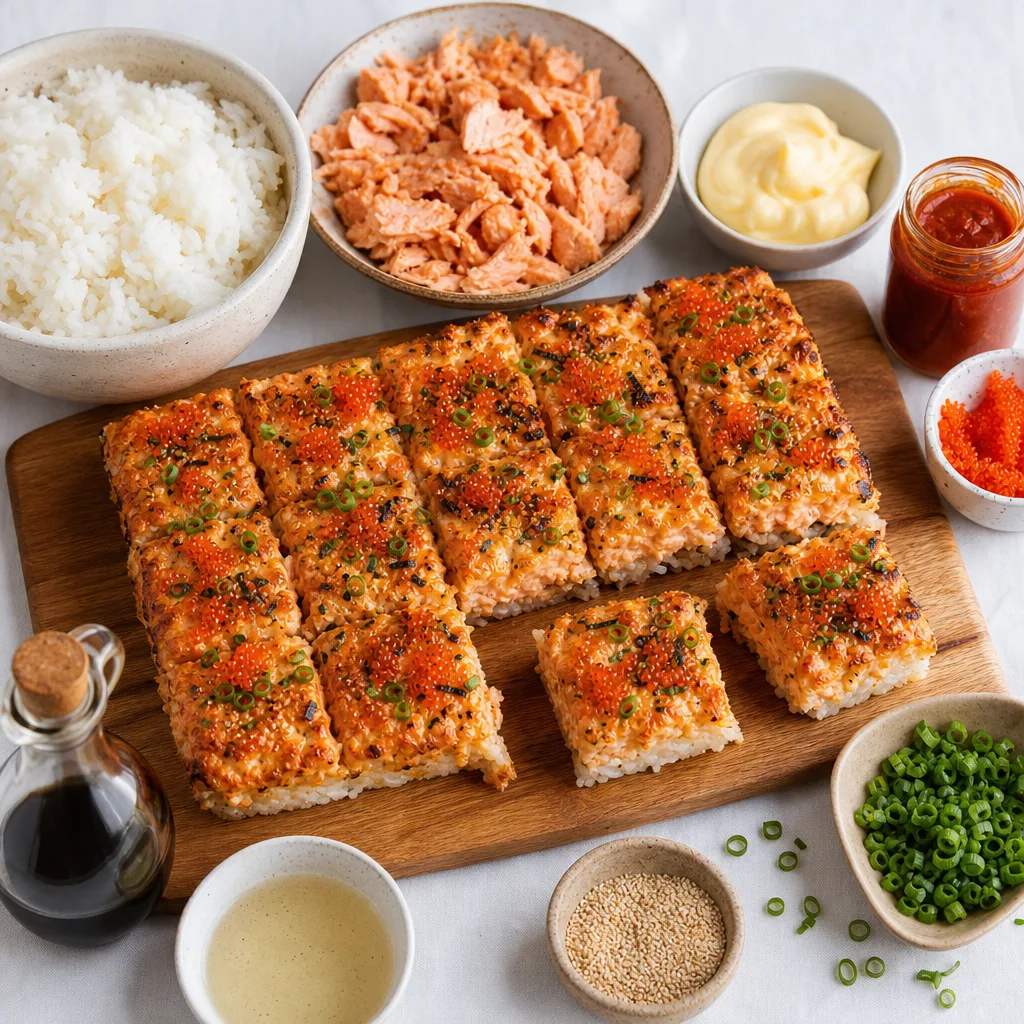
A crowd-friendly sushi-style casserole: seasoned sushi rice forms the base, topped with a savory, spicy salmon mixture and a broiled mayonnaise topping. Garnished with tobiko, scallions, sesame, and shredded nori for sushi-like flavor and texture.
Ingredients
Equipment
Method
- Prepare the sushi rice: rinse the short-grain rice under cold water until the rinse water runs mostly clear, then drain. Combine the rinsed rice and 2 1/4 cups water in a medium saucepan with a tight-fitting lid and bring to a boil over medium-high heat. Once boiling, reduce heat to low, cover, and simmer 12–15 minutes until the water is absorbed and rice is tender. Remove from heat and let stand, covered, for 10 minutes to steam.
- Make sushi seasoning: while the rice is cooking, whisk together 5 tablespoons rice vinegar, 2 tablespoons sugar, and 1 1/2 teaspoons kosher salt in a small bowl until dissolved. Gently fold the seasoning into the hot rice with a rice paddle or wooden spoon, using slicing motions. Fan or let the rice cool slightly to room temperature.
- Preheat oven to 400°F (200°C) and lightly oil a 9×13-inch baking dish or line it with parchment.
- Transfer the seasoned sushi rice into the prepared baking dish. Wet your hands or use plastic wrap to press the rice evenly into a compact layer about 1 to 1 1/2 inches thick and set aside.
- Cook the salmon: pat the salmon fillet dry and season lightly with salt and pepper. Heat 1 tablespoon neutral oil in a nonstick skillet over medium-high heat. Sear the salmon for 2–3 minutes per side until just cooked through and flaky, or bake at 400°F (200°C) for 10–12 minutes. Remove and flake into large chunks.
- In a medium bowl combine 1/4 cup low-sodium soy sauce, 1 tablespoon mirin, 1/4 cup Japanese mayonnaise, 3 tablespoons Sriracha, 1 tablespoon toasted sesame oil, 1 teaspoon grated ginger, 1 minced garlic clove, 1 tablespoon lemon juice, and 2 tablespoons chopped scallions. Stir until smooth, then gently fold in the flaked salmon so the flakes remain chunky but evenly coated. Taste and adjust seasoning.
- Spread the salmon mixture evenly over the packed rice layer. Mix 2 tablespoons mayonnaise, 1 tablespoon Japanese mayonnaise, and 1 teaspoon soy sauce to create the broil topping and spread it across the salmon layer in an even film.
- Place the baking dish on the middle rack and broil on high for 3–6 minutes until the top blisters and takes on golden-brown spots, watching carefully. Alternatively, use a kitchen torch to brown the surface.
- Immediately after broiling, sprinkle 1/2 cup tobiko or masago evenly across the top and scatter 2 teaspoons toasted sesame seeds and extra chopped scallions. If using shredded nori, sprinkle it now. Let rest 5–10 minutes to set.
- Slice into squares with a sharp knife dipped in warm water for clean cuts and serve with pickled ginger, wasabi, and extra soy sauce on the side.
- Refrigerate leftovers in an airtight container for up to 2 days. Reheat covered in a 325°F (160°C) oven until warmed through and refresh the top under the broiler or with a torch.
Notes
This recipe follows a cooked-salmon approach for safety and simplicity. See the variations for raw (sushi-grade) options.
Adjust Sriracha to control spice; Kewpie mayonnaise gives the most authentic texture and flavor.
Frequently Asked Questions
Can I use raw salmon instead of cooking it first?
Yes — if you choose to use raw salmon, make sure it is labeled sushi-grade from a trusted source and has been handled properly. Keep it cold, mix it with the spicy mayo immediately before assembly, and broil only the mayo layer briefly to avoid cooking the fish through. Note that even with sushi-grade fish there is a small food-safety risk with raw consumption; if you serve to pregnant people, infants, elderly, or immunocompromised guests, use fully cooked salmon.
How spicy is this dish and can I adjust the heat?
The recipe uses Sriracha in the salmon mixture and a mayonnaise-based broil topping; on the provided quantities it will have a noticeable, pleasant heat that doesn’t overwhelm. Adjust the Sriracha to your taste — halving it will make the dish mildly spiced, while increasing it or mixing in a touch of chili oil will bring more punch. You can also offer extra hot sauce at the table for guests.
What can I substitute for tobiko if I can’t find it?
Tobiko (flying fish roe) provides texture and a salty pop. If you can’t find it, masago (capelin roe) is the closest substitute. Salmon roe (ikura) works too but has larger beads and a more pronounced briny flavor. For a non-roe option, finely diced red bell pepper or tiny dots of spicy mayo can mimic the visual contrast without the fishiness.
Can I make components ahead of time?
Yes. Cook the sushi rice and season it up to 24 hours in advance; store tightly covered at room temperature for a few hours or refrigerate once cooled and bring to room temperature before assembling. Cook and flake the salmon up to a day ahead and refrigerate. Assemble just before the final broil for the best texture; if you must assemble early, keep the broiler topping refrigerated and broil only when ready to serve.
Why did my rice become sticky or mushy?
Sticky rice is normal for short-grain sushi rice, but overly mushy rice usually comes from too much water, under-rinsing, or packing the rice too hot. Rinse the rice until the water is mostly clear to remove excess surface starch and use the rice-to-water ratio given. Allow the rice to rest and steam after cooking before adding the vinegar seasoning.