Follow Me On Social Media!
Twix-style sandwich cookies (caramel + chocolate on soft cookie)
Make Twix-style sandwich cookies at home: tender shortbread-like rounds filled with chewy caramel and topped with glossy milk chocolate. Easy 24-cookie recipe for holiday trays.

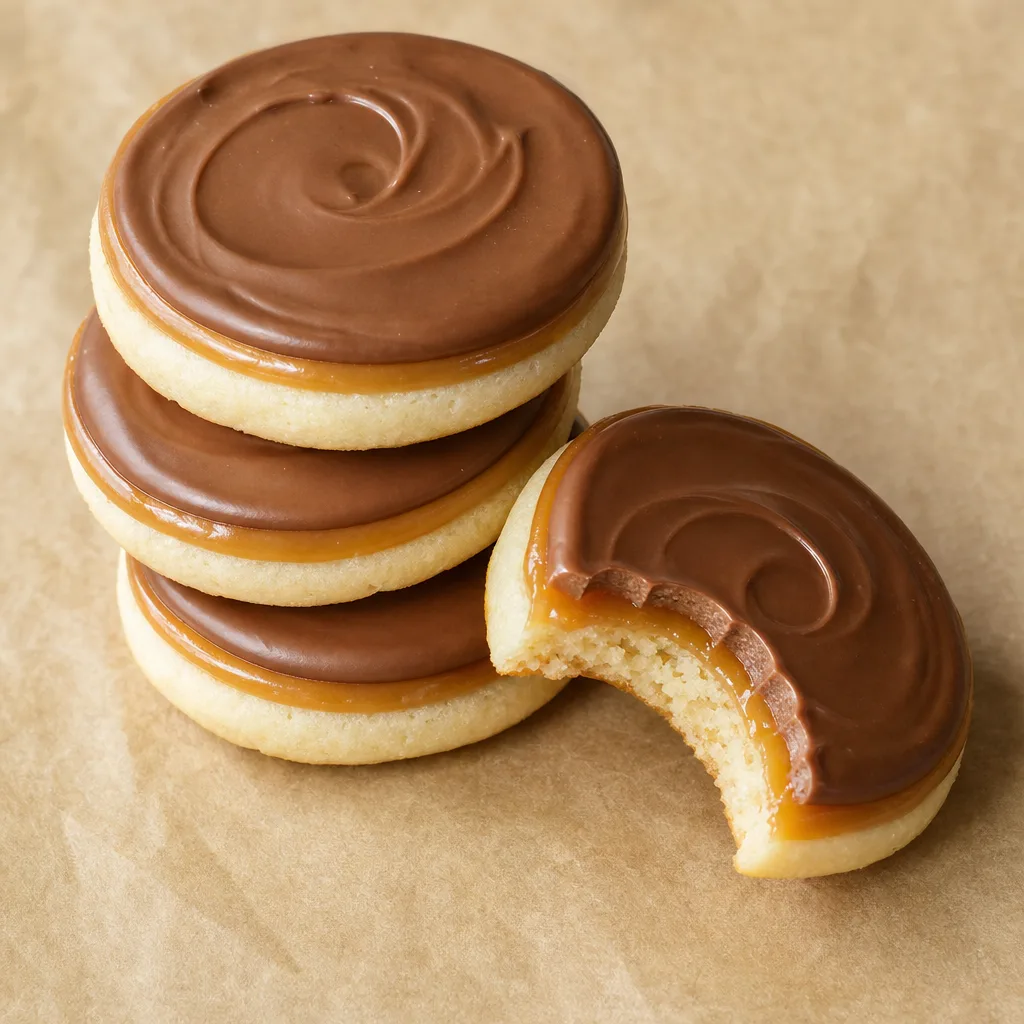
These Twix-style sandwich cookies capture the irresistible trio of buttery cookie, chewy caramel, and glossy milk chocolate in a simple home-bake that’s perfect for holiday cookie trays or an anytime sweet craving. The recipe produces a stackable, sandwich-style cookie: a soft, shortbread-like base with a shallow well that holds a ring of warm, spreadable caramel, finished with a smooth circle of milk chocolate on top. They are designed to feel familiar to anyone who loves the candy bar inspiration but assembled as pretty, hand-held cookies that look elegant on a platter.
What makes these cookies especially satisfying is the contrast of textures: the cookie is tender but supportive, the caramel adds chew and shine, and the chocolate gives a crisp snap as it cools into a glossy disc. The method is intentionally straightforward: a single cookie dough is portioned into rounds, slightly indented in the center after baking, then filled and topped. No tempering or advanced confectionery skills are required; most of the finishing work is melting and spooning, so they’re a great recipe to make with kids or to assemble during a relaxed holiday baking session.
This recipe yields 24 cookies and takes about 40 minutes of active time plus a short chill for the chocolate to set. Because the dough is simple and forgiving, you can scale the batch up or down, swap in different chocolates, or use homemade or store-bought caramel. Below you’ll find step-by-step instructions, ingredient notes, make-ahead ideas, troubleshooting tips, and creative variations so you can tailor these cookies to your pantry and occasion.
Why this recipe works
The structure of these sandwiches relies on three elements that play distinct roles. The cookie base is formulated to be soft and slightly shortbread-like so it supports the caramel and chocolate without crumbling and delivers a tender bite. A dough that’s too thin or too crispy will break instead of providing a satisfying handheld experience, which is why this recipe uses a higher fat-to-flour ratio and a small amount of baking powder for a light lift.
The caramel is the sensory centerpiece: its chewiness and gloss contrast with the cookie’s tenderness and the chocolate’s snap. Using a caramel sauce that is spoonable rather than runny ensures a clean assembly and prevents seepage during storage. Meanwhile, the chocolate cap seals the caramel in and offers a crisp surface that highlights the swirl detail that looks especially attractive in photos and on a cookie tray.
Ingredient notes and substitutions
Unsalted butter gives you control over the final salt level; if you only have salted butter, reduce the added salt by half to avoid an overly salty cookie. For richer flavor, brown the butter briefly until it smells nutty and cool it slightly before creaming with sugar—this will deepen the cookie’s taste without changing the core method.
Caramel comes in many forms: dulce de leche, jarred caramel sauce, or melted individually wrapped caramels. If you prefer a firmer interior, allow the caramel to cook to a slightly higher temperature (if making from scratch) and cool before filling. For a vegan version, use vegan butter, dairy-free chocolate, and a plant-based caramel alternative made from coconut milk and sugar.
Ingredients
- unsalted butter, 1 cup (226 g), softened
- granulated sugar, 3/4 cup (150 g)
- vanilla extract, 1 1/2 teaspoons
- large egg, 1
- all-purpose flour, 2 1/4 cups (280 g)
- baking powder, 1 teaspoon
- salt, 1/2 teaspoon
- caramel sauce (thick, spoonable), 1 1/4 to 1 1/2 cups (store-bought or homemade)
- milk chocolate chips or chopped milk chocolate, 10 ounces (280 g)
- light corn syrup, 1 tablespoon (optional, for shine in chocolate)
- vegetable oil or neutral oil, 1 teaspoon (optional, smooth melting)
- powdered sugar, to taste (optional, for dusting)
- coarse sea salt, to taste (optional, for finishing)
Instructions
- Preheat the oven to 350°F (175°C). Line two baking sheets with parchment paper or silicon mats and set aside. Gather a medium mixing bowl and an electric mixer or wooden spoon. [id_butter] [id_sugar]
- In the mixing bowl, cream the softened unsalted butter with the granulated sugar until light and pale, about 2 to 3 minutes with an electric mixer on medium speed. Scrape down the sides of the bowl as needed. Mix in the vanilla extract and the large egg until evenly incorporated. [id_butter] [id_sugar] [id_vanilla] [id_egg]
- In a separate bowl, whisk together the all-purpose flour, baking powder, and salt. Gradually add the dry ingredients to the wet mixture, mixing on low speed or stirring with a wooden spoon until a soft, slightly crumbly dough forms. Do not overmix. [id_flour] [id_baking_powder] [id_salt]
- Scoop the dough into 24 even portions (about 1 to 1 1/2 tablespoons each) and roll gently into smooth rounds. Place the dough rounds on the prepared baking sheets spaced about 1 inch apart; you will bake in batches if necessary. [id_flour]
- Using the back of a teaspoon or the end of a wooden spoon handle, press a shallow well into the center of each dough round, creating a small indentation about 1/4 inch deep and leaving a slight rim around the edge to hold caramel. This indentation will deepen slightly as the cookie bakes. [id_flour]
- Bake the cookies for 10 to 12 minutes, or until the edges are set and the tops are pale golden but not deeply browned. The centers should still look slightly soft. Remove from the oven and allow the cookies to cool on the sheets for 5 minutes, then transfer to a wire rack to cool completely. The wells will firm up as the cookies cool. [id_flour]
- While the cookies cool, warm the caramel sauce if it is very firm so it becomes spoonable. If using store-bought caramel sauce that’s thin, reduce it in a small saucepan over low heat until it thickens slightly; cool to warm, not hot. Place the caramel in a small piping bag or a zip-top bag with the corner snipped. [id_caramel]
- Spoon or pipe about 1 to 1 1/2 teaspoons of caramel into the center well of each cooled cookie, forming a slightly domed ring that reaches just to the cookie rim. Avoid overfilling; the caramel should be flush with or slightly below the top of the cookie so the chocolate will sit neatly on top. Optionally, sprinkle a few flakes of coarse sea salt over the caramel while it is still warm so they adhere. [id_caramel] [id_sea_salt]
- Prepare the chocolate topping: place the milk chocolate chips or chopped milk chocolate in a microwave-safe bowl. Microwave in 20 to 30 second intervals on medium power, stirring between each burst, until mostly melted and smooth. If desired for extra gloss and a slightly softer set, stir in 1 tablespoon light corn syrup and 1 teaspoon vegetable oil until smooth. Allow the chocolate to cool for a minute so it is pourable but not hot. [id_chocolate] [id_corn_syrup] [id_veg_oil]
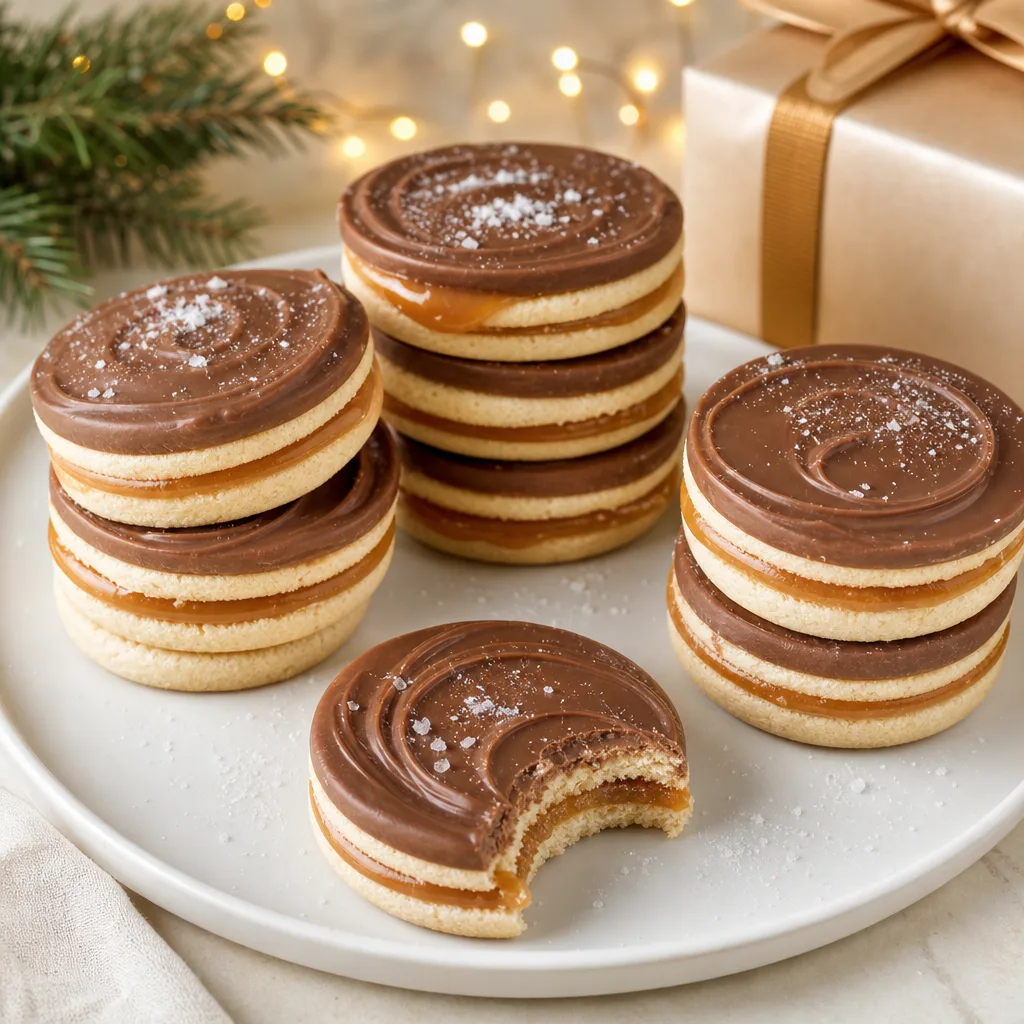
- Working quickly, spoon or pour about 1 to 1 1/2 teaspoons of melted milk chocolate over the center caramel of each cookie, smoothing gently with the back of the spoon so the chocolate forms a neat disk that reaches the caramel edge without spilling over the cookie rim. A small swirl with the tip of the spoon creates the glossy circular swirl visible in the reference presentation. [id_chocolate]
- Set the finished cookies in a single layer on a baking sheet or tray and chill in the refrigerator for 15 to 25 minutes, or until the chocolate is firm to the touch and the caramel has set slightly. Alternatively, leave them at room temperature in a cool area for about 45 minutes to allow the chocolate to firm naturally. [id_chocolate] [id_caramel]
- Once the chocolate has set, optionally dust the plate or edges with a very light sprinkle of powdered sugar for a festive look. Serve the cookies at room temperature so the caramel remains pleasantly chewy rather than rock-hard. [id_powdered_sugar]
- To assemble ahead: store the baked and cooled cookie bases and the caramel and chocolate separately in airtight containers in the refrigerator for up to 3 days. Warm and assemble as directed when ready to serve. [id_flour] [id_caramel] [id_chocolate]
Pro Tips
- Use room-temperature butter so it creams easily with the sugar; this gives the dough a light texture and helps the cookies spread evenly.
- If your caramel is very runny, reduce it briefly in a small saucepan over low heat to thicken and then cool slightly before filling, otherwise it will overflow the cookie wells.
- To make neat, uniform cookies quickly, use a small cookie scoop to portion dough and press wells with a measuring spoon for consistent depth.
- If the chocolate seizes or thickens while melting, stir in a teaspoon of corn syrup or a small splash of neutral oil to smooth it out.
- Chill the finished cookies briefly before stacking to avoid chocolate sticking and losing the glossy swirl detail.
Variations
- Dark chocolate finish: Use at least 60% dark chocolate instead of milk chocolate for a more adult, slightly bitter contrast to the sweet caramel.
- Salted caramel core: Replace the caramel sauce with slightly firmer salted caramel bits or thick dulce de leche for an extra caramel-forward bite.
- White chocolate coating: Swap the milk chocolate for white chocolate and tint it lightly with a few drops of gel-colored cocoa butter or leave it pale for a different visual effect.
- Nutty crunch: After piping the caramel, press a few finely chopped toasted hazelnuts or almonds into the caramel before topping with chocolate to add texture and a nutty flavor.
Serving Suggestions
- Arrange the cookies in neat stacks on a neutral serving plate to highlight the layered interior and glossy chocolate tops for holiday parties.
- Serve alongside coffee or espresso; the cookie’s buttery base and sweet caramel pair especially well with bright, slightly acidic coffee.
- Include them on a holiday cookie tray with a mix of chewy and crunchy cookies—these provide a chewy chocolate-caramel highlight among crisp ginger snaps.
- Package the cookies in small cellophane bags tied with ribbon as homemade edible gifts; chill before packaging so the chocolate won’t smear.
Make-ahead and gift ideas
These cookies are excellent for preparing in stages. Bake the cookie bases up to three days in advance and store them in an airtight container. Keep the caramel and melted chocolate refrigerated separately and assemble within 24 hours for the best texture. Fully assembled cookies will keep for a few days at room temperature or longer if refrigerated.
To gift, assemble the cookies, chill to set the chocolate, then layer them between sheets of parchment paper in a decorative tin. Add a ribbon and a small note on ingredients or storage—recipients will appreciate the professional appearance and the fact that they were made with care.
Storage and Reheating
Store the cookies in an airtight container at room temperature for up to 3 days. If your kitchen is warm, keep them in the refrigerator and bring to room temperature before serving so the caramel softens slightly. Baked cookie bases (without toppings) can be frozen in a single layer for up to 1 month; thaw and assemble with caramel and chocolate before serving.

Twix-style sandwich cookies (caramel + chocolate on soft cookie)
Soft, shortbread-like cookies with a spoonable caramel center and glossy milk chocolate topping. Makes 24 cookies; quick to assemble for holiday trays.
Ingredients
Equipment
Method
- Preheat the oven to 350°F (175°C). Line two baking sheets with parchment paper or silicone mats and set aside. Gather a medium mixing bowl and an electric mixer or wooden spoon.
- In the mixing bowl, cream the softened unsalted butter with the granulated sugar until light and pale, about 2 to 3 minutes with an electric mixer on medium speed. Scrape down the sides of the bowl as needed. Mix in the vanilla extract and the large egg until evenly incorporated.
- In a separate bowl, whisk together the all-purpose flour, baking powder, and salt. Gradually add the dry ingredients to the wet mixture, mixing on low speed or stirring with a wooden spoon until a soft, slightly crumbly dough forms. Do not overmix.
- Scoop the dough into 24 even portions (about 1 to 1 1/2 tablespoons each) and roll gently into smooth rounds. Place the dough rounds on the prepared baking sheets spaced about 1 inch apart; you will bake in batches if necessary.
- Using the back of a teaspoon or the end of a wooden spoon handle, press a shallow well into the center of each dough round, creating a small indentation about 1/4 inch deep and leaving a slight rim around the edge to hold caramel.
- Bake the cookies for 10 to 12 minutes, or until the edges are set and the tops are pale golden but not deeply browned. The centers should still look slightly soft. Remove from the oven and allow the cookies to cool on the sheets for 5 minutes, then transfer to a wire rack to cool completely. The wells will firm up as the cookies cool.
- While the cookies cool, warm the caramel sauce if it is very firm so it becomes spoonable. If using store-bought caramel sauce that’s thin, reduce it in a small saucepan over low heat until it thickens slightly; cool to warm, not hot. Place the caramel in a small piping bag or a zip-top bag with the corner snipped.
- Spoon or pipe about 1 to 1 1/2 teaspoons of caramel into the center well of each cooled cookie, forming a slightly domed ring that reaches just to the cookie rim. Avoid overfilling; the caramel should be flush with or slightly below the top of the cookie so the chocolate will sit neatly on top. Optionally, sprinkle a few flakes of coarse sea salt over the caramel while it is still warm so they adhere.
- Prepare the chocolate topping: place the milk chocolate chips or chopped milk chocolate in a microwave-safe bowl. Microwave in 20 to 30 second intervals on medium power, stirring between each burst, until mostly melted and smooth. If desired for extra gloss and a slightly softer set, stir in 1 tablespoon light corn syrup and 1 teaspoon vegetable oil until smooth. Allow the chocolate to cool for a minute so it is pourable but not hot.
- Working quickly, spoon or pour about 1 to 1 1/2 teaspoons of melted milk chocolate over the center caramel of each cookie, smoothing gently with the back of the spoon so the chocolate forms a neat disk that reaches the caramel edge without spilling over the cookie rim. A small swirl with the tip of the spoon creates the glossy circular swirl visible in the reference presentation.
- Set the finished cookies in a single layer on a baking sheet or tray and chill in the refrigerator for 15 to 25 minutes, or until the chocolate is firm to the touch and the caramel has set slightly. Alternatively, leave them at room temperature in a cool area for about 45 minutes to allow the chocolate to firm naturally.
- Once the chocolate has set, optionally dust the plate or edges with a very light sprinkle of powdered sugar for a festive look. Serve the cookies at room temperature so the caramel remains pleasantly chewy rather than rock-hard.
- To assemble ahead: store the baked and cooled cookie bases and the caramel and chocolate separately in airtight containers in the refrigerator for up to 3 days. Warm and assemble as directed when ready to serve.
Notes
This recipe is inspired by layered caramel-chocolate cookie confections. Quantities and technique here are provided to create a reliable home-bake version.
Frequently Asked Questions
Can I use store-bought caramel candies instead of caramel sauce?
Yes. To use soft caramel candies, gently melt them with a tablespoon or two of heavy cream in a small saucepan over low heat until smooth and spoonable. If the candies are firmer, cut them into small pieces first so they melt evenly. Allow the mixture to cool slightly before piping into the cookie wells. Avoid overheating, which can make caramel grainy.
Why did my chocolate look dull instead of glossy?
Glossy chocolate comes from smooth melted chocolate and minimal moisture exposure. If you overheat chocolate, introduce water, or stir too aggressively, it can lose sheen. Stir chocolate gently and add a small amount of corn syrup or neutral oil if needed for shine. Cooling the chocolate slowly in a cool, dry place also helps it set with a nice gloss.
How do I keep the caramel from running out of the cookie after assembly?
Make sure the cookie wells are slightly raised along the edges and that the caramel is thick enough to hold its shape. If the caramel is too thin, reduce it briefly on low heat until syrup thickens, then cool slightly before filling. Chilling the cookies after assembly will also firm the caramel so it doesn’t run during handling.
Can I make the cookie dough ahead of time?
Yes. You can refrigerate the shaped dough rounds on a parchment-lined tray, covered, for up to 24 hours before baking. For longer storage, freeze the shaped dough in a single layer, then transfer to a freezer bag for up to one month; bake from frozen, adding a couple of minutes to the bake time.
Is there a gluten-free version of this cookie?
You can substitute a 1:1 gluten-free all-purpose flour blend that contains xanthan gum for the same amount of all-purpose flour. Note that texture may vary slightly—gluten-free cookies sometimes feel more delicate—so chill the shaped dough for 15 minutes before pressing wells and baking to help them hold their shape.