Follow Me On Social Media!
Crème Brûlée Cheesecake Cupcakes
Learn how to make Crème Brûlée Cheesecake Cupcakes: a silky baked cheesecake filling on a tender vanilla sponge, finished with a crisp caramelized sugar top. Full recipe, tips, and variations.

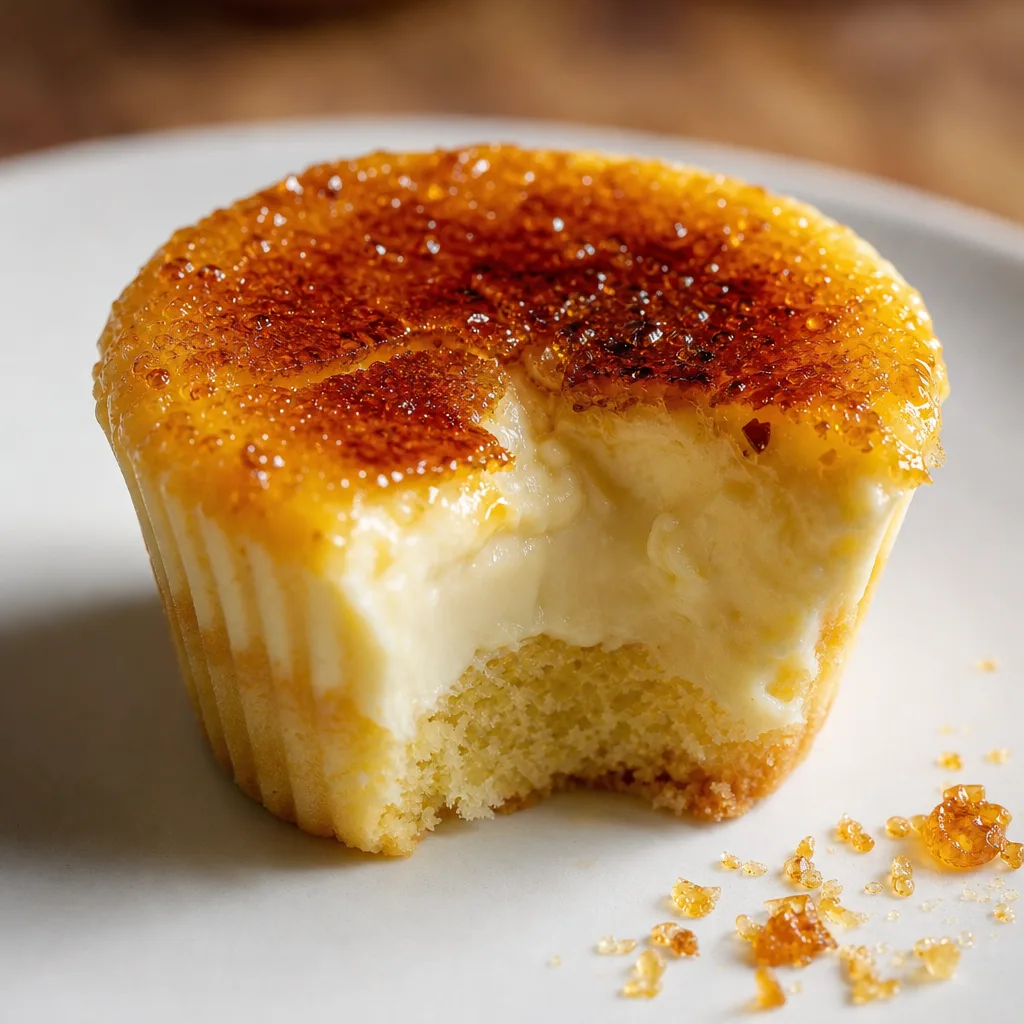
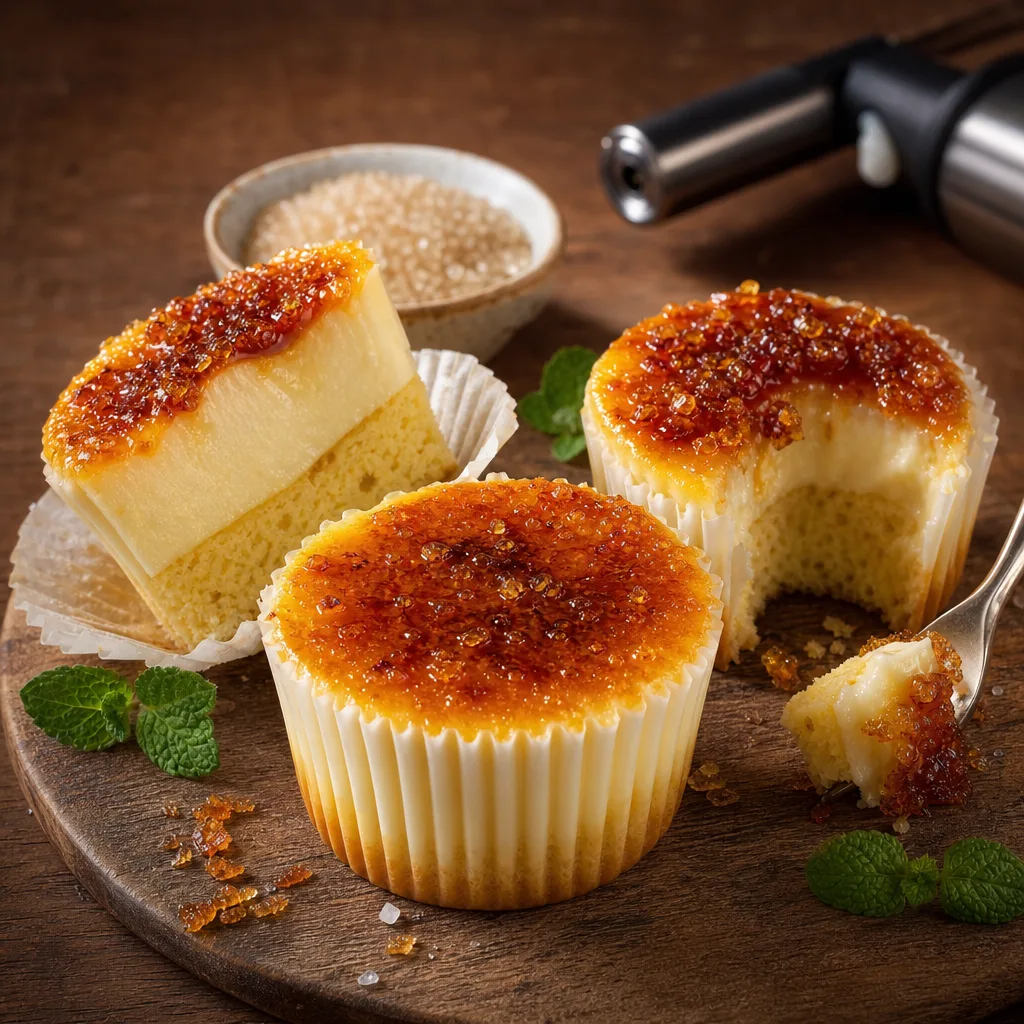
These Crème Brûlée Cheesecake Cupcakes combine two of the most irresistible desserts into a single, elegant bite: the silky, vanilla-scented cheesecake and the signature hard caramel shell of crème brûlée, all perched on a tender vanilla sponge base. They look like miniature works of pastry art—glossy amber caramel tops that crack under your spoon to reveal a dense, creamy interior and a soft cake cushion below. Serve them at dinner parties, holiday gatherings, or anytime you want to impress without fussing over a full-sized showpiece.
The method balances a classic baked cheesecake technique adapted for individual cupcakes with a short sponge layer that provides lift and texture contrast. After baking and chilling, each cupcake receives a final sugar torching to create the caramelized crust. This creates a thrilling contrast between crunchy, slightly bitter caramel and sweet, luscious filling. While the photo inspiration suggests a perfect brûlée shell and a pale creamy filling, the recipe below defines precise steps, cooking times, and quantities to reliably recreate that look and mouthfeel at home.
If you’ve made cheesecakes or crème brûlée before, you’ll find aspects of both in this recipe: careful mixing to avoid air over-incorporation, a gentle water bath in the oven to stabilize the filling and prevent cracks, and a patient chill so the texture fully sets. If the idea of torching worries you, there are alternative finishing options included below so you can still get a caramelized surface without a kitchen torch. Read on for ingredients, equipment, and thorough guidance that will help you master these cupcakes from start to delicious finish.
Why this method works
Combining a thin sponge base with a baked cheesecake filling creates a balanced structure: the sponge provides lightness and a slight spring under the dense filling, while the cheesecake layer gives the silky custard-like interior that we expect from crème brûlée-inspired desserts. This layered approach ensures every bite has textural contrast, which is essential to the appeal of these cupcakes.
The water bath is key to achieving a crack-free, velvety filling. Moist heat reduces direct dry oven heat and keeps the temperature around each cupcake consistent. The gentle baking prevents the centers from curdling and helps them set without becoming overly firm. Cooling slowly inside the oven avoids thermal shock that can cause fractures across the top surface.
Ingredient notes and substitutions
Cream cheese: Full-fat cream cheese gives the best flavor and texture. If you must substitute with a lighter alternative, choose a block-style cream cheese rather than a spreadable tub for better stability. Room temperature cream cheese incorporates more smoothly and minimizes lumps.
Vanilla: Using vanilla bean seeds produces the small black flecks and the most aromatic flavor, which complements the brûléed sugar. If using extract, opt for pure vanilla extract. For a different flavor profile, try a vanilla-bean paste which adds both scent and the speckled appearance.
Troubleshooting common issues
If the center seems too wobbly after the recommended bake time, remember the filling firms as it cools; give it the full chilling time. If it still hasn’t set after chilling, bake the cupcakes for an additional 5–8 minutes at the same temperature and re-chill.
If your caramel top burns quickly when broiling, move the rack down farther from the element and reduce broiler time. Broilers vary in intensity, so always watch the sugar closely. For a uniform caramel color, keep the torch moving; holding it stationary can create hot spots that burn.
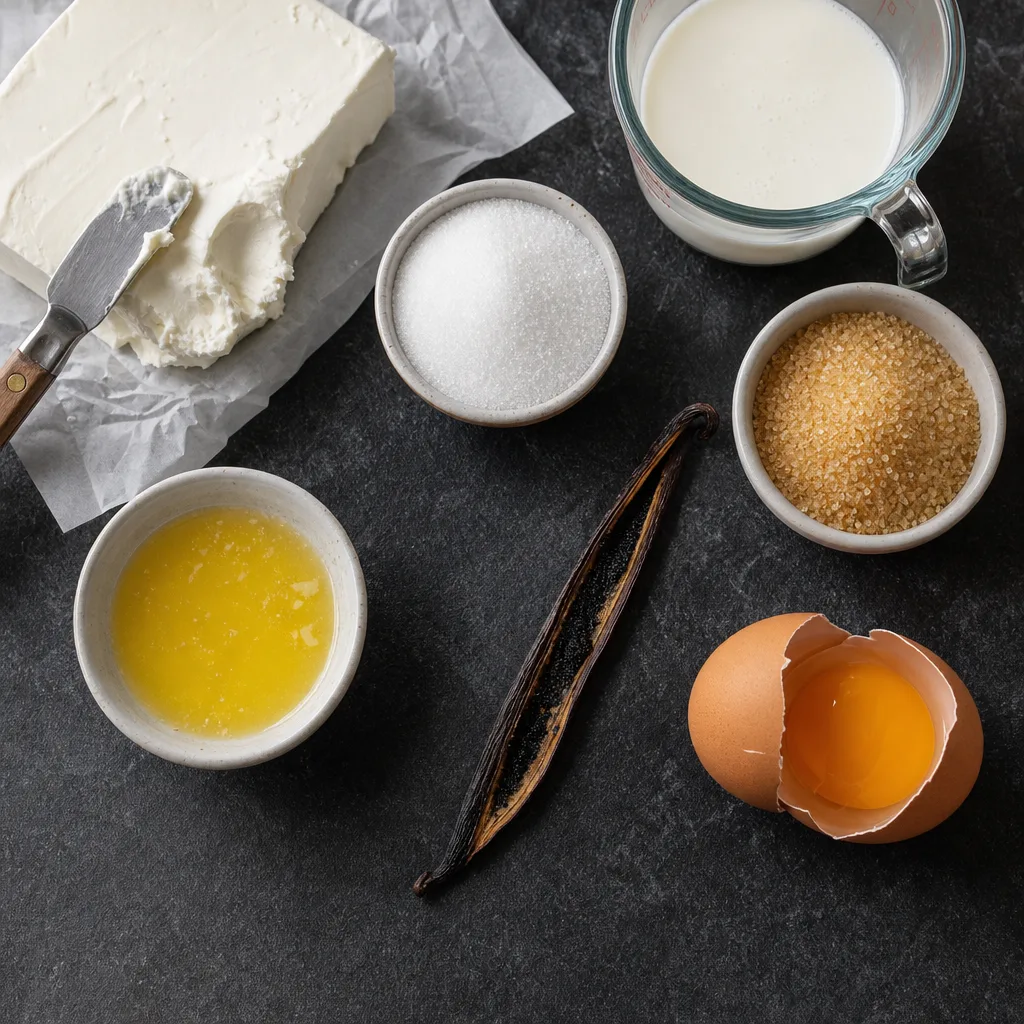
Ingredients
- 8 ounces (225 g) cream cheese, room temperature
- 1/2 cup (100 g) granulated sugar (for cheesecake filling)
- 2 large eggs, room temperature
- 1/2 cup (120 ml) heavy cream
- 1/4 cup (60 g) sour cream
- 1 vanilla bean or 2 teaspoons vanilla extract
- 1 tablespoon all-purpose flour
- Pinch fine salt
- 3/4 cup (95 g) all-purpose flour (sponge base)
- 1/2 cup (100 g) granulated sugar (sponge base)
- 1 teaspoon baking powder
- 1/4 teaspoon fine salt (sponge base)
- 1/3 cup (75 g) unsalted butter, melted and cooled
- 1 large egg (sponge base), room temperature
- 2 tablespoons whole milk
- 2 tablespoons granulated sugar (to sprinkle before torching)
- Optional coarse sugar or sanding sugar for garnish
- Butter or nonstick spray for muffin tin
- Water (for water bath)
- Optional lemon zest (to taste)
Instructions
- {"text":"Preheat the oven to 325°F (160°C). Lightly butter or spray a 12-cup muffin tin and line each cup with a paper liner or silicon liner if desired.","ingredient_ids":["butter_or_nonstick"]}
- {"text":"Make the sponge base: whisk together 3/4 cup all-purpose flour (95 g), 1/2 cup granulated sugar (100 g), 1 teaspoon baking powder, and 1/4 teaspoon salt in a medium bowl.","ingredient_ids":["sponge_flour","sponge_sugar","baking_powder","sponge_salt"]}
- {"text":"In a separate bowl, whisk the large egg, 1/3 cup melted cooled unsalted butter (75 g), and 2 tablespoons whole milk until combined. Add the wet ingredients to the dry mix and stir until just combined; do not overmix.","ingredient_ids":["sponge_egg","melted_butter","milk"]}
- {"text":"Spoon about one heaping tablespoon of the batter into each prepared muffin cup, forming a thin sponge layer. Reserve the remainder for any cups that need topping. Bake the sponge layers for 6–8 minutes until just set but not browned. Remove from oven and let cool slightly.","ingredient_ids":["sponge_batter"]}
- {"text":"Reduce oven temperature to 300°F (150°C). Prepare a large baking dish for a water bath by placing a folded kitchen towel on the bottom (optional) and positioning it so it will support the muffin tin flatly.","ingredient_ids":["water"]}
- {"text":"Prepare the cheesecake filling: in a mixing bowl, beat 8 ounces cream cheese (225 g) with 1/2 cup granulated sugar (100 g) on medium speed until smooth and free of lumps, scraping the bowl down halfway through.","ingredient_ids":["cream_cheese","filling_sugar"]}
- {"text":"Add 2 large eggs, one at a time, mixing on low speed until just combined after each addition. Scrape down the bowl so the mixture is even.","ingredient_ids":["eggs"]}
- {"text":"Warm and add the dairy: very gently heat 1/2 cup heavy cream (120 ml) just until it loses chill but does not boil; let it cool slightly. Stir in 1/4 cup sour cream (60 g) and the seeds from 1 vanilla bean or 2 teaspoons vanilla extract, mixing until smooth.","ingredient_ids":["heavy_cream","sour_cream","vanilla"]}
- {"text":"Add 1 tablespoon all-purpose flour and a pinch of fine salt to the filling and fold gently to incorporate. The batter should be silky and pourable without lumps.","ingredient_ids":["filling_flour","salt"]}
- {"text":"Pour the cheesecake filling on top of the partially baked sponge layers, filling each muffin cup nearly to the rim but leaving a small gap to prevent overflow. Tap the tin gently on the counter to release any trapped air bubbles.","ingredient_ids":["filling"]}
- {"text":"Place the filled muffin tin into the prepared baking dish, then pour very hot water into the baking dish until it reaches halfway up the sides of the muffin tin to create a bain-marie (water bath). Be careful not to splash water into the cups.","ingredient_ids":["water"]}
- {"text":"Bake at 300°F (150°C) for 20–25 minutes. The centers should be set but still slightly jiggly when the pan is nudged. Avoid overbaking for the creamiest texture.","ingredient_ids":[]}
- {"text":"Turn off the oven and prop the door open slightly; allow the tin to cool in the oven for 30 minutes to reduce shock and prevent cracking, then remove and cool to room temperature on a rack.","ingredient_ids":[]}
- {"text":"Once cooled, transfer the cupcakes to the refrigerator and chill for at least 4 hours, preferably overnight, to allow the cheesecake filling to fully set.","ingredient_ids":[]}
- {"text":"When ready to finish, pat the tops of each chilled cupcake dry with a paper towel. Sprinkle about 1/2 to 1 teaspoon granulated sugar evenly over each top to form a thin layer for caramelizing. For a more dramatic crack, use coarse sanding sugar or a mix of fine and coarse sugar.","ingredient_ids":["sprinkle_sugar","coarse_sugar"]}
- {"text":"Caramelize the sugar using a butane kitchen torch: hold the flame about 2–3 inches from the sugar and move it in a slow circular motion until the sugar melts, bubbles, and turns a deep amber. Allow the caramel to harden for a minute before serving.","ingredient_ids":["sprinkle_sugar"]}
- {"text":"If you don’t have a torch, preheat the oven broiler on high and position the top oven rack about 6 inches from the broiler element. Place the cupcakes on a baking sheet and broil for 1–3 minutes, watching constantly, until the sugar melts and caramelizes; remove immediately to cool and harden.","ingredient_ids":[]}
- {"text":"If desired, add a small flake of coarse sugar or a shard of torched sugar as garnish for texture contrast and visual appeal. Serve chilled or bring to room temperature for 10–15 minutes before eating for a softer mouthfeel.","ingredient_ids":["coarse_sugar"]}
Pro Tips
- Use room temperature cream cheese and eggs to achieve a smooth, lump-free filling.
- Avoid overbeating the filling once the eggs are added to minimize air incorporation and reduce the chance of cracks.
- A water bath moderates oven temperature and prevents the tops from puffing and cracking; make sure the water is hot but not boiling when pouring it around the tin.
- Caramelize just before serving to preserve the crisp sugar top; the crack and contrast are best when the shell is freshly torched.
- If using a broiler, watch continuously—sugar can go from amber to burnt in seconds.
Variations
- Bourbon Vanilla: Add 1 tablespoon of bourbon to the filling for an adult twist that pairs beautifully with the caramelized top.
- Chocolate Crust: Swap the sponge base for a thin chocolate cookie crumb mixed with melted butter for a richer flavor profile.
- Citrus Zest: Stir 1 teaspoon lemon or orange zest into the filling for a bright, citrus-forward version that cuts the richness.
- Espresso-Caramel: Sprinkle a pinch of instant espresso powder into the filling and top with coffee-flavored caramelized sugar for a mocha-inspired treat.
Serving Suggestions
- Serve one or two cupcakes per person alongside a cup of espresso or strong coffee to balance the richness.
- Present the cupcakes on a white ceramic platter with a few fresh berries and mint leaves for color contrast and freshness.
- For a party, arrange the cupcakes in concentric circles on a tiered stand and torch them tableside for theater and immediate caramel crack.
- Add a small quenelle of lightly whipped cream or a dollop of crème fraîche next to each cupcake if you want an extra silky complement to the caramelized top.
Make-ahead and timing
These cupcakes benefit from being made a day ahead. After baking and cooling, refrigerate overnight and caramelize immediately before serving. This schedule lets you prepare in advance without sacrificing texture or visual drama at the moment of service.
If serving at a party, bake and chill a day ahead, transport the cold cupcakes in a well-padded container, and torch them at the venue if possible. If a torch isn’t available, arrange a quick broil just before guests arrive to finish the tops.
Storage and Reheating
Store leftover cupcakes in an airtight container in the refrigerator for up to 4 days. Do not caramelize sugar until ready to serve because chilled moisture will soften the sugar crust. To re-crisp a softened top, sprinkle a little sugar and re-torch or briefly broil right before serving. Do not freeze after the caramel top has been torched; you can freeze un-torched cupcakes wrapped tightly for up to 1 month and thaw overnight in the refrigerator before finishing.
Crème Brûlée Cheesecake Cupcakes
Individual baked cheesecakes set on a thin vanilla sponge and finished with a caramelized brûlée top. Rich, creamy interiors contrast with a crisp sugar shell for an elegant dessert that’s perfect for entertaining.
Ingredients
Equipment
Method
- Preheat the oven to 325°F (160°C). Lightly butter or spray a 12-cup muffin tin and line each cup with a paper liner or silicon liner if desired.
- Make the sponge base: whisk together 3/4 cup all-purpose flour (95 g), 1/2 cup granulated sugar (100 g), 1 teaspoon baking powder, and 1/4 teaspoon salt in a medium bowl.
- In a separate bowl, whisk the large egg, 1/3 cup melted cooled unsalted butter (75 g), and 2 tablespoons whole milk until combined. Add the wet ingredients to the dry mix and stir until just combined; do not overmix.
- Spoon about one heaping tablespoon of the batter into each prepared muffin cup, forming a thin sponge layer. Reserve the remainder for any cups that need topping. Bake the sponge layers for 6–8 minutes until just set but not browned. Remove from oven and let cool slightly.
- Reduce oven temperature to 300°F (150°C). Prepare a large baking dish for a water bath by placing a folded kitchen towel on the bottom (optional) and positioning it so it will support the muffin tin flatly.
- Prepare the cheesecake filling: in a mixing bowl, beat 8 ounces cream cheese (225 g) with 1/2 cup granulated sugar (100 g) on medium speed until smooth and free of lumps, scraping the bowl down halfway through.
- Add 2 large eggs, one at a time, mixing on low speed until just combined after each addition. Scrape down the bowl so the mixture is even.
- Warm and add the dairy: very gently heat 1/2 cup heavy cream (120 ml) just until it loses chill but does not boil; let it cool slightly. Stir in 1/4 cup sour cream (60 g) and the seeds from 1 vanilla bean or 2 teaspoons vanilla extract, mixing until smooth.
- Add 1 tablespoon all-purpose flour and a pinch of fine salt to the filling and fold gently to incorporate. The batter should be silky and pourable without lumps.
- Pour the cheesecake filling on top of the partially baked sponge layers, filling each muffin cup nearly to the rim but leaving a small gap to prevent overflow. Tap the tin gently on the counter to release any trapped air bubbles.
- Place the filled muffin tin into the prepared baking dish, then pour very hot water into the baking dish until it reaches halfway up the sides of the muffin tin to create a bain-marie (water bath). Be careful not to splash water into the cups.
- Bake at 300°F (150°C) for 20–25 minutes. The centers should be set but still slightly jiggly when the pan is nudged. Avoid overbaking for the creamiest texture.
- Turn off the oven and prop the door open slightly; allow the tin to cool in the oven for 30 minutes to reduce shock and prevent cracking, then remove and cool to room temperature on a rack.
- Once cooled, transfer the cupcakes to the refrigerator and chill for at least 4 hours, preferably overnight, to allow the cheesecake filling to fully set.
- When ready to finish, pat the tops of each chilled cupcake dry with a paper towel. Sprinkle about 1/2 to 1 teaspoon granulated sugar evenly over each top to form a thin layer for caramelizing. For a more dramatic crack, use coarse sanding sugar or a mix of fine and coarse sugar.
- Caramelize the sugar using a butane kitchen torch: hold the flame about 2–3 inches from the sugar and move it in a slow circular motion until the sugar melts, bubbles, and turns a deep amber. Allow the caramel to harden for a minute before serving.
- If you don’t have a torch, preheat the oven broiler on high and position the top oven rack about 6 inches from the broiler element. Place the cupcakes on a baking sheet and broil for 1–3 minutes, watching constantly, until the sugar melts and caramelizes; remove immediately to cool and harden.
- If desired, add a small flake of coarse sugar or a shard of torched sugar as garnish for texture contrast and visual appeal. Serve chilled or bring to room temperature for 10–15 minutes before eating for a softer mouthfeel.
Notes
For the cleanest vanilla flavor and appearance use seeds from a vanilla bean.
Chilling overnight yields the best texture and eases caramelization at serving time.
Store caramelized tops separately if transporting; finish at the venue for the freshest crack.
Frequently Asked Questions
Can I make these without a water bath?
You can bake the cupcakes without a water bath, but the water bath creates a gentler, more stable environment that reduces cracking and produces the creamiest texture. If you skip the water bath, bake at the lower temperature and expect slightly firmer centers and a greater chance of surface imperfections.
Is it possible to make these as a no-bake version?
A no-bake adaptation is possible by making a chilled cheesecake filling stabilized with gelatin or a larger proportion of sour cream and refrigerating until firm. However, that version will not have the exact dense baked texture shown in the inspiration and may be softer when torched; freeze briefly before torching to help the surface caramelize more cleanly.
What’s the best way to torch the sugar if I don’t own a culinary torch?
Use the oven broiler on the highest setting, placing the cupcakes close to the broiler element and monitoring constantly. Place the cupcakes on a rimmed baking sheet to catch any drips and remove them as soon as the sugar turns amber. Another option is to make a small batch of caramel on the stovetop and spoon it carefully onto each cup, allowing it to harden; this requires practice to avoid overcooking.
Why did my caramelized top become sticky after refrigeration?
Sugar absorbs moisture from the chilled cheesecake over time, which can make the caramel top lose its crispness. For best texture, caramelize just before serving. If the top has softened, re-sprinkle a little sugar and re-torch or briefly broil to recrystallize the surface.
Can I use low-fat dairy instead of heavy cream and sour cream?
Using low-fat dairy will change the texture and richness of the filling. Heavy cream and sour cream contribute fat that yields a smooth, dense mouthfeel. Substituting lower-fat products may result in a slightly grainier or less luxurious filling and may affect how the cakes set; for best results follow the recipe as written.