Follow Me On Social Media!
Roasted turkey crochet coaster (craft item)
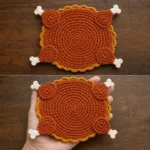
Quick and cute Roasted Turkey Crochet Coaster pattern — a festive, flat crochet coaster with scalloped edge and drumstick details. Perfect Thanksgiving craft and hostess gift.

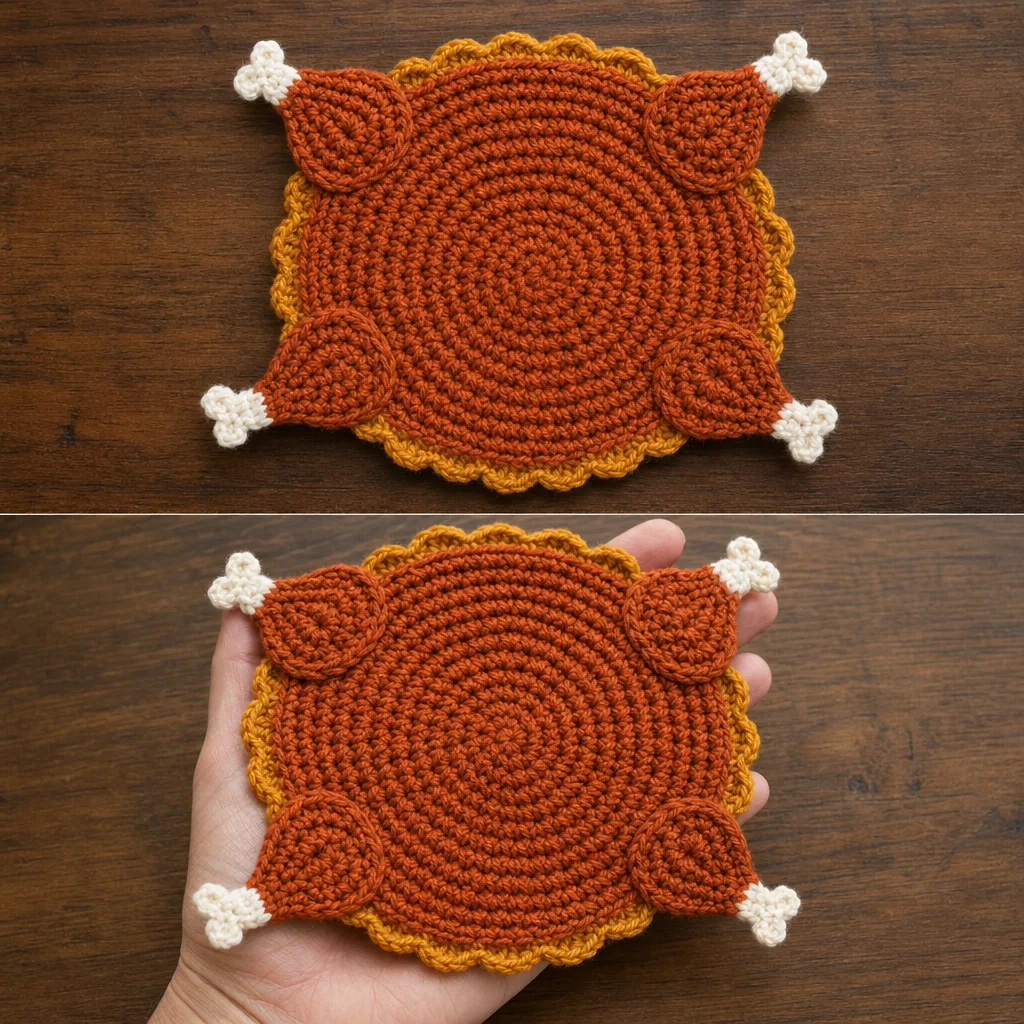
Make a charming Roasted Turkey Crochet Coaster to brighten your Thanksgiving table and delight gift recipients. This flat, festive coaster captures the visual pun of a roasted bird with scalloped edges, four little drumstick protrusions and a tiny off-white ‘bone’ detail — all worked in simple crochet stitches. It’s a quick, low-stress project that’s perfect for beginners who know basic stitches and experienced crocheters who want a quick seasonal make. The finished piece lies flat, absorbs condensation, and doubles as a playful trivet for small dishes. Because the coaster is decorative rather than structural, you can make multiples in an afternoon and mix colorways to suit your table decor.
This pattern emphasizes approachable construction: a spiraled round worked from the center, increasing to a coaster-sized circle, then adding four rounded leg shapes and scalloped edging to suggest a roasted turkey silhouette. You’ll practice working in the round, single crochet and half-double crochet stitches, and learn an easy technique for attaching small bone details with contrasting yarn. There’s no stuffing or shaping, so assembly is minimal and the project is very fast.
Beyond the basic pattern, the post includes helpful troubleshooting tips, yarn substitution notes, finishing techniques for durability, and creative serving suggestions for using the coasters in holiday displays. If you’re preparing a gift set, there are ideas for bundling and personalization. Read on for the full materials list, step-by-step instructions, and plenty of variations to make the project your own.
Why this coaster design works
The Roasted Turkey Crochet Coaster balances whimsy and function. Its circular base mirrors the silhouette of a roast, while scalloped edging provides a visual dressing that reads like crisped skin. The small drumstick nubs and cream bone details turn a simple round into a recognizable seasonal motif without adding bulk or complexity, which keeps the piece practical as a coaster.
The choice of medium-weight yarn gives the coaster sufficient body to absorb condensation from cold glasses while still remaining flexible enough to lie flat against uneven surfaces. The pattern’s construction — worked in a spiral with carefully placed increases — promotes an even, flat finish and a consistent gauge that’s easy to replicate across multiples.
Choosing yarn and hook
Pick a yarn that matches the balance you want between absorbency and color vibrancy. If you intend the coaster for actual beverage use, go for 100% cotton or a cotton blend. Acrylic yarns provide brighter colors and are more forgiving to beginner stitches but won’t soak up moisture as effectively.
Your hook choice affects both size and texture. A 4.0 mm hook with worsted-weight yarn typically produces a dense and tidy fabric. If stitches look too loose or gaps appear, drop down half a millimeter. Conversely, if the coaster is too stiff, increasing the hook size by a step will soften the fabric. Always check the coaster’s diameter as you progress.
Ingredients
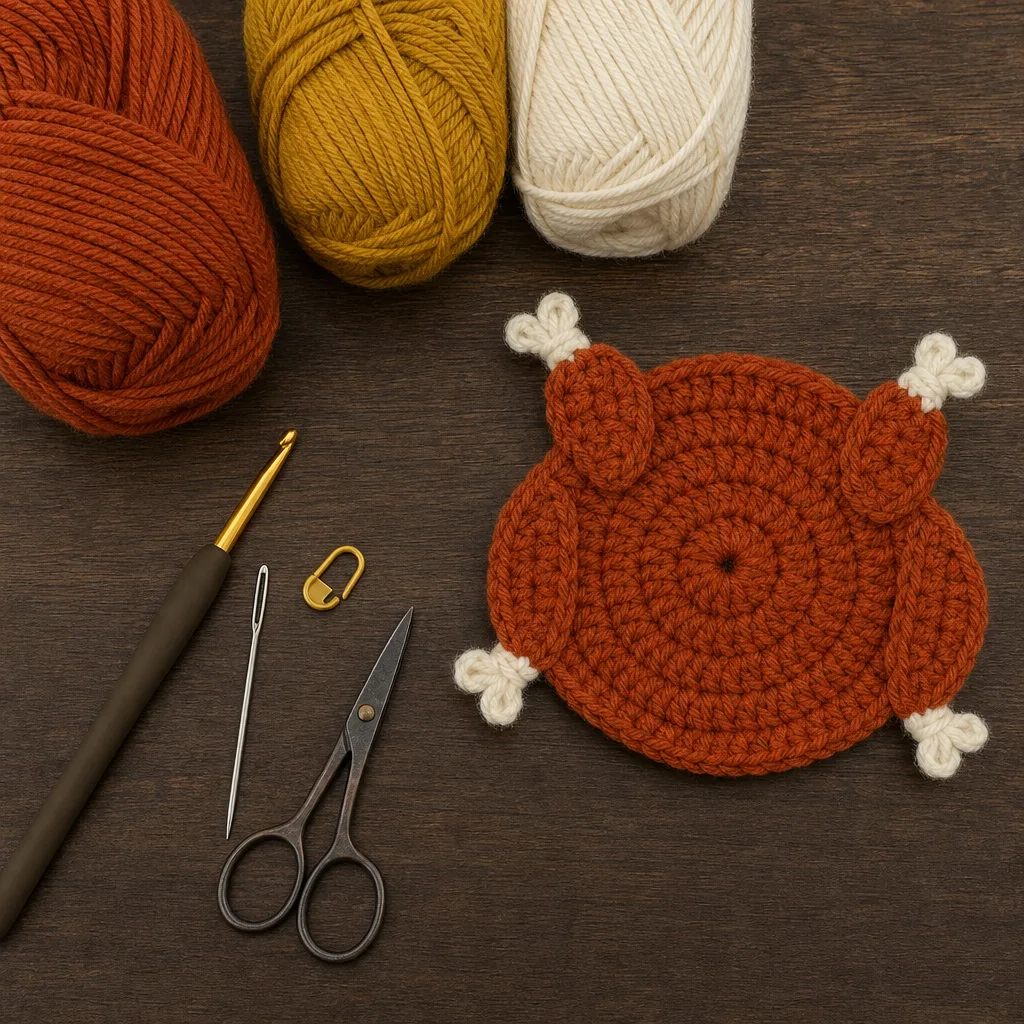
- Medium-weight (worsted/Aran) yarn, burnt orange or rust — about 25 g
- Medium-weight yarn, mustard/golden yellow — about 10 g
- Small amount off-white or cream yarn for 'bone' detail — about 5 g
- Small amount dark brown yarn for accent (optional) — about 5 g
- 4.0 mm (G/6) crochet hook (or size to obtain gauge)
- Yarn needle
- Scissors
- Stitch marker
- Measuring tape or ruler
- Small container of fabric stiffener or light spray starch (optional, to help coaster lie flat)
Instructions
- Prepare materials and gauge: Gather burnt orange (main color), mustard (accent), off-white (bone), dark brown (optional) yarns and a 4.0 mm crochet hook. Place a stitch marker where helpful and have a yarn needle and scissors ready. Aim for a finished coaster approximately 10–12 cm (4–4.5 in) across; adjust hook if needed to match size expectations. (ingredient_ids: ["yarn_main", "yarn_accent", "yarn_bone", "yarn_dark", "hook", "stitch_marker", "yarn_needle", "scissors", "measuring_tape"])
- Magic ring and round 1: With burnt orange yarn, make a magic ring. Chain 1 (does not count as a stitch), then work 8 single crochets (sc) into the ring. Pull the tail to close the ring. Place a stitch marker in the first stitch to mark the start of the round. (ingredient_ids: ["yarn_main", "stitch_marker"])
- Round 2: Work 2 sc in each stitch around (increase in every stitch) — 16 sc total. Move the stitch marker up to the new round’s first stitch. (ingredient_ids: ["yarn_main", "stitch_marker"])
- Round 3: *1 sc in next stitch, 2 sc in next stitch* — repeat around (24 sc total). (ingredient_ids: ["yarn_main"])
- Round 4: *1 sc in each of next 2 stitches, 2 sc in next stitch* — repeat around (32 sc total). (ingredient_ids: ["yarn_main"])
- Round 5: *1 sc in each of next 3 stitches, 2 sc in next stitch* — repeat around (40 sc total). This round should produce a flat circle; check for curling. If the circle begins to ruffle instead of lying flat, stop increasing and proceed to working a plain round. (ingredient_ids: ["yarn_main"])
- Rounds 6–7 (or until desired diameter): Work 1 sc in each stitch around for two rounds (or work single crochet rounds until the diameter reaches 10–12 cm). Keep the piece flat by checking frequently and adjusting the number of plain rounds if needed. (ingredient_ids: ["yarn_main", "measuring_tape"])
- Form the base scallops: Switch to mustard/golden yarn. Join with a slip stitch at the front loop of any stitch, chain 1, *work (sc, hdc, dc, hdc, sc) in the same stitch to create a scallop; skip 2 stitches; slip stitch in next stitch* — repeat around to produce evenly spaced scallops around the outer edge. Aim for 8 scallops; if spacing is off, adjust by skipping only 1 stitch between scallops or shifting placement slightly. Finish the round with a slip stitch and fasten off. Weave in tails. (ingredient_ids: ["yarn_accent", "yarn_main", "yarn_needle", "scissors"])
- Mark leg placement: Using burnt orange, identify four evenly spaced points around the edge where the ‘drumstick’ shapes will attach. Think of placing them at roughly the 12, 3, 6 and 9 o’clock positions; move the stitch marker as needed to mark the attachment points. (ingredient_ids: ["yarn_main", "stitch_marker"])
- Crochet each drumstick (make 4): Attach burnt orange yarn at a marked point with a slip stitch. Chain 2, then work the following into the next few free loops to form a small rounded nub: 6 sc into the first chain space (forming a small rounded piece), then slip stitch back into the base to secure. For a slightly longer leg, chain 1 after the nub and slip stitch back into the base again. Fasten off leaving a tail for weaving. Repeat for the remaining three legs. (ingredient_ids: ["yarn_main", "yarn_needle", "scissors", "stitch_marker"])
- Add bone details: Thread off-white yarn onto the yarn needle. For each drumstick, bring the off-white yarn through the outermost edge of the nub and create a small loop to represent the bone end: wrap the yarn once or twice and stitch it to the nub securely, then take the needle back through the coaster body and knot on the underside. Trim the bone tails short or leave tiny tassels if preferred. Use dark brown yarn sparingly to embroider tiny roast marks on the drumsticks if desired. (ingredient_ids: ["yarn_bone", "yarn_dark", "yarn_needle", "scissors"])
- Finish and block: Weave all tails into the coaster so they’re hidden. Lightly spray the coaster with a fabric stiffener or light spray starch if you want a firmer, more coaster-like finish; press gently with your hand to smooth. Lay flat to dry completely. (ingredient_ids: ["yarn_needle", "scissors", "measuring_tape"])
- Optional edging touch-up: If the scallops or leg attachments look uneven, use a round of slip stitches in burnt orange around the outermost edge to tidy the joins. Work evenly spaced slip stitches, then fasten off and weave in the ends. (ingredient_ids: ["yarn_main", "yarn_needle", "scissors"])
- Care instructions: To wash, hand-wash gently in cool water with mild soap and lay flat to dry. Avoid machine washing or high heat drying to preserve shape and color. If you used starch, reapply after washing for stiffness. (ingredient_ids: ["yarn_main", "yarn_accent", "yarn_bone"])
Pro Tips
- Use a slightly smaller hook than the yarn label recommends to make a denser coaster that resists slippage and drips.
- Work with a stitch marker to keep track of your rounds and keep the circle neat; moving the marker after each round prevents counting mistakes.
- If your coaster curls, stop increasing earlier or add an extra plain round to flatten it without rerunning previous rounds.
- Experiment with cotton yarn for better absorbency if you intend to use the coaster under cold drinks that sweat.
- For a sturdier trivet, work a second coaster and join them together with single crochet around the edge, or add a thin layer of interfacing between two identical coasters and blanket-stitch the edges together.
Variations
- Mini platter set: Make three smaller coasters in coordinating colors and stack them for a mini 'platter' decoration. Use muted autumn shades for a vintage look.
- Child-friendly palette: Replace burnt orange with bright primary colors and use contrasting bones for a playful set that doubles as puppets for little hands.
- Textured stitch variation: Substitute half-double crochet or puff stitches in the main round for a textured surface that mimics crisp roasted skin.
- Holiday bundle: Create a matching set (coaster, napkin ring, and small applique) using the same yarn and use them as hostess gifts or place setting accents.
Serving Suggestions
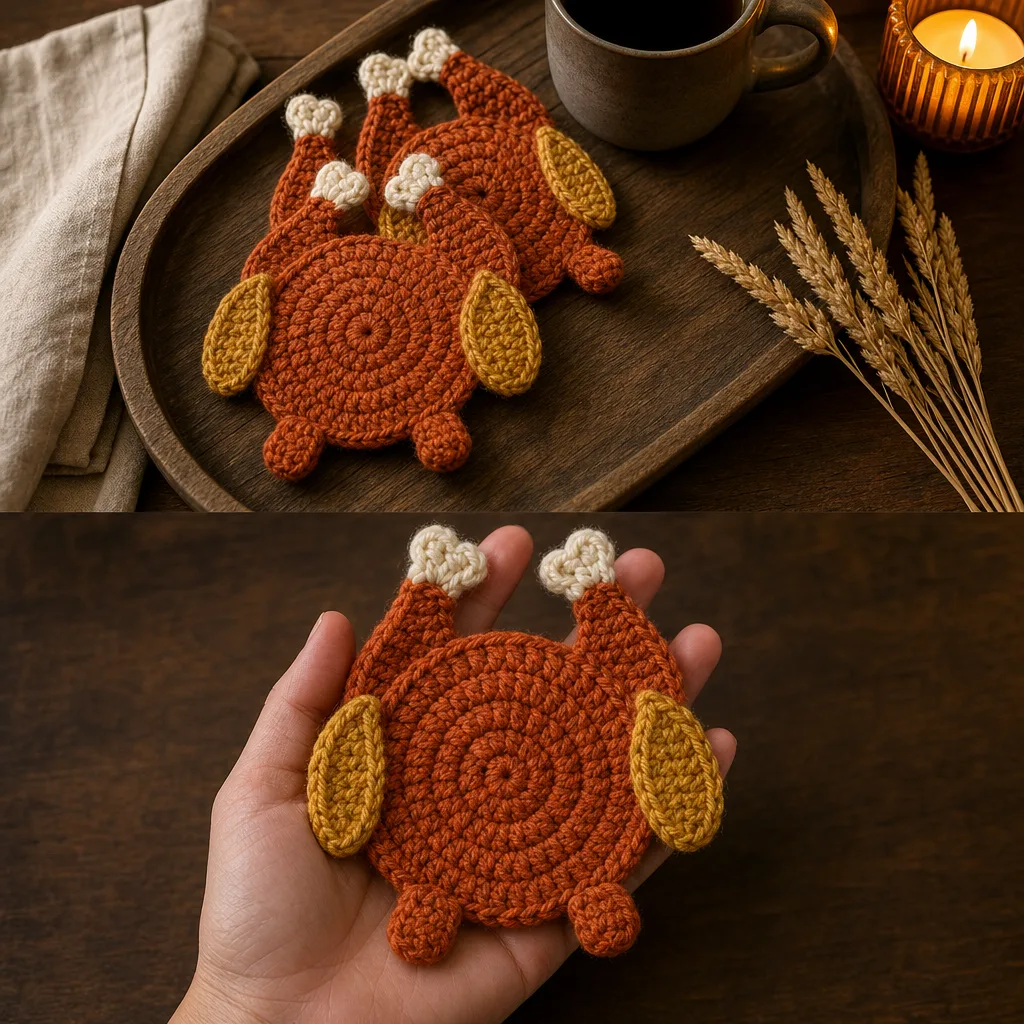
- Place a single turkey coaster at each place setting under the water glass or festive mug to reinforce a Thanksgiving theme.
- Arrange a trio of coasters in the center of a small side table and top with votive candles (on a heatproof plate) for an instant autumn vignette.
- Bind a set of four coasters with a ribbon and tuck a handwritten tag into the bow for a last-minute hostess gift.
- Use the coaster as an invitation prop: photograph it with your invitation suite to show guests a playful visual hint of your holiday motif.
Make-ahead and gifting
Coasters are ideal small items to make in batches ahead of the holiday season. Store finished coasters flat between pieces of acid-free tissue paper to prevent color transfer, especially if using bright or dark yarns. If you plan to hand them out as favors, assemble sets of two to four and wrap with twine or ribbon.
Personalize gifts with small tags that note fiber content and care instructions. Including a short line about the handmade nature of the item and suggested care (hand-wash or gentle machine-wash in a bag) adds a professional touch that recipients appreciate.
Roasted turkey crochet coaster (craft item)
A flat crochet coaster shaped and decorated to resemble a roasted turkey, worked in the round with scalloped edges and four little drumstick protrusions. Quick to make and great for holiday decor or gifts.
Ingredients
Equipment
Method
- Prepare materials and gauge: Gather burnt orange (main color), mustard (accent), off-white (bone), dark brown (optional) yarns and a 4.0 mm crochet hook. Place a stitch marker where helpful and have a yarn needle and scissors ready. Aim for a finished coaster approximately 10–12 cm (4–4.5 in) across; adjust hook if needed to match size expectations.
- Magic ring and round 1: With burnt orange yarn, make a magic ring. Chain 1 (does not count as a stitch), then work 8 single crochets (sc) into the ring. Pull the tail to close the ring. Place a stitch marker in the first stitch to mark the start of the round.
- Round 2: Work 2 sc in each stitch around (increase in every stitch) — 16 sc total. Move the stitch marker up to the new round’s first stitch.
- Round 3: *1 sc in next stitch, 2 sc in next stitch* — repeat around (24 sc total).
- Round 4: *1 sc in each of next 2 stitches, 2 sc in next stitch* — repeat around (32 sc total).
- Round 5: *1 sc in each of next 3 stitches, 2 sc in next stitch* — repeat around (40 sc total). This round should produce a flat circle; check for curling. If the circle begins to ruffle instead of lying flat, stop increasing and proceed to working a plain round.
- Rounds 6–7 (or until desired diameter): Work 1 sc in each stitch around for two rounds (or work single crochet rounds until the diameter reaches 10–12 cm). Keep the piece flat by checking frequently and adjusting the number of plain rounds if needed.
- Form the base scallops: Switch to mustard/golden yarn. Join with a slip stitch at the front loop of any stitch, chain 1, *work (sc, hdc, dc, hdc, sc) in the same stitch to create a scallop; skip 2 stitches; slip stitch in next stitch* — repeat around to produce evenly spaced scallops around the outer edge. Aim for 8 scallops; if spacing is off, adjust by skipping only 1 stitch between scallops or shifting placement slightly. Finish the round with a slip stitch and fasten off. Weave in tails.
- Mark leg placement: Using burnt orange, identify four evenly spaced points around the edge where the ‘drumstick’ shapes will attach. Think of placing them at roughly the 12, 3, 6 and 9 o’clock positions; move the stitch marker as needed to mark the attachment points.
- Crochet each drumstick (make 4): Attach burnt orange yarn at a marked point with a slip stitch. Chain 2, then work the following into the next few free loops to form a small rounded nub: 6 sc into the first chain space (forming a small rounded piece), then slip stitch back into the base to secure. For a slightly longer leg, chain 1 after the nub and slip stitch back into the base again. Fasten off leaving a tail for weaving. Repeat for the remaining three legs.
- Add bone details: Thread off-white yarn onto the yarn needle. For each drumstick, bring the off-white yarn through the outermost edge of the nub and create a small loop to represent the bone end: wrap the yarn once or twice and stitch it to the nub securely, then take the needle back through the coaster body and knot on the underside. Trim the bone tails short or leave tiny tassels if preferred. Use dark brown yarn sparingly to embroider tiny roast marks on the drumsticks if desired.
- Finish and block: Weave all tails into the coaster so they’re hidden. Lightly spray the coaster with a fabric stiffener or light spray starch if you want a firmer, more coaster-like finish; press gently with your hand to smooth. Lay flat to dry completely.
- Optional edging touch-up: If the scallops or leg attachments look uneven, use a round of slip stitches in burnt orange around the outermost edge to tidy the joins. Work evenly spaced slip stitches, then fasten off and weave in the ends.
- Care instructions: To wash, hand-wash gently in cool water with mild soap and lay flat to dry. Avoid machine washing or high heat drying to preserve shape and color. If you used starch, reapply after washing for stiffness.
Notes
This item is decorative and functional as a coaster; it contains no stuffing and is not edible.
Gauge and final size can be adjusted by switching hook size or yarn weight.
Pattern is written in US crochet terms.
Frequently Asked Questions
What yarn fiber is best for coasters?
Cotton or cotton-blend yarns are excellent choices for coasters because they absorb moisture and withstand repeated washing. Acrylic is lightweight, holds color well, and is easy to care for, but it doesn’t absorb liquid as well as cotton. For a balance between absorbency and softness, choose a cotton-acrylic blend. If you want a very sturdy coaster, a mercerized cotton will give a slight sheen and improved stitch definition.
Can I make the coaster larger or smaller?
Yes. To change size, alter the number of increasing rounds in the spiral center or change hook size. Fewer increase rounds or a smaller hook produces a smaller coaster; additional increase rounds or a larger hook gives a bigger piece. Keep an eye on the flatness of the circle: too many increases will cause ruffling, which you can correct by adding plain rounds or adjusting spacing.
How do I keep the coaster from stretching out with use?
Using a denser stitch and slightly smaller hook reduces stretch. Finishing with a lightweight fabric stiffener or starch helps the coaster maintain shape when damp. If you expect heavy use, consider making a double-layer coaster by crocheting two identical pieces and joining them, or insert a thin, washable interfacing layer sewn between two coasters for added stability.
Is there a way to make the bone detail more durable?
Instead of short yarn tassels, try embroidering the bone with multiple passes of off-white yarn to create a small, flat loop that’s stitched down securely at both ends. Knot the yarn on the underside and weave the tail in. For an even more durable detail, use a small piece of white felt glued and stitched into place after crocheting, but note that using glue changes washability.
Can this pattern be adapted for machine washing?
If you use machine-washable yarns (labelled as such) and avoid fabric stiffeners, the coaster can generally tolerate gentle machine washing. Place coasters in a mesh laundry bag, use a delicate cycle with cool water, and reshape and lay flat to dry. Reapply light starch if you prefer a stiffer finish after washing.