Follow Me On Social Media!
Brownie gingerbread-style houses (decorated brownie houses)
Make festive brownie gingerbread-style houses: fudgy brownie slabs coated in glossy ganache, piped white icing, and candy decorations. Step-by-step instructions, tips, and variations for an edible winter village.

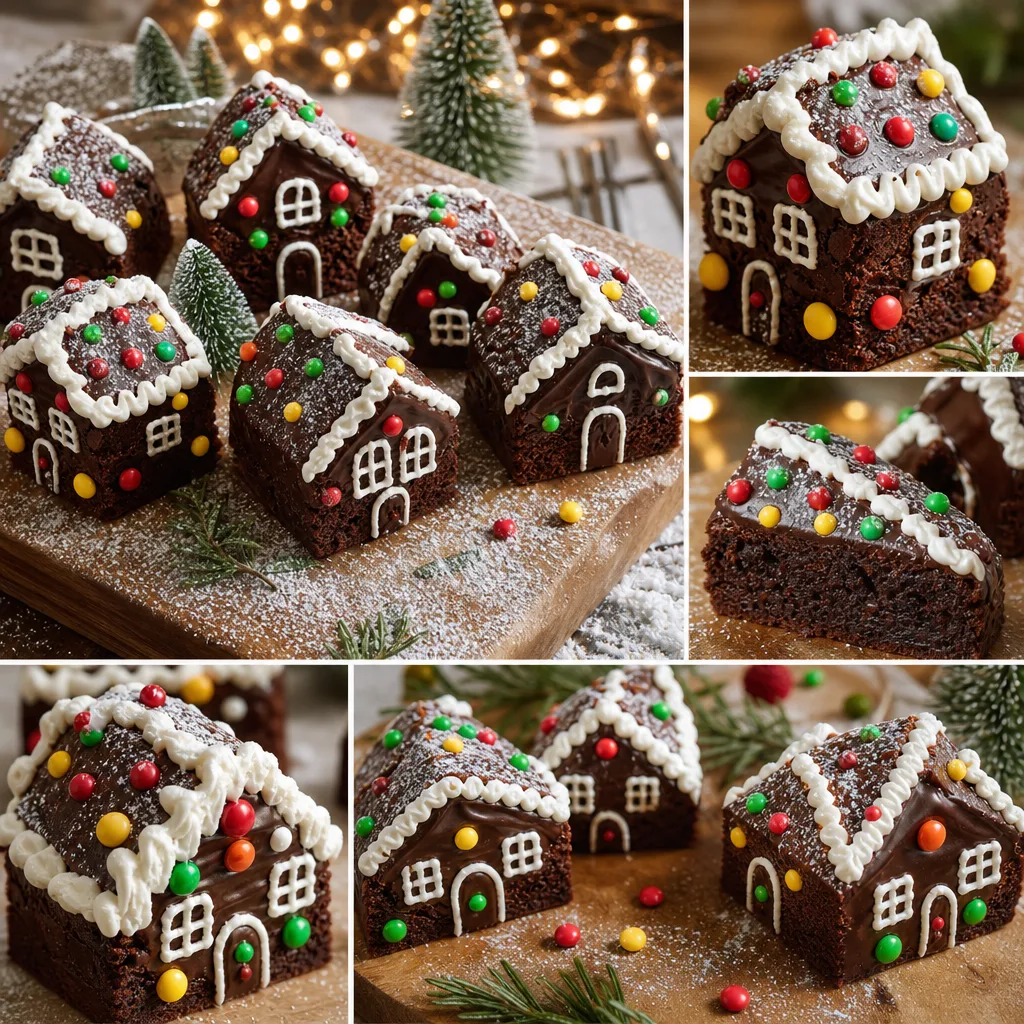
These brownie gingerbread-style houses are a festive twist on two holiday classics: the fudgy brownie and the decorated gingerbread house. Instead of baking panels of gingerbread, you bake a dense, glossy-topped slab of chocolate brownie, cut it into little house-shaped blocks, coat them in a shiny chocolate exterior and pipe snowy white icing for roofs, windows and trim. The result is a tiny chocolate village that's both decorative and entirely edible — sturdy enough to display for a holiday table and indulgent enough to slice open and enjoy like a decadent brownie.
Beyond the novelty, this recipe is designed to be approachable. The brownie batter is straightforward and intentionally fudgy, with a crackly top and moist interior that holds its shape when cut into blocks. A simple chocolate ganache provides the glossy coating that mimics the classic gingerbread look, while a thick white icing (royal-icing style) lets you create sharp piped edges and fine details that won’t slump. Small round candies and a dusting of powdered sugar finish the houses with bright, festive accents and a delicate “snow” veil.
Whether you make a handful to gift, line a board with a miniature village for your centerpiece, or let kids decorate them as an activity, this project balances flavor, texture and visual charm. The technique is flexible: if you prefer richer chocolate, add a bit of melted dark chocolate to the batter; if you want quicker assembly, use a store-bought ganache or chocolate spread as the coating. Read on for step-by-step instructions, ingredient notes, helpful tips, and creative variations to tailor these brownie houses to your holiday plans.
Why this works
The success of these brownie houses rests on three complementary textures: a dense fudgy interior, a glossy stable coating, and a firm piped icing. Brownies that are dense rather than cake-like hold their shape when cut into architectural blocks; the internal fat content and careful baking time ensure they remain moist without crumbling.
Ganache is ideal as a coating because it sets to a smooth, shiny surface that behaves much like the exterior of a traditional gingerbread house. It traps moisture from the brownie slightly, creating an irresistible contrast between the slightly cooler chocolate shell and the tender interior.
Royal-style icing, made with meringue powder or whipped egg whites and powdered sugar, dries to a hard, matte finish. That firmness lets you pipe crisp roof ridges, window outlines and other delicate details that won’t sag. Using meringue powder simplifies handling and reduces food-safety concerns compared to raw whites.
Ingredient notes and substitutions
Butter and chocolate: for the richest flavor, use high-quality bittersweet or dark chocolate in the brownie and ganache. If you prefer milk chocolate, reduce the sugar slightly in the batter to prevent excessive sweetness. Unsalted butter gives you control over salt; if using salted butter, reduce added salt in the recipe.
Flour and cocoa: all-purpose flour gives structure without toughness; for an even fudgier result, replace up to 2 tablespoons of flour with an equal measure of extra cocoa powder. Use Dutch-process cocoa for deep color and mellow flavor, or natural cocoa for brighter chocolate notes. Be aware different cocoas absorb liquids differently, so watch batter texture for adjustments.
Decorating with kids
Decorating these brownie houses is a fun, less-fussy alternative to traditional gingerbread houses for kids: the base is soft and forgiving, and candies stick easily to the icing. Set up trays of small candies, sprinkles and edible glitter and let kids pipe their own rooflines and windows under supervision.
To keep designs tidy, pre-pipe basic outlines on the houses and let kids fill in with candies. If young decorators want to eat their supplies, ensure candies are age-appropriate and supervise use of small pieces.
Ingredients
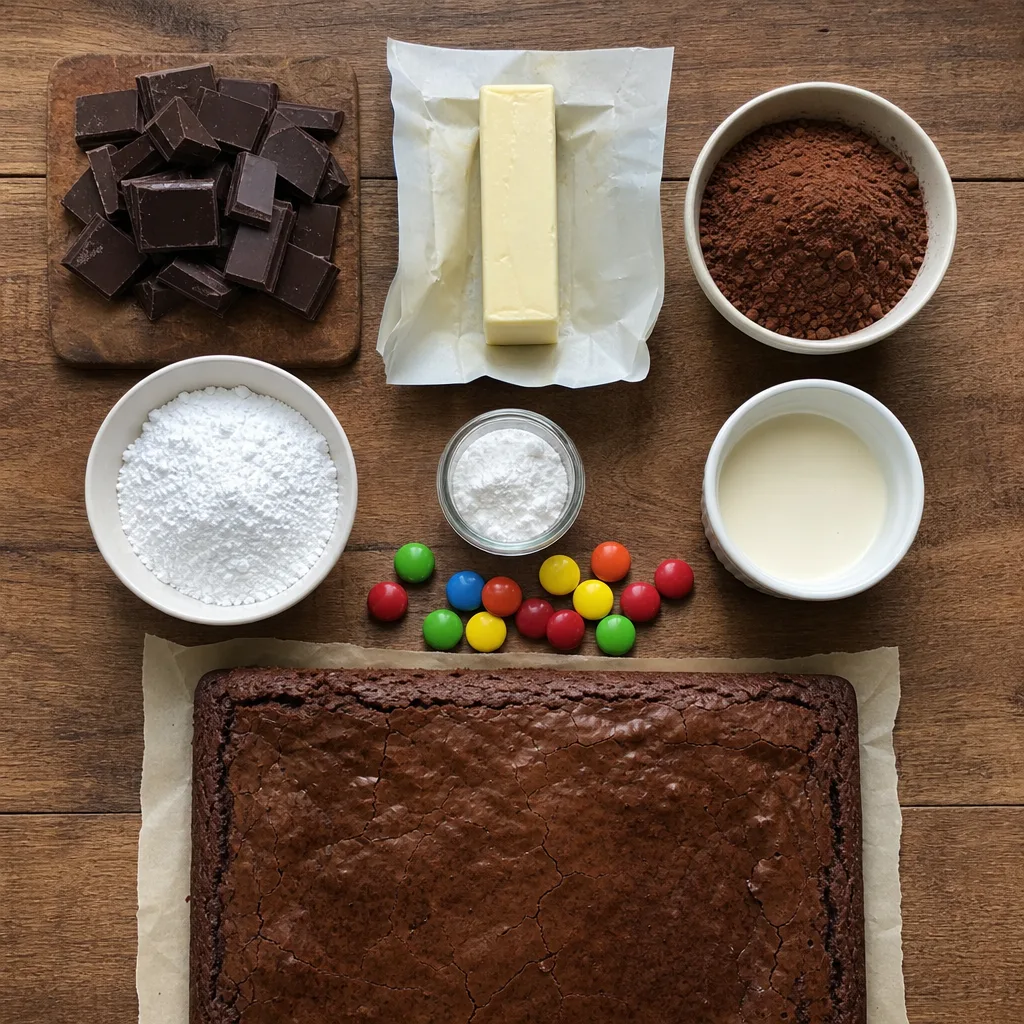
- unsalted butter (10 tablespoons / 140 g), plus extra for greasing
- bittersweet or dark chocolate (6 oz / 170 g), coarsely chopped
- granulated sugar (1 cup / 200 g)
- light brown sugar, packed (1/2 cup / 110 g)
- large eggs (3), room temperature
- vanilla extract (2 teaspoons)
- all-purpose flour (1 cup / 125 g)
- unsweetened cocoa powder (1/3 cup / 35 g)
- fine sea salt (3/4 teaspoon)
- instant espresso powder (optional) (1/2 teaspoon)
- vegetable oil or neutral oil (1 tablespoon) for shiny top (optional)
- heavy cream (3/4 cup / 180 ml) for ganache
- dark chocolate for ganache (6 oz / 170 g), chopped
- unsalted butter for ganache (1 tablespoon / 15 g), softened
- confectioners' (powdered) sugar (2 to 2 1/2 cups / 240–300 g) for royal-style icing
- paste meringue powder (or 2 large egg whites) (3 tablespoons meringue powder or 2 egg whites)
- fresh lemon juice or vanilla (1 teaspoon) for royal-style icing
- water (as needed) for icing (about 1 to 2 tablespoons)
- small colorful round sugar candies (M&M-style) (1 cup) for windows and decorations
- powdered sugar for dusting (to taste)
- nonstick cooking spray or parchment for lining pan (as needed)
Instructions
- {"text":"Preheat the oven to 350°F (175°C). Line a 9×9 inch (23×23 cm) square baking pan with parchment paper, leaving a 1-inch overhang on two sides for easy lifting; grease lightly with butter or nonstick cooking spray.", "ingredient_ids": ["ing12"]}
- {"text":"In a heatproof bowl set over (or gently in) simmering water, melt 6 oz chopped bittersweet/dark chocolate with 10 tablespoons unsalted butter, stirring until smooth and glossy. Remove the bowl from heat and let cool slightly for 5 minutes.", "ingredient_ids": ["ing1","ing2"]}
- {"text":"Whisk the granulated sugar and light brown sugar into the cooled chocolate-butter mixture until mostly dissolved and slightly thickened.", "ingredient_ids": ["ing3","ing4","ing1","ing2"]}
- {"text":"Whisk in the eggs one at a time, fully incorporating each before adding the next, then stir in the vanilla extract and the optional instant espresso powder for depth of flavor.", "ingredient_ids": ["ing5","ing6","ing9"]}
- {"text":"Sift together the all-purpose flour, unsweetened cocoa powder and fine sea salt into a bowl; fold the dry mixture into the wet batter gently until just combined. If using, stir in 1 tablespoon vegetable oil to help encourage a shiny crackly top.", "ingredient_ids": ["ing7","ing8","ing9","ing10"]}
- {"text":"Pour the batter into the prepared pan and smooth the top with a spatula. Bake for 28–34 minutes, until the edges are set and a toothpick inserted into the center comes out with a few moist crumbs (not raw batter). Do not overbake; the center should remain fudgy.", "ingredient_ids": []}
- {"text":"Remove the pan to a wire rack and allow the brownie to cool completely in the pan, at least 1 hour. Use the parchment overhang to lift the slab from the pan and transfer to a cutting board.", "ingredient_ids": []}
- {"text":"While the brownie cools, make the ganache: heat 3/4 cup heavy cream in a small saucepan until it begins to simmer; remove from heat and pour over 6 oz chopped dark chocolate. Let it sit 2 minutes, then whisk until smooth and shiny. Whisk in 1 tablespoon softened butter for extra gloss and set aside to thicken to a spreadable consistency at room temperature (10–20 minutes).", "ingredient_ids": ["ing11","ing13","ing14"]}
- {"text":"Trim the brownie slab edges so you have straight sides. Using a sharp serrated knife, cut the slab into rectangular blocks about 2.5 x 1.5 inches (6 x 4 cm) for house bases. For each house, cut a small triangular roof shape from the top of the block or leave as a simple peaked roof by cutting a shallow diagonal if desired. Reserve scraps for snacking.", "ingredient_ids": []}
- {"text":"Set the cut brownie blocks on a wire rack over a sheet pan. Spread or pour ganache over each block, using an offset spatula to smooth and fully coat the sides and top. Work quickly while ganache is pourable; if it firms too much, warm gently for a few seconds and stir.", "ingredient_ids": ["ing11","ing13","ing14"]}
- {"text":"Place coated brownie houses on a baking sheet and chill in the refrigerator for 10–15 minutes to set the ganache surface so piping won’t melt into it.", "ingredient_ids": []}
- {"text":"Prepare royal-style piping icing: in a mixing bowl combine confectioners' sugar with 3 tablespoons meringue powder (or the two egg whites) and 1 teaspoon lemon juice or vanilla. Add 1 tablespoon water and beat with a hand mixer on medium until the icing is glossy and holds a firm peak; add a little more water, a teaspoon at a time, if too stiff for piping. Transfer icing to a piping bag fitted with a small round tip or a zip-top bag with the corner snipped.", "ingredient_ids": ["ing15","ing16","ing17","ing18"]}
- {"text":"Pipe roof lines, window frames and decorative trim using the white icing. Press small colorful candies into the wet icing to form windows, wreaths or rooftop dots. Work systematically from larger roof outlines to small details so the base structure has time to set between additions.", "ingredient_ids": ["ing15","ing19"]}
- {"text":"Dust the assembled village lightly with powdered sugar to simulate snow. Return to the refrigerator for 10 minutes to allow piped decorations to firm fully before handling.", "ingredient_ids": ["ing20"]}
- {"text":"To serve, bring the houses to room temperature for about 10–15 minutes so the ganache softens slightly and the brownie interior is tender. Arrange on a wooden board or platter and enjoy. Store any leftovers in an airtight container in the refrigerator for up to 4 days; bring to room temperature before eating.", "ingredient_ids": []}
Pro Tips
- For the fudgiest texture, avoid overbaking — check the center starting at 25 minutes; a few moist crumbs on a tester indicate proper fudginess.
- Chill the ganache-coated houses briefly before piping so the white icing maintains crisp edges and doesn’t bleed into the chocolate.
- If you prefer to skip tempering, melt chocolate slowly over a double boiler and add a tablespoon of vegetable oil for shine; ganache offers a more stable coating for warmer kitchens.
- Use a serrated knife dipped in hot water and wiped dry between cuts for clean brownie edges and neater house shapes.
- Make the brownie slab a day ahead and refrigerate wrapped tightly; this makes cutting and coating easier, and flavors deepen overnight.
Variations
- Mint-chocolate: stir 1/2 teaspoon peppermint extract into the ganache and top with green candies and crushed peppermint for a cool holiday twist.
- Salted caramel: drizzle thin salted caramel over the ganache before it sets and use caramel-colored candies for warm accents.
- White chocolate houses: use white chocolate ganache (white chocolate + cream) and tint piping icing with pastel food colors for a snow-covered cottage look.
- Nut-crusted: press finely chopped toasted hazelnuts or almonds into the ganache sides before it sets for added texture and a nutty flavor.
Serving Suggestions
- Arrange several decorated houses on a wooden serving board surrounded by small sprigs of rosemary (as edible trees) and extra candies to create a miniature winter village centerpiece.
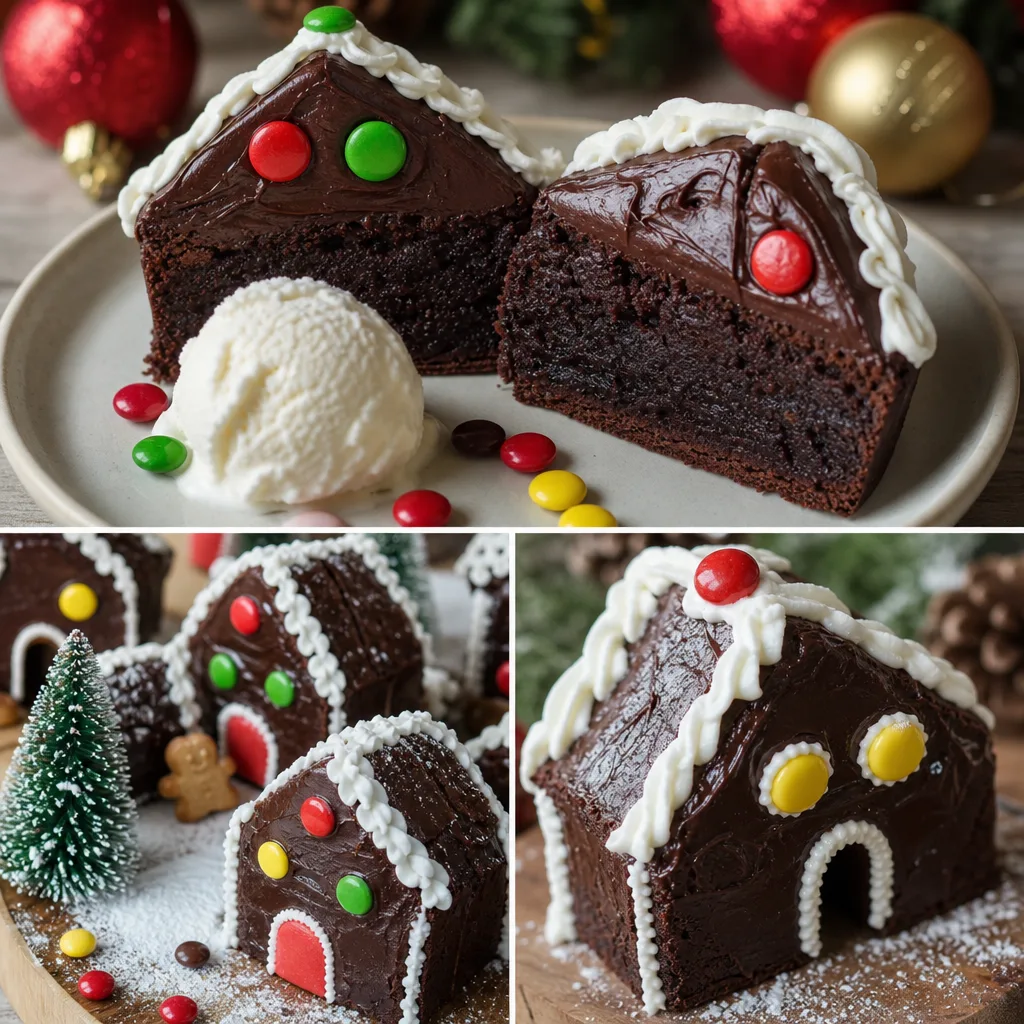
- Serve a house with a scoop of vanilla ice cream or whipped cream and warm berry compote for a plated dessert at holiday dinners.
- Pair individual houses with espresso or hot chocolate for a cozy after-dinner treat — the bitter coffee balances the rich chocolate.
- Wrap individual houses in clear cellophane and tie with ribbon to give as edible gifts; include a small tag with assembly notes and storage tips.
Make-ahead and timing
You can prepare components ahead to spread work across days: bake the brownie slab and store it wrapped in the refrigerator up to 48 hours before cutting and assembling. Prepare ganache and set it in the refrigerator; rewarm gently before using so it’s spreadable. Royal icing can be made and kept in an airtight container; if stored, cover the surface with plastic wrap to prevent crusting and re-whip briefly before piping.
For a relaxed schedule, bake and cool the brownies one day, make ganache and icing the next morning, and assemble and decorate in the afternoon. This staggered approach reduces last-minute stress and lets flavors meld for improved depth.
Storage and Reheating
Store finished brownie houses in an airtight container in the refrigerator for up to 4 days. For best texture, remove from fridge 30–60 minutes before serving to bring ganache and brownie interior back toward room temperature. Do not microwave assembled decorated houses; for a warm serving, unwrap and briefly warm a single slice in a 300°F (150°C) oven for 4–6 minutes, watching closely so icing and candies do not melt.
Brownie gingerbread-style houses (decorated brownie houses)
Fudgy brownie slabs cut into small house-shaped blocks, coated with glossy chocolate ganache and decorated with firm royal-style icing and colorful candies to form a miniature edible winter village.
Ingredients
Equipment
Method
- Preheat the oven to 350°F (175°C). Line a 9×9 inch (23×23 cm) square baking pan with parchment paper, leaving a 1-inch overhang on two sides for easy lifting; grease lightly with butter or nonstick cooking spray.
- In a heatproof bowl set over (or gently in) simmering water, melt 6 oz chopped bittersweet/dark chocolate with 10 tablespoons unsalted butter, stirring until smooth and glossy. Remove the bowl from heat and let cool slightly for 5 minutes.
- Whisk the granulated sugar and light brown sugar into the cooled chocolate-butter mixture until mostly dissolved and slightly thickened.
- Whisk in the eggs one at a time, fully incorporating each before adding the next, then stir in the vanilla extract and the optional instant espresso powder for depth of flavor.
- Sift together the all-purpose flour, unsweetened cocoa powder and fine sea salt into a bowl; fold the dry mixture into the wet batter gently until just combined. If using, stir in 1 tablespoon vegetable oil to help encourage a shiny crackly top.
- Pour the batter into the prepared pan and smooth the top with a spatula. Bake for 28–34 minutes, until the edges are set and a toothpick inserted into the center comes out with a few moist crumbs (not raw batter). Do not overbake; the center should remain fudgy.
- Remove the pan to a wire rack and allow the brownie to cool completely in the pan, at least 1 hour. Use the parchment overhang to lift the slab from the pan and transfer to a cutting board.
- While the brownie cools, make the ganache: heat 3/4 cup heavy cream in a small saucepan until it begins to simmer; remove from heat and pour over 6 oz chopped dark chocolate. Let it sit 2 minutes, then whisk until smooth and shiny. Whisk in 1 tablespoon softened butter for extra gloss and set aside to thicken to a spreadable consistency at room temperature (10–20 minutes).
- Trim the brownie slab edges so you have straight sides. Using a sharp serrated knife, cut the slab into rectangular blocks about 2.5 x 1.5 inches (6 x 4 cm) for house bases. For each house, cut a small triangular roof shape from the top of the block or leave as a simple peaked roof by cutting a shallow diagonal if desired. Reserve scraps for snacking.
- Set the cut brownie blocks on a wire rack over a sheet pan. Spread or pour ganache over each block, using an offset spatula to smooth and fully coat the sides and top. Work quickly while ganache is pourable; if it firms too much, warm gently for a few seconds and stir.
- Place coated brownie houses on a baking sheet and chill in the refrigerator for 10–15 minutes to set the ganache surface so piping won’t melt into it.
- Prepare royal-style piping icing: in a mixing bowl combine confectioners’ sugar with 3 tablespoons meringue powder (or the two egg whites) and 1 teaspoon lemon juice or vanilla. Add 1 tablespoon water and beat with a hand mixer on medium until the icing is glossy and holds a firm peak; add a little more water, a teaspoon at a time, if too stiff for piping. Transfer icing to a piping bag fitted with a small round tip or a zip-top bag with the corner snipped.
- Pipe roof lines, window frames and decorative trim using the white icing. Press small colorful candies into the wet icing to form windows, wreaths or rooftop dots. Work systematically from larger roof outlines to small details so the base structure has time to set between additions.
- Dust the assembled village lightly with powdered sugar to simulate snow. Return to the refrigerator for 10 minutes to allow piped decorations to firm fully before handling.
- To serve, bring the houses to room temperature for about 10–15 minutes so the ganache softens slightly and the brownie interior is tender. Arrange on a wooden board or platter and enjoy. Store any leftovers in an airtight container in the refrigerator for up to 4 days; bring to room temperature before eating.
Notes
Times and temperatures are authored based on standard baking practice for fudgy brownies and setting ganache; adjust as needed for altitude or oven variance.
Use meringue powder for a shelf-stable royal-style icing when possible; substitute with pasteurized egg whites if necessary.
Frequently Asked Questions
Can I make these houses without chilling in the refrigerator?
Chilling is recommended because it firms the ganache coating and sets piped decorations quickly. In warm kitchens or when using softer ganache, skipping the chill will likely cause the white icing to sink or spread. If you prefer not to chill, use a firmer chocolate coating and keep the workspace cool.
Is it safe to use raw egg whites in the royal-style icing?
Using fresh pasteurized egg whites or pasteurized meringue powder is safest. If you use raw egg whites, be sure they come from a trusted source and know that there is a small risk of foodborne illness. Meringue powder provides similar stability with lower risk and is shelf-stable.
How do I store leftovers so the candy decorations don’t sweat?
Place the houses in a single layer in an airtight container and refrigerate. To minimize condensation (sweating) when returning to room temperature, remove the container to the refrigerator door for 15–20 minutes before bringing to the counter, or unwrap and let them sit still at room temperature for 30–60 minutes rather than exposing them to rapid temperature changes.
Can I assemble the houses ahead of time for a party?
Yes — you can bake the brownie slab 2 days ahead (wrapped tightly and refrigerated) and make ganache and icing the day before. Complete assembly the day of the event for the freshest appearance, or fully assemble and refrigerate overnight if needed. Avoid long storage at room temperature if your ganache is very soft.
How do I fix a crackled or uneven ganache coating?
If the ganache sets with small cracks, gently warm it with a hair dryer on low or hold under a warm oven light for a few seconds and smooth with a small offset spatula. If the surface is uneven, a second thin layer of slightly warmed ganache will smooth imperfections; work quickly and allow to set between thin layers.