Follow Me On Social Media!
Taco salad cups (tortilla bowls)
Make crunchy taco salad cups (tortilla bowls) filled with seasoned ground beef, lettuce, salsa and cheese. A customizable party appetizer or quick dinner — bake tortilla shells, cook the meat, assemble and serve.

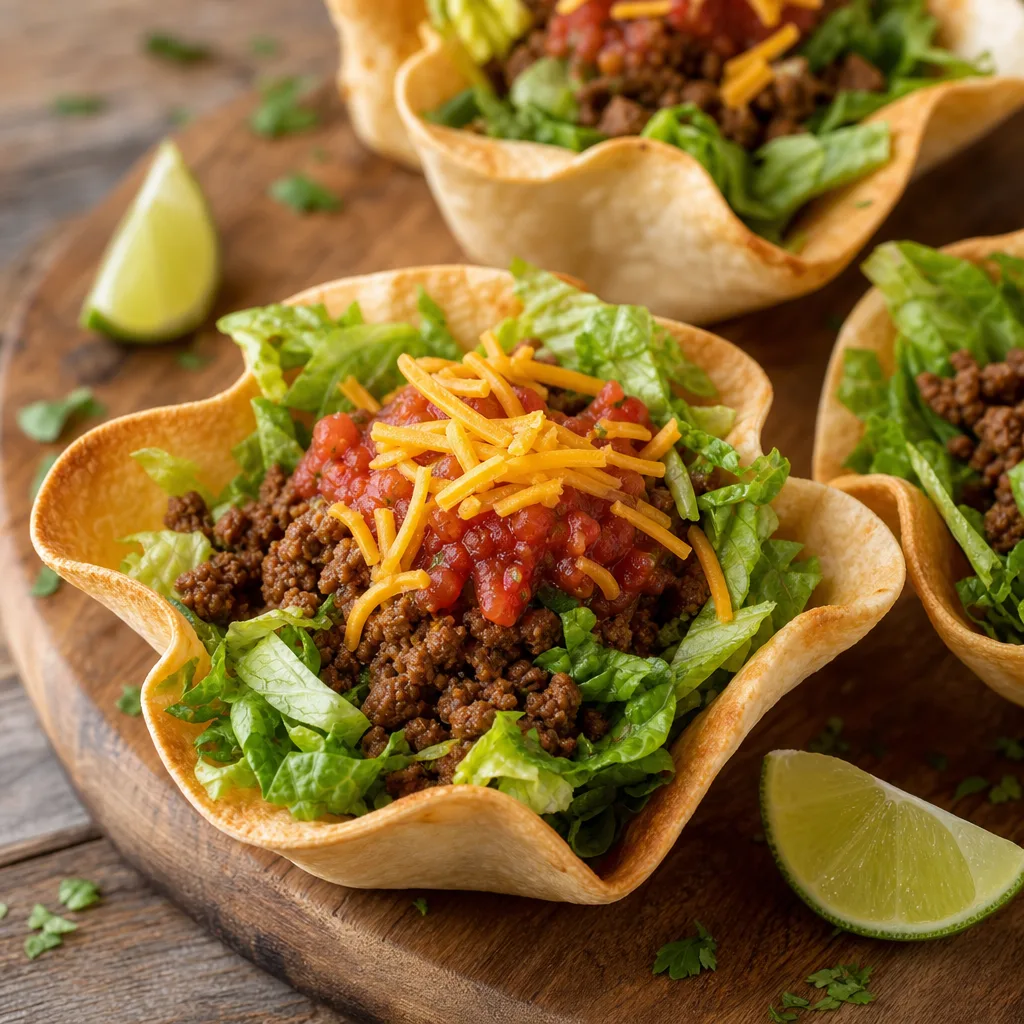
These Taco salad cups (tortilla bowls) are a joyful, hand-held way to serve all the bright Tex‑Mex flavors of a taco salad in a neat, crunchy package. Crisped tortilla cups cradle a simple seasoned ground beef, a crisp lettuce liner, a spoonful of chunky salsa and a snowy sprinkle of shredded cheese. They make a lively appetizer for a gathering, a playful weeknight dinner when you want minimal plates, and an irresistible finger food for kids and adults alike.
The idea is straightforward and flexible: shape flour tortillas into small bowls and bake them until golden and slightly crunchy; cook and season ground beef so it’s crumbly and well-flavored; and assemble everything so each cup has texture contrasts — crisp shell, crunchy lettuce, meaty crumble, juicy salsa and melty cheese. The result is a pleasing bite that looks great presented on a wooden board or a large platter, each cup a miniature composed salad.
What makes these cups especially useful is how customizable they are. You can make the tortilla bowls in advance and stash them in an airtight container, or cook the meat ahead and reheat; swap proteins or go vegetarian with textured soy crumbles or spiced lentils; use store-bought salsa or stir together a quick pico. The recipe below gives exact steps to form crispy, even cups and a reliably seasoned ground beef so you get consistently delicious results every time.
Why this recipe works
The success of these taco salad cups comes down to balancing texture and moisture. A crisp, sturdy shell provides contrast to the tender, seasoned meat and juicy salsa. Lining the cup with lettuce creates a protective layer so the liquid elements don't immediately soften the shell.
Seasoning the meat while it’s still hot allows the spices to bloom in the pan and cling to the crumbles, creating a cohesive filling. Adding a small amount of water after the spices helps distribute the seasoning and dissolves any browned bits on the pan surface, which deepens the flavor.
The method of using a muffin tin or inverted bowls to form the tortilla ensures bowls that hold their shape and look polished on a serving board. Baking rather than frying reduces grease while still delivering a satisfyingly crisp edge that makes each cup delightful to bite.
Ingredient notes and substitutions
Flour tortillas are forgiving and crisp nicely; if you choose corn tortillas, warm them briefly so they are pliable before forming to reduce cracking. A light brush of oil helps both types turn golden without burning.
Ground beef provides a classic taco flavor and texture, but ground chicken, turkey, or a plant-based crumbled product makes easy swaps. When substituting, adjust cooking time so the protein reaches a safe internal temperature and drains if needed to minimize excess grease.
Salsa can be store-bought or homemade. Use a chunkier salsa for a rustic mouthfeel and a smooth salsa if you prefer less texture. If you want more brightness, stir a tablespoon of fresh lime juice into the salsa just before assembling.
Make‑ahead and party prep
For party service, bake the shells the day before and keep them in an airtight container. Prepare and cool the seasoned beef, then reheat gently before assembly. Chop cheese, cilantro and lettuce ahead and set them in bowls for a quick assembly line.
Set up a toppings station so guests can personalize cups; include small bowls of sour cream, avocado, chopped tomatoes, pickled jalapeños and extra salsa. Keeping wet toppings separate until the moment of serving ensures the shells stay crisp and appetizing.
Plating and presentation tips
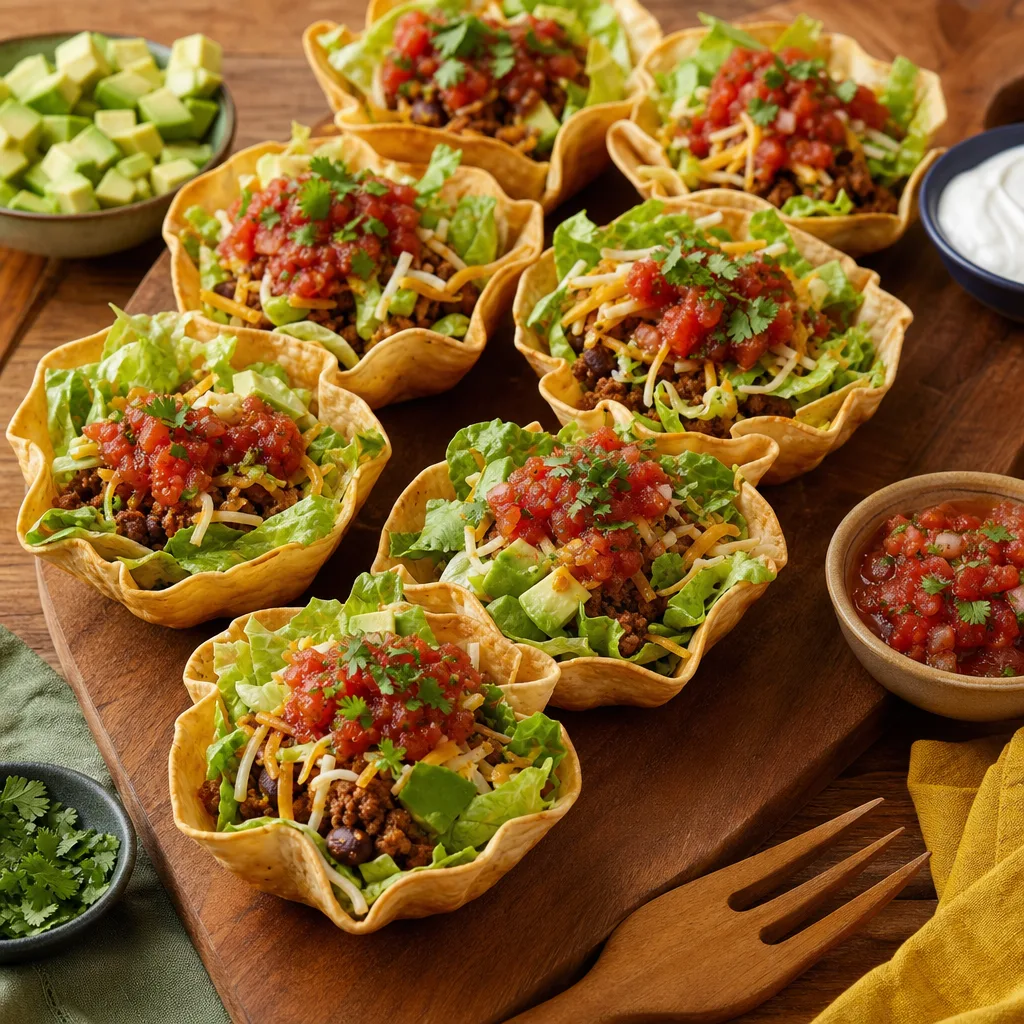
Arrange the filled cups on a wooden cutting board or shallow platter in a staggered formation to mimic a rustic taco truck presentation. Scatter extra cilantro leaves and lime wedges around the board for pops of color and an invitation to squeeze.
If you want a slightly more formal presentation, place each cup on a small square of lettuce or a little nested paper cup to keep them upright and easy to pick up without spilling.
Ingredients
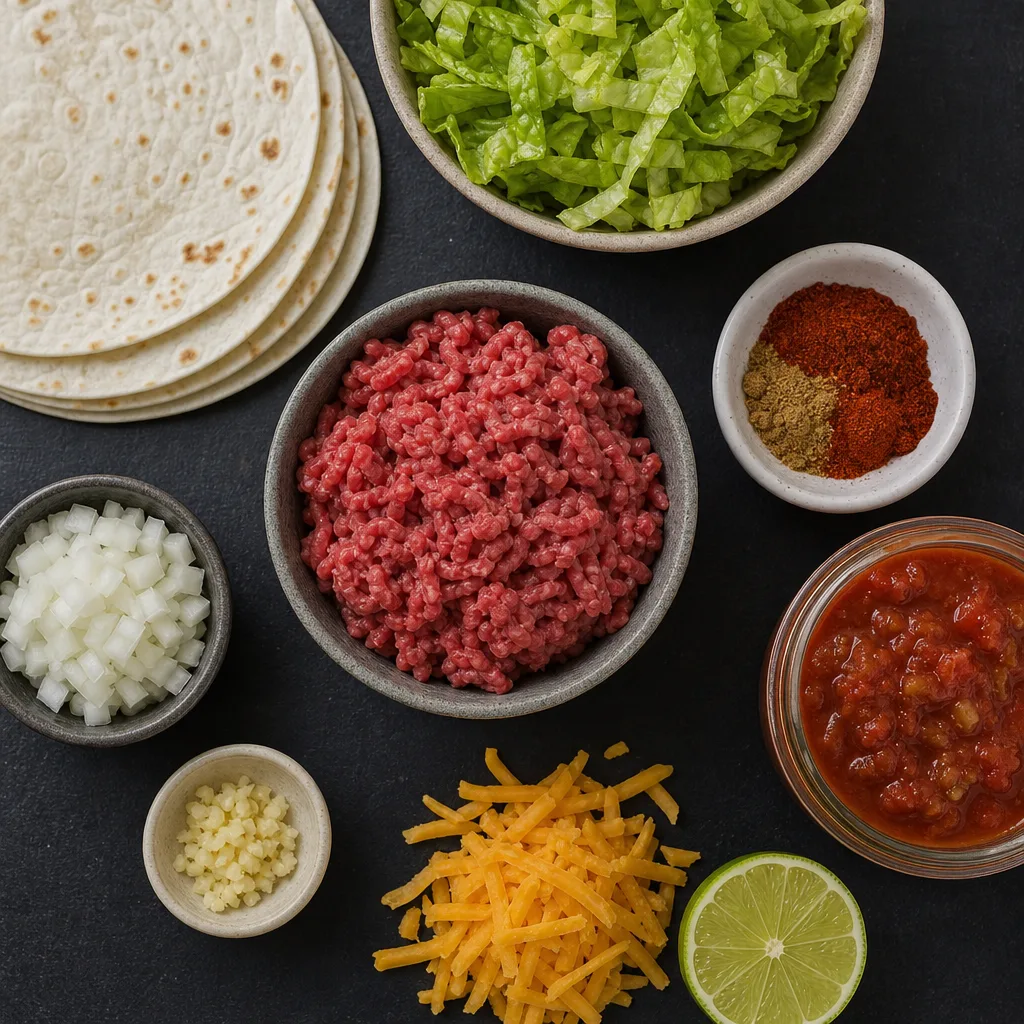
- 8 small (6-inch) flour tortillas
- 1 lb (450 g) ground beef
- 1 small yellow onion, finely chopped (about 1 cup)
- 2 garlic cloves, minced
- 1 tbsp chili powder
- 1 tsp ground cumin
- 1 tsp smoked paprika
- 1/2 tsp dried oregano
- 1/2 cup water
- 1 tbsp olive oil
- Salt to taste
- Black pepper to taste
- 2 cups shredded romaine or leaf lettuce
- 1 cup chunky tomato salsa (mild or hot)
- 1 cup shredded cheddar cheese (or cheddar/Monterey Jack blend)
- 1/4 cup chopped fresh cilantro (optional)
- 1/2 cup sour cream (optional, for serving)
- 1 lime, cut into wedges (optional, for serving)
- Vegetable oil or neutral oil for brushing (about 1–2 tbsp)
Instructions
- Preheat the oven to 375°F (190°C). Lightly brush both sides of each flour tortilla with vegetable oil so they crisp evenly without burning. Arrange the tortillas in a muffin tin, pressing each one into a cup to form a bowl shape, or drape them over inverted oven-safe small bowls on a baking sheet if you prefer larger, looser bowls. (ing1, ing17)
- Bake the tortillas for 10–15 minutes, rotating the pan once midway, until the edges are golden and the centers are set and lightly crisp. Remove from the oven and carefully transfer to a wire rack to cool; they will continue to crisp as they cool. Allow at least 10 minutes for complete cooling and firming. (ing1)
- While the bowls bake, heat a large skillet over medium-high heat and add the olive oil. When the oil shimmers, add the chopped onion and a pinch of salt; sauté until the onion becomes translucent and edges begin to color, about 4–5 minutes. (ing10, ing3, ing11)
- Add the minced garlic to the skillet and cook for 30 seconds until fragrant. Push the aromatics to the side, add the ground beef and break it into small pieces with a spatula. Cook for 6–8 minutes, stirring occasionally, until the beef is fully browned and crumbly. (ing4, ing5)
- Sprinkle the chili powder, ground cumin, smoked paprika and dried oregano over the beef and stir to combine. Pour in 1/2 cup water and scrape up any browned bits from the bottom of the pan. Simmer 2–3 minutes until the liquid reduces and the meat is coated in the spice mix. Taste and season with salt and black pepper as needed. (ing6, ing7, ing8, ing9, ing5, ing11, ing12)
- If you prefer a saucier filling, stir in an additional 1/4 cup of salsa and warm through for 1–2 minutes; otherwise transfer the seasoned beef to a bowl and keep warm while you assemble. (ing5, ing13)
- Line each cooled tortilla bowl with a small handful of shredded lettuce so the greens create a barrier between the shell and wet ingredients. This helps keep the bowl crisp longer. (ing2)
- Spoon about 2–3 tablespoons of the seasoned ground beef into each lettuce-lined cup. Top each with a tablespoon of chunky salsa, then sprinkle with shredded cheddar cheese. Add a few leaves of cilantro if using. (ing5, ing13, ing14, ing16)
- If you like the cheese slightly melted, return the filled cups to the oven at 350°F (175°C) for 3–5 minutes until the cheese softens. Remove and let cool slightly before serving. Serve with lime wedges and sour cream on the side for squeezing and dolloping. (ing14, ing16, ing15)
Pro Tips
- Choose 6-inch flour tortillas for perfectly sized cups that are easy to eat. Larger tortillas can be used but will require different forming and baking times.
- Brush the tortillas lightly with oil rather than drenching them; a thin sheen crisps the surface without making the shell greasy.
- If you don’t have a muffin tin, press tortillas over inverted oven-safe ramekins or small bowls on a baking sheet to shape bowls.
- Line bowls with lettuce just before filling to keep the shells crisp; the lettuce acts as a moisture barrier.
- To make assembly faster for a party, bake the shells ahead and store them in an airtight container at room temperature for up to 2 days.
- For evenly seasoned meat, add spices once the beef is mostly browned so they bloom in the hot pan and coat the crumbles.
- If you want less grease, drain excess fat from the skillet before adding spices and water.
- Warm the salsa slightly before spooning onto the meat if you prefer a juicier feel; cold salsa straight from the fridge gives a fresher contrast.
- Use a fine shredder for cheese so it melts quickly and distributes evenly across the cups.
- When making vegetarian cups, swap the beef for cooked lentils or seasoned crumbled tempeh and follow the same seasoning and moisture adjustments.
Variations
- Chicken taco salad cups: Swap ground beef for 1 lb ground chicken or shredded rotisserie chicken; sauté until golden and season the same way. Add a squeeze of lime to the finished filling for brightness.
- Black bean and corn cups (vegetarian): Combine 1 can drained black beans with 1 cup cooked corn, a pinch of cumin, 1/2 tsp chili powder and a splash of lime juice. Warm briefly and spoon into the bowls; top with avocado slices.
- Spicy chorizo cups: Replace the ground beef with 1 lb fresh chorizo (casings removed) cooked until crumbly and well browned. Omit or reduce the added chili powder since chorizo is already spicy and flavorful.
- Fish taco cups: Bake the shells as directed and fill with small pieces of grilled or pan-fried white fish (seasoned with chili powder and cumin), shredded cabbage, a drizzle of crema and pico de gallo.
Serving Suggestions
- Serve the taco salad cups on a large wooden board or platter garnished with lime wedges and extra cilantro for a rustic presentation.
- Make a toppings station with bowls of diced avocado, pickled jalapeños, extra salsa, and chopped tomatoes so guests can customize each cup.
- Pair the cups with a light side of Mexican street corn salad or a simple black bean salad for a heartier meal.
- For a casual party, place the cups in muffin tins on the buffet so they remain upright and easy to pick up.
Storage and Reheating
Store leftover components separately: keep baked tortilla cups at room temperature in an airtight container for up to 2 days; refrigerate cooked seasoned beef in a sealed container for up to 3 days. To reheat the meat, warm in a skillet over medium heat with a splash of water until piping hot. For crisper shells, re-crisp in a 350°F (175°C) oven for 5–7 minutes before filling. Once assembled with lettuce and salsa, the cups are best eaten immediately and are not recommended for long storage.
Taco salad cups (tortilla bowls)
Miniature tortilla bowls filled with seasoned ground beef, a lettuce liner, chunky salsa and shredded cheddar for a crunchy, hand-held taco salad perfect for parties or quick dinners.
Ingredients
Equipment
Method
- Preheat the oven to 375°F (190°C). Lightly brush both sides of each flour tortilla with vegetable oil so they crisp evenly without burning. Arrange the tortillas in a muffin tin, pressing each one into a cup to form a bowl shape, or drape them over inverted oven-safe small bowls on a baking sheet if you prefer larger, looser bowls.
- Bake the tortillas for 10–15 minutes, rotating the pan once midway, until the edges are golden and the centers are set and lightly crisp. Remove from the oven and carefully transfer to a wire rack to cool; they will continue to crisp as they cool.
- While the bowls bake, heat a large skillet over medium-high heat and add the olive oil. When the oil shimmers, add the chopped onion and a pinch of salt; sauté until the onion becomes translucent and edges begin to color, about 4–5 minutes.
- Add the minced garlic to the skillet and cook for 30 seconds until fragrant. Push the aromatics to the side, add the ground beef and break it into small pieces with a spatula. Cook for 6–8 minutes, stirring occasionally, until the beef is fully browned and crumbly.
- Sprinkle the chili powder, ground cumin, smoked paprika and dried oregano over the beef and stir to combine. Pour in 1/2 cup water and scrape up any browned bits from the bottom of the pan. Simmer 2–3 minutes until the liquid reduces and the meat is coated in the spice mix. Taste and season with salt and black pepper as needed.
- If you prefer a saucier filling, stir in an additional 1/4 cup of salsa and warm through for 1–2 minutes; otherwise transfer the seasoned beef to a bowl and keep warm while you assemble.
- Line each cooled tortilla bowl with a small handful of shredded lettuce so the greens create a barrier between the shell and wet ingredients. This helps keep the bowl crisp longer.
- Spoon about 2–3 tablespoons of the seasoned ground beef into each lettuce-lined cup. Top each with a tablespoon of chunky salsa, then sprinkle with shredded cheddar cheese. Add a few leaves of cilantro if using.
- If you like the cheese slightly melted, return the filled cups to the oven at 350°F (175°C) for 3–5 minutes until the cheese softens. Remove and let cool slightly before serving. Serve with lime wedges and sour cream on the side for squeezing and dolloping.
Notes
Assemble just before serving for best texture.
Baked shells will stay crisp longer if fully cooled before storing.
Adjust spice levels to suit your guests.
Frequently Asked Questions
Can I make the tortilla cups ahead of time?
Yes. Baked tortilla cups keep well at room temperature for up to 48 hours if stored in an airtight container. Make sure they are completely cool before storing to avoid steam softening. Do not fill them with wet ingredients until you are ready to serve to preserve the crisp texture.
What can I use instead of flour tortillas?
You can use corn tortillas if you prefer a corn flavor, but they tend to be more fragile and may need to be brushed with oil on both sides and baked a little longer at a slightly lower temperature. Another option is wonton wrappers for miniature, crisp cups; they bake very quickly and produce a different, flakier texture.
How do I prevent the shells from becoming soggy?
Line the baked tortilla cups with shredded lettuce before adding any juicy ingredients — the lettuce acts as a moisture barrier. Also, assemble just before serving. If you need to prep, keep shells and fillings separate and assemble at the last minute.
Can I make these gluten-free?
Yes. Use 6-inch corn tortillas labeled gluten-free or look for certified gluten-free flour tortillas. Corn tortillas may need a touch more oil and careful handling to avoid cracking while forming, but they make a tasty gluten-free alternative.
How can I reduce calories or fat in this recipe?
Choose lean ground beef (90/10 or leaner) or switch to ground turkey or chicken. Skim any excess fat from the pan after browning the meat. Use reduced-fat cheese and skip the sour cream or substitute plain low-fat yogurt. Also, limit the amount of oil brushed on the tortillas and use a light misting instead.