Follow Me On Social Media!
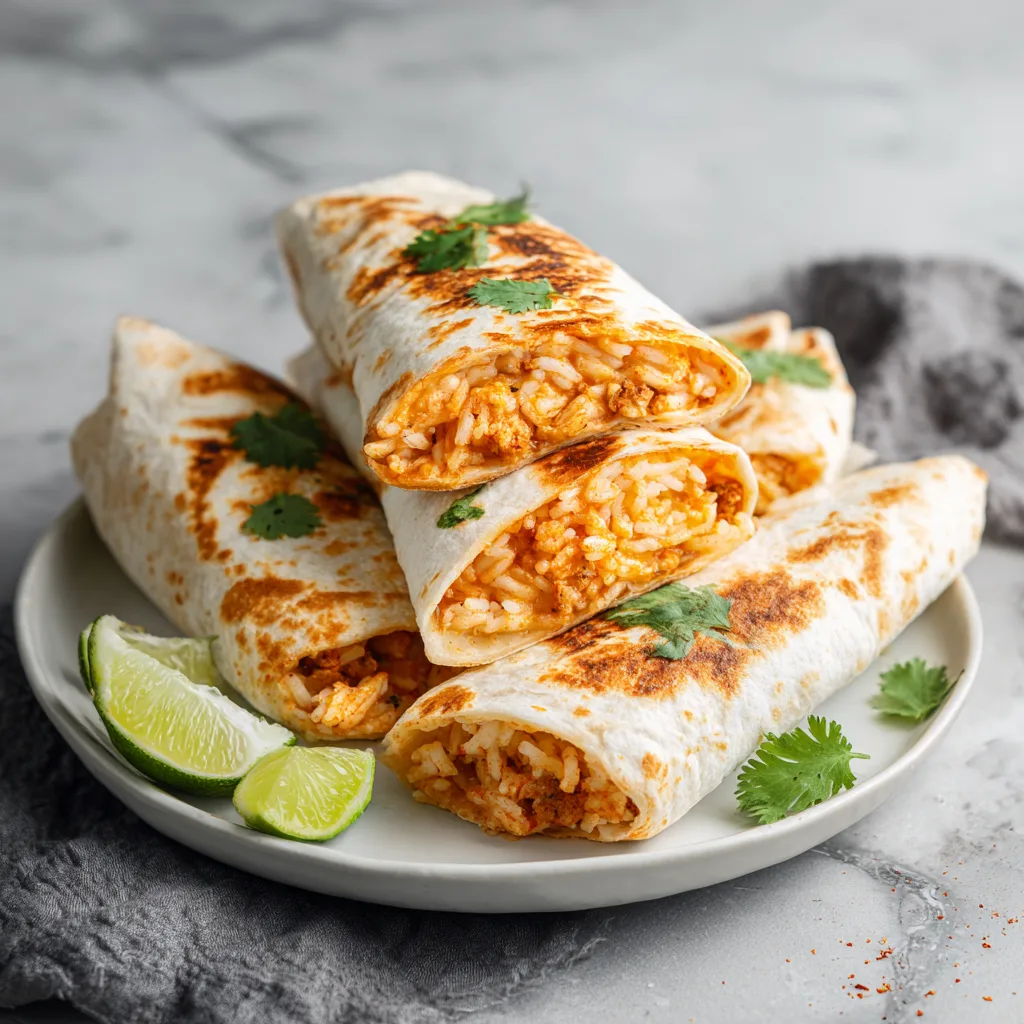
Cheesy Ground Chicken & Rice Burritos: The Ultimate Budget-Friendly Comfort Food
If you are looking for a meal that ticks every single box—easy, affordable, filling, and absolutely delicious—look no further than these Cheesy Ground Chicken & Rice Burritos. In a world where grocery prices seem to climb daily, finding a recipe that feeds the whole family without breaking the bank is like striking gold. But this isn’t just “economy food”; it is a flavor-packed, cheesy, comforting delight that will have everyone at the table asking for seconds.
This recipe combines the lean protein of ground chicken with the heartiness of fluffy rice, all bound together by a rich, seasoned tomato sauce and simpler-than-you-think spices. Wrapped in a soft flour tortilla and loaded with melted cheese, it is the perfect answer to “What’s for dinner?” on a busy Tuesday night. Plus, these burritos are practically designed for meal prep. You can make a large batch on Sunday, freeze them, and have a grab-and-go lunch or dinner ready in minutes throughout the week.
Whether you are a college student cooking in a dorm, a busy parent needing a quick win, or just someone who loves a good burrito, this guide will walk you through everything you need to know to master this dish. We will cover the best ingredients to use, how to get that perfect “burrito fold,” and variations to keep things exciting.
Why This Recipe Works
There is a reason this combination is a classic. Ground chicken acts as a blank canvas, readily absorbing the smoky cumin, zesty chili powder, and savory garlic flavors we will be using. Unlike beef, which can sometimes be heavy, chicken keeps the filling light yet satisfying. The rice adds bulk and texture, stretching the meat further to make more servings for less money—a classic culinary trick that never goes out of style.
The real magic, however, happens inside the wrapper. The steam trapped inside the tortilla helps meld the cheese and the hot filling together into a gooey, cohesive bite. Every mouthful offers a little bit of everything: the chew of the tortilla, the creaminess of the cheese, and the savory spice of the chicken and rice mixture.
Ingredients
To make these delicious burritos, you will need a handful of pantry staples and fresh ingredients. Here is what you need to gather:
- Ground Chicken: 1 pound. This is the star of the show. It cooks quickly and is often more affordable than ground beef or turkey.
- White Rice: 1 cup (uncooked), or about 3 cups cooked. You can use long-grain white rice, jasmine, or even brown rice if you want a nuttier texture and more fiber.
- Vegetable Oil: 1 tablespoon. For sautéing the aromatics and browning the chicken.
- Onion: 1 medium, yellow or white. Finely diced to disappear into the filling while adding sweetness.
- Bell Pepper: 1 red or green. Diced small. This adds a lovely crunch and sweetness that balances the savory spices.
- Garlic: 2 cloves, minced. Fresh is best, but jarred works in a pinch.
- Taco Seasoning: 1 packet (or a homemade mix of chili powder, cumin, paprika, oregano, salt, and pepper).
- Chicken Broth: 1/2 cup. This helps create a sauce so the filling isn’t dry.
- Salsa: 1/2 cup. Use your favorite jarred variety—mild, medium, or hot depending on your preference.
- Shredded Cheese: 2 cups. Cheddar, Monterey Jack, or a Mexican blend all melt beautifully here.
- Flour Tortillas: 6 to 8 large “burrito size” tortillas.
- Salt and Black Pepper: To taste.
- Fresh Cilantro: Optional, for garnish.

Instructions
Making these burritos is a straightforward process. Follow these steps for the best results:
- Prepare the Rice: Cook the rice according to the package directions. You want it to be fluffy and tender. If you are using leftover rice, ensure it is heated through or broken up so there are no hard clumps. Set it aside.
- Sauté the Vegetables: Place a large skillet over medium-high heat and add the vegetable oil. Once the oil creates a shimmer, add the diced onion and bell pepper. Sauté them for about 4-5 minutes until the onion is translucent and the peppers have softened.
- Cook the Chicken: Push the vegetables to the side of the pan (or remove them if the pan is small) and add the ground chicken. Break the meat apart with a wooden spoon or spatula as it cooks. You want it to be fully browned and crumbly, with no pink remaining. This usually takes about 6-8 minutes.
- Season the Mixture: Add the minced garlic to the pan and cook for just 30 seconds until fragrant—be careful not to burn it! Sprinkle the taco seasoning over the meat and vegetable mixture. Stir well to coat everything evenly in the spices.
- Create the Sauce: Pour in the chicken broth and the salsa. Stir to combine. Let the mixture simmer for 2-3 minutes. The liquid should reduce slightly, creating a thick, flavorful sauce that coats the meat rather than making it soupy.
- Combine with Rice: Lower the heat to medium-low. Add the cooked rice to the skillet. Gently fold the rice into the chicken mixture until it is evenly incorporated. Taste the filling and add salt or pepper if needed. Remove the pan from the heat.
- Warm the Tortillas: This step is crucial! Cold tortillas will crack when you try to roll them. Wrap your stack of tortillas in a damp paper towel and microwave them for 30 seconds, or heat them individually in a dry skillet for 10 seconds per side.
- Assemble: Lay a warm tortilla flat on a clean surface or plate. Sprinkle a generous amount of shredded cheese in the center. Spoon about 1/2 to 3/4 cup of the chicken and rice filling on top of the cheese. Add a little more cheese on top if you like it extra cheesy.
- Roll the Burritos: Fold the sides of the tortilla in towards the center. Then, bring the bottom flap up and over the filling, tucking it in tightly as you roll away from yourself. Place the burrito seam-side down to keep it sealed. Repeat with the remaining tortillas and filling.
- Optional Crisp: If you prefer a crispy exterior, heat a clean skillet over medium heat with a tiny bit of oil or butter. Place the finished burritos seam-side down and cook for 1-2 minutes until golden brown, then flip and brown the other side.
- Serve: Serve immediately while hot, perhaps with a side of sour cream, guacamole, or extra salsa.
Tips for the Perfect Burrito
Don’t Overfill: It is tempting to stuff as much delicious filling as possible into the tortilla, but this is the number one cause of burrito blowouts. Stick to a reasonable amount so you can fold it securely.
Drain the Liquids: While we want a saucy filling, we don’t want it watery. If your chicken mixture looks too wet after simmering, let it cook for another minute or two to reduce. A wet filling will make your tortilla soggy and prone to tearing.
The Cheese Barrier: Placing a layer of cheese directly on the tortilla before adding the hot filling creates a “cheese barrier.” As the cheese melts, it protects the tortilla from getting soggy from the sauce immediately.
Rice Varieties: While white rice is standard, you can elevate the dish by using Spanish rice or cilantro-lime rice. To make cilantro-lime rice, simply toss your cooked white rice with fresh lime juice and chopped cilantro before adding it to the skillet.
Variations to Try
One of the best things about this recipe is its versatility. Here are a few ways to switch it up:
- Make it Spicy: Add a diced jalapeño along with the onions and peppers, or dash in some cayenne pepper with the taco seasoning. You can also use “Hot” salsa instead of mild.
- Boost the Fiber: Add a can of drained and rinsed black beans or pinto beans to the chicken mixture. This adds fiber and bulk, allowing you to use less meat or make even more burritos.
- Low Carb Option: Skip the rice and double up on the veggies (add zucchini or cauliflower rice) and use low-carb tortillas.
- Breakfast Style: Believe it or not, this filling works great with scrambled eggs. Mix the leftover filling with eggs for a hearty breakfast burrito the next morning.
Serving Suggestions
These burritos are a meal in themselves, but they pair wonderfully with sides.
- Chips and Dip: A classic side of tortilla chips with queso or guacamole.
- Salad: A light cucumber and tomato salad with a vinaigrette dressing cuts through the richness of the cheese and meat.
- Corn: Mexican street corn (Elote) or a simple corn salad is a fantastic accompaniment.
Storing and Reheating
Fridge: Store leftovers in an airtight container or wrapped individually in foil for up to 3-4 days.
Freezer: These are freezer superstars. Wrap each cooled burrito tightly in plastic wrap, then a layer of aluminum foil. Place them in a freezer-safe bag. They will keep for up to 3 months.
Reheating:
- From Fridge: Microwave on high for 1-2 minutes, flipping halfway through. Or bake at 350°F wrapped in foil for 15-20 minutes.
- From Freezer: Remove the foil and plastic wrap. Wrap the burrito in a damp paper towel and microwave for 3-4 minutes, flipping halfway through, until hot in the center. Alternatively, bake (foil-wrapped) at 400°F for about 30-40 minutes.

Cheesy Ground Chicken & Rice Burritos
A super easy, inexpensive, and freezer-friendly meal featuring seasoned ground chicken, fluffy rice, and melted cheese wrapped in a soft flour tortilla.
Ingredients
Equipment
Method
- Cook rice according to package instructions and set aside.
- Heat vegetable oil in a large skillet over medium-high heat. Add diced onion and bell pepper; sauté until softened (4-5 mins).
- Add ground chicken to the skillet. Cook, breaking up meat with a spoon, until browned and cooked through.
- Stir in minced garlic and taco seasoning, coating the meat evenly. Cook for 30 seconds until fragrant.
- Pour in chicken broth and salsa. Simmer for 2-3 minutes until liquid reduces and thickens slightly.
- Lower heat, add cooked rice to the skillet, and fold until combined. Taste and adjust salt/pepper if needed.
- Warm tortillas in microwave (damp paper towel) or dry skillet to make them pliable.
- Assemble: Place cheese on tortilla, top with chicken-rice mixture, and roll tightly, tucking in the ends.
- Optional: Toast filled burritos in a skillet for 1-2 minutes per side for a crispy exterior.
Notes
To freeze: Wrap cooled burritos in plastic wrap and foil. Freeze for up to 3 months.
Cultural Context
While the burrito we know and love today is a staple of Tex-Mex cuisine, its roots trace back to Northern Mexico. Traditionally, burritos in Mexico are often smaller and contain fewer ingredients—meat or beans wrapped in a flour tortilla. The “Mission-style” burrito, famous for its large size and inclusion of rice, beans, cheese, salsa, and meat all in one package, was popularized in San Francisco’s Mission District in the 1960s. This chicken and rice version leans heavily into that Mission-style tradition of a complete meal wrapped in bread, prioritizing sustenance, flavor, and portability.
In many households, dishes like this are the backbone of family dining. They utilize ingredients that are shelf-stable (rice) and cost-effective (ground meat), proving that you do not need expensive cuts of steak or exotic imports to create a dinner that brings people together. It is comfort food in its purest form—warm, savory, and made with love.
Enjoy making these Cheesy Ground Chicken & Rice Burritos. Whether you are meal prepping for a busy week or sitting down for a family dinner, this recipe is sure to become a regular in your rotation.