Follow Me On Social Media!
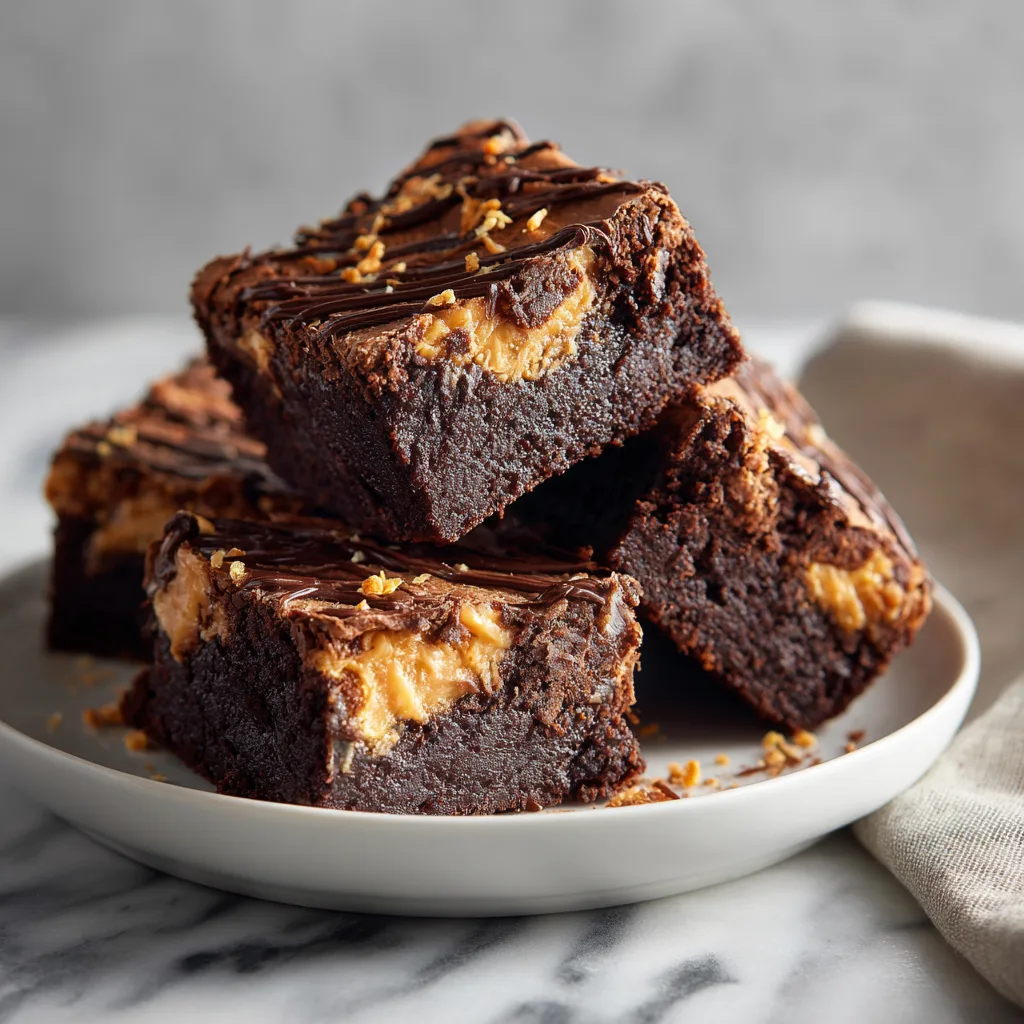
The Ultimate Guide to Homemade Samoa Brownies: A Decadent Caramel & Coconut Dream
If there is one flavor combination that instantly evokes a sense of nostalgia and pure indulgence, it is the trifecta of rich chocolate, gooey caramel, and toasted coconut. For decades, this trio has been the hallmark of one of the world’s most beloved cookies: the Samoa (or Caramel deLites, depending on where you live). But what if you could take those iconic flavors and elevate them from a crunchy cookie into a dense, fudgy, melt-in-your-mouth dessert? Enter the Samoa Brownie.
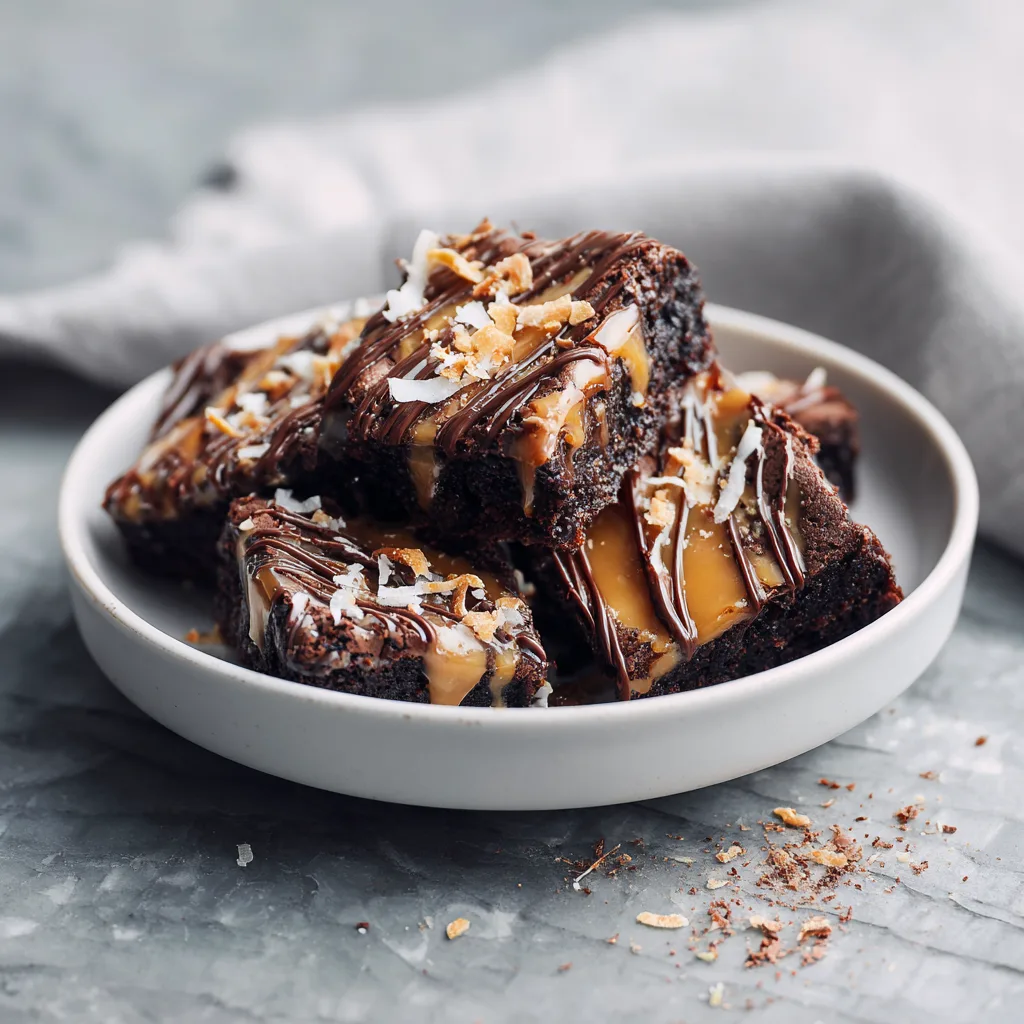
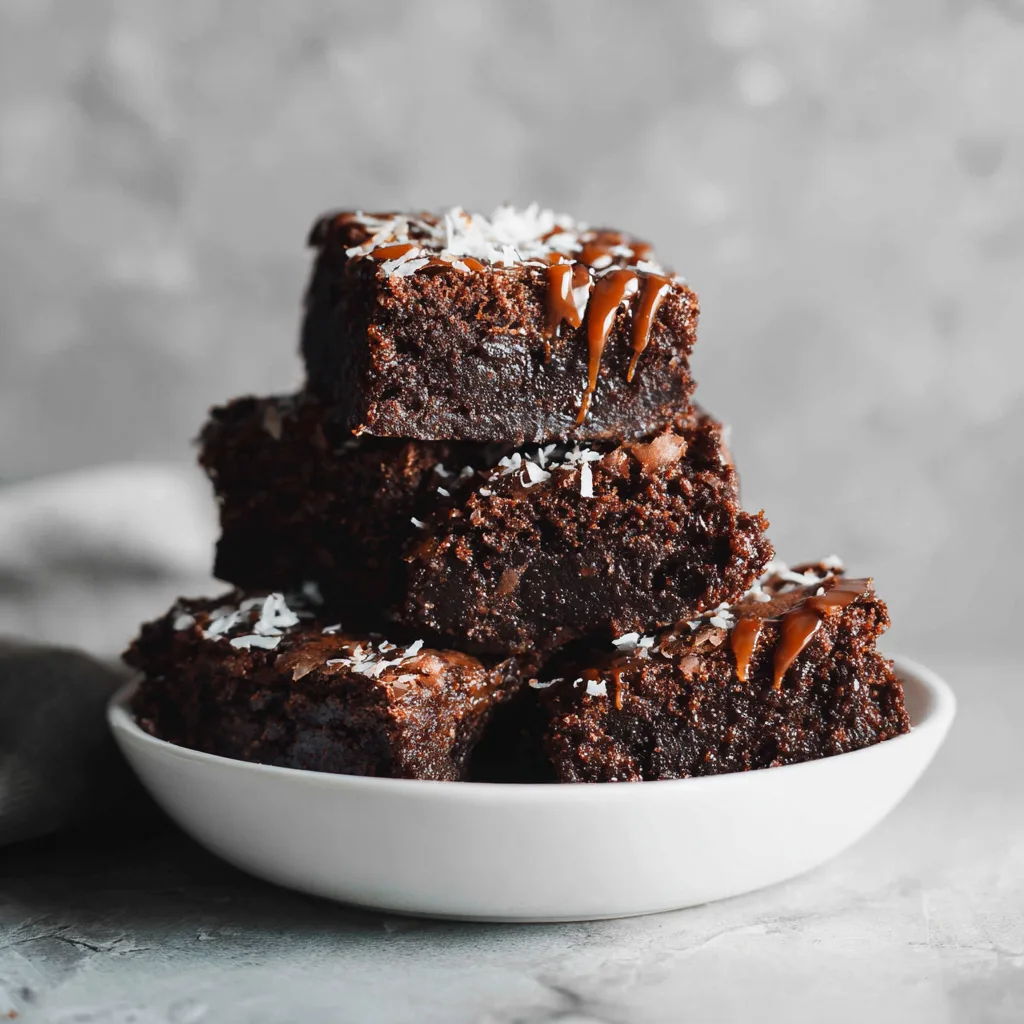
This recipe is not just a dessert; it is an experience. We are taking a base of incredibly dark, moist chocolate brownies and smothering them in a thick, sticky layer of homemade caramel loaded with golden toasted coconut. To finish, a generous drizzle of dark chocolate sets the whole thing off, creating a treat that is chewy, crunchy, sweet, and salty all at once. Whether you are a die-hard coconut fan or just looking for the ultimate crowd-pleaser for your next gathering, these brownies are guaranteed to steal the show.
In this comprehensive guide, we will walk through everything you need to know to master this recipe. From selecting the right cocoa powder to the science of toasting coconut perfectly, we have left no stone unturned. Get your apron ready—it’s time to bake.
Why This Recipe Works
You might be wondering, “Why brownies? Why not just make the cookies?” While the cookies are undeniably delicious, they can be labor-intensive to make from scratch, requiring rolling, cutting, and dipping. Samoa Brownies offer a “shortcut” to flavor paradise without sacrificing any of the decadence.
- Texture Contrast: The success of this dessert lies in the interplay of textures. The base is dense and fudgy (never cakey), providing a sturdy foundation. The topping is sticky and chewy thanks to the caramel, while the toasted coconut adds a crucial crunch that cuts through the richness.
- Flavor Balance: Chocolate and caramel are a classic pairing, but they can sometimes be overwhelmingly sweet. The addition of toasted coconut introduces a nutty, savory note that balances the sugar. Furthermore, using semi-sweet or dark chocolate for the drizzle ensures the dessert doesn’t become cloying.
- Ease of Preparation: Unlike the cookies, which require precision shaping, this recipe is a “bar” dessert. You bake the base in one pan, spread the topping, and slice. It looks incredibly impressive but requires half the effort of individual pastries.
The Ingredients: A Deep Dive
To create the perfect Samoa Brownie, quality ingredients are key. Here is what you will need and why.
For the Brownie Base
- Unsalted Butter: Using unsalted butter allows you to control the sodium level. It provides the fat needed for a fudgy texture.
- Granulated Sugar & Brown Sugar: We use a mix. Granulated sugar dries out the surface slightly to create that crackly top, while brown sugar adds moisture and molasses depth, enhancing the “fudgy” factor.
- Eggs: Large eggs at room temperature are essential for binding the batter and providing structure.
- Vanilla Extract: Always use pure vanilla extract, not imitation, to round out the chocolate flavor.
- Cocoa Powder: For the darkest, most intense flavor, opt for Dutch-processed cocoa powder. It is less acidic than natural cocoa and gives the brownies a deep, mahogany color.
- All-Purpose Flour: Just enough to hold the batter together. Too much flour leads to cakey brownies, which we want to avoid.
- Salt: A crucial ingredient to balance the sweetness of the chocolate and caramel.
- Chocolate Chips: Stirring semi-sweet chips into the batter adds pockets of melted chocolate for extra indulgence.
For the Caramel Coconut Topping
- Soft Caramels: You can use store-bought soft caramel candies (unwrapped) for ease, or make your own caramel sauce. For consistency and time-saving, high-quality soft caramels work beautifully.
- Heavy Cream: This is melted down with the caramels to keep the topping soft and pliable, rather than hard and sticky.
- Shredded Coconut: Sweetened shredded coconut is standard, but you can use unsweetened if you prefer a less sugary topping. The key is toasting it.
- Dark or Semi-Sweet Chocolate: For the final drizzle.
Instructions
Phase 1: The Brownie Base
- Prep: Preheat your oven to 350°F (175°C). Line an 8×8 or 9×9 inch baking pan with parchment paper, leaving an overhang on the sides. This “sling” will make it easy to lift the brownies out later for cutting. Grease the parchment lightly with butter or cooking spray.
- Melt Butter: In a large microwave-safe bowl, melt the butter. If you want an extra layer of flavor, you can brown the butter on the stove first until it smells nutty, but simple melted butter works perfectly.
- Mix Sugars: Whisk the granulated and brown sugars into the warm butter. Vigorously whisking at this stage helps dissolve some of the sugar, which contributes to the shiny crust on top.
- Add Eggs: Beat in the eggs one at a time, followed by the vanilla extract. Whisk until the mixture is glossy and slightly thickened.
- Dry Ingredients: Sift the flour, cocoa powder, and salt into the wet mixture. Sifting is non-negotiable here; it removes stubborn cocoa lumps that can ruin the texture.
- Fold: Switch to a rubber spatula. Gently fold the dry ingredients into the wet until just combined. Do not overmix! Overmixing activates the gluten in the flour and will make your brownies tough. Fold in the chocolate chips last.
- Bake: Pour the batter into the prepared pan and smooth the top. Bake for 25–30 minutes. A toothpick inserted into the center should come out with a few moist crumbs attached, but not wet batter. If it’s clean, they might be overbaked.
- Cool: Let the brownies cool completely in the pan. This is vital. If you add the topping while the brownies are hot, the caramel will slide right off.
Phase 2: Toasting the Coconut
While the brownies bake, prepare the coconut. This is the step that transforms the flavor.
- Pan Method: Place the shredded coconut in a large, dry skillet over medium-low heat.
- Stir Constantly: Do not walk away! Coconut goes from white to burnt in seconds. Stir continuously for 5–8 minutes until the flakes are a beautiful golden brown and incredibly fragrant.
- Remove Heat: Immediately transfer the toasted coconut to a cool bowl to stop the cooking process.
Phase 3: The Caramel Topping
- Melt: In a medium saucepan (or microwave-safe bowl), combine the unwrapped soft caramels and heavy cream.
- Stir: Cook over medium-low heat, stirring constantly, until the caramels are completely melted and the mixture is smooth. If using a microwave, heat in 30-second bursts, stirring in between.
- Combine: Pour the toasted coconut into the caramel mixture. Fold it in until every flake is coated in sticky, golden goodness.
Phase 4: Assembly
- Spread: Spoon the warm caramel-coconut mixture over the cooled brownies. Use an offset spatula (or the back of a spoon) to spread it into an even layer, reaching all the way to the edges.
- Set: Let the brownies sit for about 15–20 minutes to allow the caramel to set slightly.
- Drizzle: Melt the remaining dark chocolate in the microwave. Transfer it to a piping bag or a Ziploc bag with a tiny corner snipped off. Drizzle the chocolate in a zig-zag pattern over the coconut topping.
- Final Chill: For the cleanest slices, refrigerate the pan for 30 minutes before cutting.
Tips for Success
- Parchment Paper is Your Friend: Do not try to bake these directly in a greased pan without paper. The caramel topping is sticky, and you will struggle to get them out intact. The parchment sling allows you to lift the entire block out to a cutting board.
- The Knife Trick: Cutting caramel brownies can be messy. To get clean, bakery-style cuts, run your sharp chef’s knife under hot water, wipe it dry, and then make a cut. Repeat for every slice. The heat melts through the caramel and chocolate without dragging.
- Don’t Skimp on Toasting: It might be tempting to use raw coconut, but you will miss out on the crunch and nutty flavor that defines a “Samoa.”
- Storage: Store these in an airtight container at room temperature for up to 3 days, or in the refrigerator for up to a week. They are actually delicious cold, as the brownie becomes even fudgier.
Variations to Try
While the classic recipe is perfection, you can tweak it to suit your tastes:
- Salted Caramel: Sprinkle flaky sea salt (like Maldon) over the caramel layer before drizzling the chocolate. The salt cuts the sweetness and enhances the chocolate flavor.
- Blondie Base: Prefer vanilla notes? Swap the brownie base for a brown-sugar blondie base. The caramel and coconut pair just as well with a vanilla dough.
- Nutty Addition: For extra crunch, add chopped pecans or toasted almonds to the coconut mixture. This leans slightly toward a “Turtle” flavor profile but keeps the Samoa spirit.
Cultural Context & Fun Facts
The inspiration for this brownie, the Samoa cookie, was introduced in the mid-1970s. It quickly rose to become the second most popular Girl Scout cookie in history, trailing only behind Thin Mints. The name “Samoa” is thought to be a nod to the tropical ingredients (coconut and cocoa) associated with the islands of Samoa, though the recipe itself is an American invention.
By transforming this cookie into a brownie, we are participating in a long tradition of “mash-up” desserts—taking the best elements of two different treats and combining them. This recipe celebrates the modern home baker’s desire for nostalgia wrapped in a format that is easy to share and impossible to resist.
Samoa Brownies
Fudgy, rich brownies topped with a layer of gooey caramel, toasted coconut, and a dark chocolate drizzle. A decadent twist on the classic Girl Scout cookie.
Ingredients
Equipment
Method
- Preheat oven to 350°F (175°C). Line a 9×9 inch pan with parchment paper.
- In a large bowl, whisk melted butter and sugar. Add eggs and vanilla, beating until smooth.
- Sift in cocoa powder, flour, and salt. Fold gently until combined. Stir in chocolate chips.
- Pour batter into pan. Bake 25-30 minutes until a toothpick comes out with moist crumbs. Cool completely.
- While baking, toast coconut in a dry skillet over medium heat until golden brown. Stir constantly.
- Melt caramels and cream in a saucepan over low heat until smooth. Fold in toasted coconut.
- Spread coconut mixture over cooled brownies. Let set for 15 minutes.
- Drizzle melted dark chocolate over the top. Chill for 30 minutes before slicing.
Notes
For easier cutting, run your knife under hot water and wipe dry between slices.
Conclusion
Samoa Brownies are more than just a sweet treat; they are a celebration of texture and flavor. The deep, dark chocolate base provides the perfect canvas for the sweet, chewy, nutty topping. They look professional, taste incredible, and are surprisingly forgiving to make. Whether you are baking for a holiday, a birthday, or just a Tuesday night craving, this recipe is sure to become a permanent fixture in your repertoire. So grab your mixing bowls, toast that coconut, and get ready to enjoy the ultimate brownie upgrade.