Follow Me On Social Media!
No-Bake Mint Chocolate Chip Clusters
Make glossy, mint-green No-Bake Mint Chocolate Chip Clusters with crispy cereal and dark chocolate chips. Quick, no-oven treats perfect for gifting and parties.

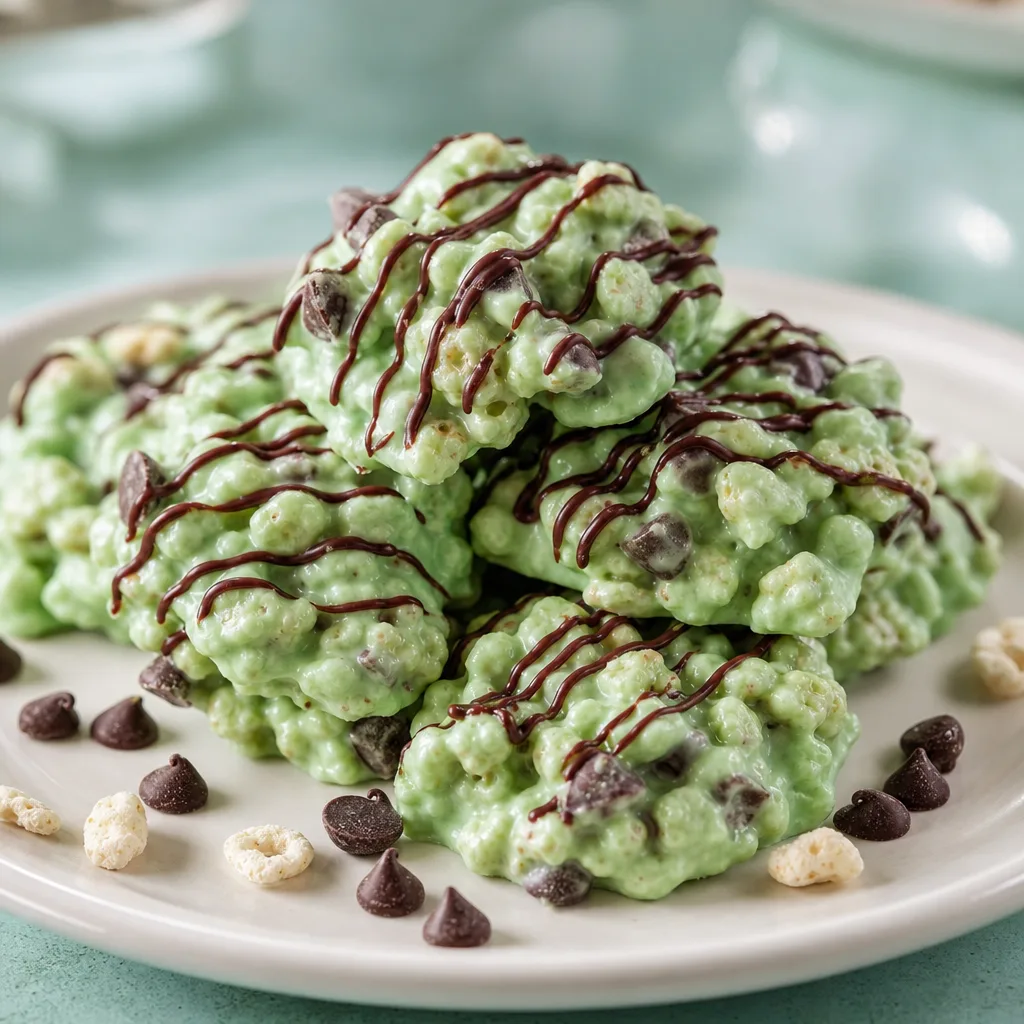
Bright, glossy, and impossibly easy, these No-Bake Mint Chocolate Chip Clusters are a small-bite confection that feels festive and indulgent. Crisp cereal, a minty pale-green coating, and pops of dark chocolate make each cluster addictive: crunchy, creamy, and perfectly portioned. Because they require no oven and set in the refrigerator, they're a wonderful quick project for a last-minute party platter, a holiday cookie swap, or an afternoon snack when you want a mint-chocolate fix without fuss.
This recipe balances texture and flavor. The coating—rich white chocolate or melting wafers—carries mint flavor and pastel color while the cereal provides the crunch that gives these clusters their signature bumpy, mound-like silhouette. Dark chocolate chips studded through the clusters and a finishing drizzle of melted dark chocolate add contrast, both visually and in taste. You’ll end up with glossy, uniform green clusters that look polished on a pale plate, perfect for stacking in a casual pile or arranging neatly on a platter.
Because these treats are no-bake, they’re also forgiving and fast. The method uses simple melting and folding techniques: melt and flavor the coating, fold in cereal and mix-ins, scoop clusters onto parchment, and chill until set. I include optional marshmallows for those who like a chewier interior and suggestions for making them dairy-free or gluten-free, plus tips for smooth, glossy coating and clean drizzles. Read on for the full ingredient list, step-by-step instructions, and lots of ways to customize these clusters to your mood or occasion.
Why these ingredients work
Each element in these clusters has a functional role as well as a flavor contribution. White chocolate (or candy melt) acts as both glue and flavor carrier: it binds the crunchy base together into easily held clusters and provides the creamy, sweet backdrop for mint. Because the coating covers most of the cereal, its texture and mouthfeel dominate, which is why choosing good-quality melting chocolate matters.
Crispy rice cereal delivers the airy crunch that creates the bumpy, clustered surface and prevents the cluster from becoming too dense. Mini marshmallows are optional but useful if you want a slightly chewier interior that holds together without relying solely on the coating. Dark chocolate chips bring the contrasting pockets of bittersweet flavor and a pleasing visual pop against the mint-green coating.
Ingredient notes and substitutions
White chocolate: If you select white chocolate chips labeled as baking chips, they sometimes include stabilizers that keep them from being as glossy when melted. If presentation is essential, look for couverture or compound chocolate wafers made for melting. If you only have white chocolate bars, chop them finely so they melt in shorter, more even bursts.
Mint extract and coloring: Pure mint extract is potent — a little goes a long way. Add mint in measured small increments and taste as you go. Use gel food coloring for a saturated mint tone with minimal liquid. If you want a natural tint, a very small amount of finely blended powdered matcha can give a green tint, but it will change the flavor profile.
Troubleshooting
If the white coating is too runny and won’t form clusters, it likely needs more cereal or a few minutes of refrigeration to firm up. Stir in small amounts of additional cereal until you can scoop tidy mounds. If the coating is too thick or has hardened while you’re working, briefly rewarm in short bursts and add a tiny amount of oil to loosen it.
If the drizzle becomes grainy or dull, it’s a sign the chocolate was overheated or cooled too much. Rewarm in short bursts and strain through a fine sieve if it looks lumpy. For consistent thin lines, keep the drizzle only slightly warm so it flows but doesn’t flatten the cluster surface when applied.
Ingredients
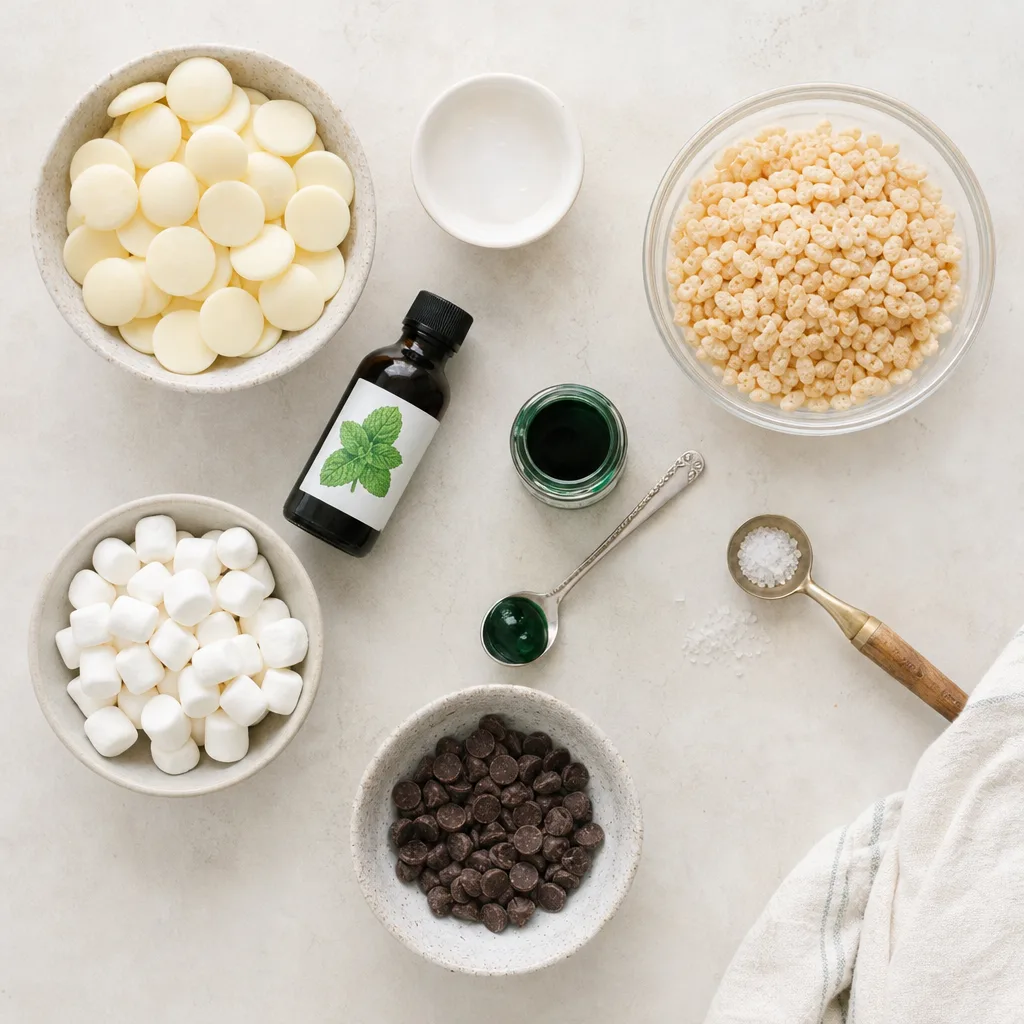
- 12 ounces white chocolate chips or white candy melts
- 1 tablespoon coconut oil (or neutral oil like vegetable oil), plus more if needed
- 1 teaspoon pure mint extract
- a few drops green gel food coloring (optional, adjust to desired color)
- 4 cups crispy rice cereal (e.g., Rice Krispies) or crushed cookies for more dense clusters
- 1 cup mini marshmallows (optional — for chewiness and extra binding)
- 1/2 cup dark chocolate chips (plus 2 tablespoons for drizzle)
- 1/2 teaspoon fine sea salt
- 1/2 teaspoon pure vanilla extract (optional, softens the sweetness)
- Parchment paper or silicone mat (for setting clusters)
- Nonstick cooking spray or a light coating of oil (for scooping, optional)
Instructions
- Line two baking sheets with parchment paper or silicone mats and set them near your work area so clusters can be spooned and chilled immediately. (ingredients: Parchment paper or silicone mat)
- Place the white chocolate chips or candy melts and 1 tablespoon coconut oil in a medium, heatproof bowl. Microwave in 20–30 second bursts, stirring between bursts, until smooth and just melted. Alternatively, melt the mixture in a heatproof bowl set over gently simmering water (double boiler). Stop heating when just smooth. (ingredients: 12 ounces white chocolate chips or white candy melts; 1 tablespoon coconut oil (or neutral oil like vegetable oil))
- Stir the melted white chocolate until glossy, then whisk in the mint extract, vanilla extract (if using), and a few drops of green gel food coloring until you reach a uniform mint-green color. Taste carefully and add more mint extract a few drops at a time if you want more pronounced mint flavor. (ingredients: 1 teaspoon pure mint extract; 1/2 teaspoon pure vanilla extract (optional); a few drops green gel food coloring (optional))
- In a large mixing bowl combine the crispy rice cereal and mini marshmallows (if using). Sprinkle the 1/2 teaspoon sea salt evenly over the cereal. Stir gently to distribute. (ingredients: 4 cups crispy rice cereal (e.g., Rice Krispies) or crushed cookies for more dense clusters; 1 cup mini marshmallows (optional); 1/2 teaspoon fine sea salt)
- Pour the mint-colored melted white chocolate over the cereal mixture. Use a sturdy spatula to fold and coat the cereal evenly. Work quickly but gently to avoid crushing the cereal; the goal is to get every flake coated so clusters will hold together. If the coating looks too thick to fold, warm it a few seconds more in the microwave and stir in up to 1 teaspoon additional coconut oil to loosen. (ingredients: 12 ounces white chocolate chips or white candy melts; 1 tablespoon coconut oil (or neutral oil like vegetable oil))
- Fold in 1/2 cup dark chocolate chips so they’re distributed throughout the mixture. These will remain visible as dark studs in the pale green clusters. Reserve 2 tablespoons dark chocolate chips for the final drizzle. (ingredients: 1/2 cup dark chocolate chips (plus 2 tablespoons for drizzle))
- Working quickly, use a tablespoon or a small cookie scoop to mound small clusters (about 1 tablespoon each) onto the prepared parchment. Leave space between clusters so the chocolate drizzle can be added neatly later. If the mixture resists forming tidy mounds, chill it in the refrigerator for 5–10 minutes to firm slightly, then scoop. (ingredients: Nonstick cooking spray or a light coating of oil (for scooping, optional))
- Place the baking sheets of clusters in the refrigerator to set for 20–30 minutes until the coating is firm to the touch. Meanwhile, melt the reserved 2 tablespoons of dark chocolate chips with a teaspoon of coconut oil in short bursts in the microwave or over a double boiler until glossy and pourable. (ingredients: 2 tablespoons dark chocolate chips for drizzle; 1 tablespoon coconut oil (or neutral oil like vegetable oil))
- Transfer the melted dark chocolate to a small disposable piping bag, small zip-top bag with a corner snipped off, or a spoon. Drizzle thin lines of dark chocolate over the chilled clusters to create the decorative stripes visible in the picture. Add a few extra dark chocolate chips on top of several clusters for garnish before the drizzle sets. Lightly sprinkle a pinch of sea salt on a few clusters if desired. (ingredients: 2 tablespoons dark chocolate chips for drizzle; 1/2 teaspoon fine sea salt)
- Return the trays to the refrigerator for another 5–10 minutes so the drizzle sets. Once the clusters are fully firm, transfer them to an airtight container with parchment layers between stacks and store in the refrigerator for up to two weeks or at room temperature for up to three days if your room is cool. (ingredients: Parchment paper or silicone mat)
Pro Tips
- Use good-quality white chocolate or melting wafers for a smooth, glossy coating. White chocolate with a higher cocoa butter content melts more evenly and tastes richer than cheaper wafers.
- If your melted white chocolate seizes or becomes grainy from too-high heat, add 1 teaspoon of neutral oil and gently rewarm in 10-second bursts, stirring between each, until smooth.
- To make perfectly uniform clusters, use a small cookie scoop; pressing the back of another spoon gently over the top helps compact the mixture so pieces hold together better.
- Chill the coated cereal mixture briefly (5–10 minutes) if it becomes too loose to shape; slight chilling firms it just enough without hardening completely.
- For glossy drizzle lines, make sure the dark chocolate drizzle is thin and warm. If it hardens while you’re working, reheat briefly for 5–10 seconds so it flows again.
Variations
- Peppermint Crunch: Substitute crushed peppermint candies or candy cane pieces for half of the cereal, and increase mint extract slightly. The crushed candy adds a bright crunch and seasonal flair.
- Double Chocolate: Use chocolate-flavored cereal or crushed chocolate sandwich cookies instead of crispy rice and swap the white coating for a light mint-tinted milk chocolate coating so the clusters are richer and darker.
- Nutty Mint: Fold in 1/2 cup chopped roasted pistachios or almonds for added flavor and a crunchy contrast. Pistachios give a complementary green color and nutty complexity.
- Marshmallow Chew: Add an extra cup of mini marshmallows and gently warm them with the coating so they melt slightly into the mixture; this creates softer, chewier clusters reminiscent of rocky road.
Serving Suggestions
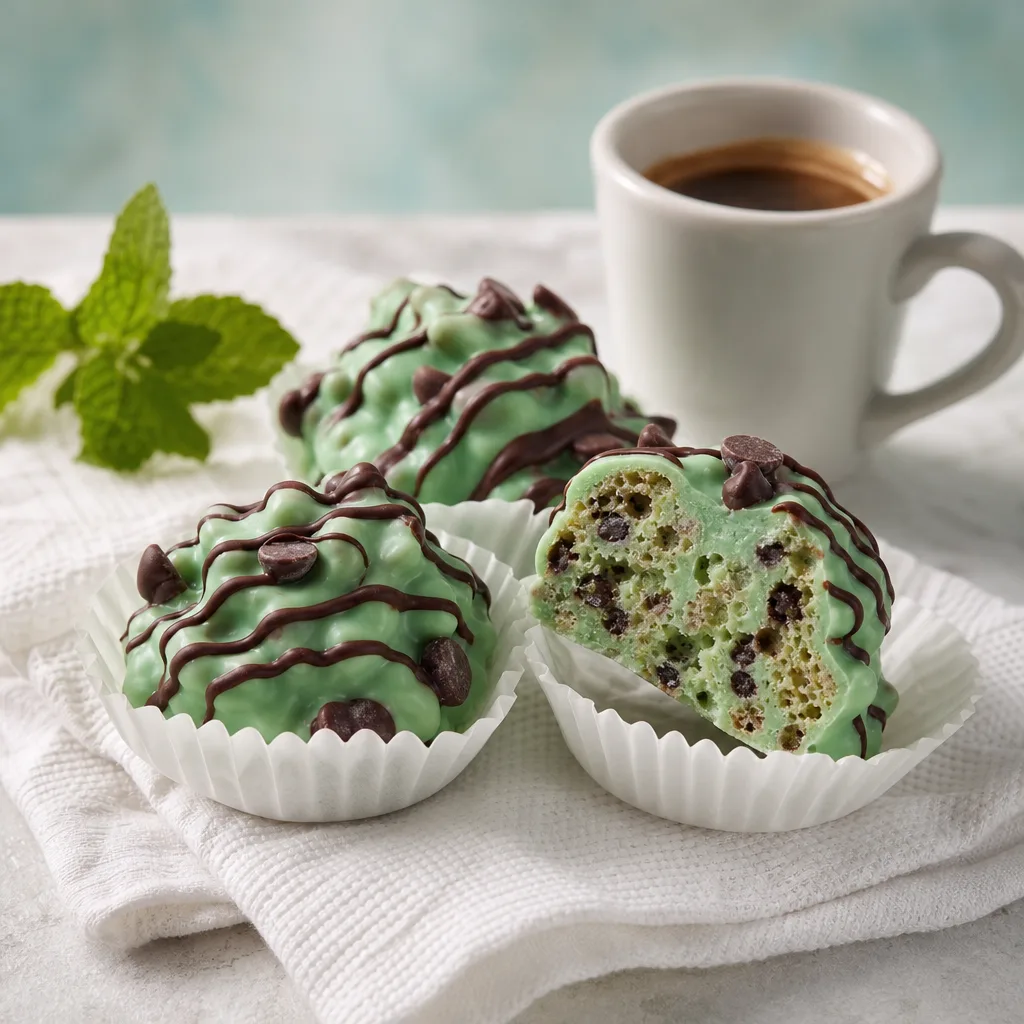
- Serve the clusters in small paper candy cups arranged on a pale serving plate to highlight the mint-green color and glossy chocolate drizzle.
- Create a dessert board with an assortment of small confections: place these clusters alongside dark chocolate squares, mint candies, and fresh berries for contrast.
- Package clusters in clear cellophane bags tied with ribbon as homemade gifts; include a small label that says the clusters should be refrigerated in warmer climates.
- Pair the clusters with a cup of rich espresso or a minty hot chocolate for a themed coffee break— the bright mint and dark chocolate hold up well against strong coffee.
Make-ahead and gifting tips
These clusters are a great make-ahead treat because they keep their shape and texture well in cool storage. Make them up to a week in advance and keep refrigerated in a single container. If you’re prepping for a party, you can make them two days ahead and finish with the dark chocolate drizzle the day of to preserve the sharp contrast between coating and drizzle.
For gifting, place clusters in food-safe boxes or small cellophane bags. Layer parchment between stacks to prevent sticking and keep them chilled until you deliver them. Attach a note advising recipients to store them in a cool place or the refrigerator, especially in warmer weather, so the glossy coating remains intact.
Storage and Reheating
Store the clusters in an airtight container layered with parchment paper between layers. Keep refrigerated for up to 2 weeks or at room temperature for up to 3 days if the ambient temperature is cool. For best texture, remove from the fridge 10–15 minutes before serving so they warm slightly and the flavors open. Do not attempt to reheat clusters in a microwave to soften; they are best enjoyed chilled or at cool room temperature.
No-Bake Mint Chocolate Chip Clusters
No-bake clusters of crispy cereal coated in mint-scented white chocolate, studded with dark chocolate chips and finished with a dark chocolate drizzle. Quick to assemble and perfect for parties, gifting, or a minty snack.
Ingredients
Equipment
Method
- Line two baking sheets with parchment paper or silicone mats and set them near your work area so clusters can be spooned and chilled immediately.
- Place the white chocolate chips or candy melts and 1 tablespoon coconut oil in a medium, heatproof bowl. Microwave in 20–30 second bursts, stirring between bursts, until smooth and just melted, or melt over a double boiler.
- Stir the melted white chocolate until glossy, then whisk in the mint extract, vanilla extract (if using), and a few drops of green gel food coloring until you reach a uniform mint-green color.
- In a large mixing bowl combine the crispy rice cereal and mini marshmallows (if using). Sprinkle the 1/2 teaspoon sea salt evenly over the cereal and stir gently to distribute.
- Pour the mint-colored melted white chocolate over the cereal mixture. Use a sturdy spatula to fold and coat the cereal evenly. If the coating looks too thick to fold, warm it a few seconds more and stir in up to 1 teaspoon additional coconut oil to loosen.
- Fold in 1/2 cup dark chocolate chips so they’re distributed throughout the mixture. Reserve 2 tablespoons dark chocolate chips for the final drizzle.
- Working quickly, use a tablespoon or a small cookie scoop to mound small clusters (about 1 tablespoon each) onto the prepared parchment. If the mixture resists forming tidy mounds, chill it in the refrigerator for 5–10 minutes to firm slightly, then scoop.
- Place the baking sheets of clusters in the refrigerator to set for 20–30 minutes until the coating is firm to the touch. Meanwhile, melt the reserved 2 tablespoons of dark chocolate chips with a teaspoon of coconut oil until glossy and pourable.
- Transfer the melted dark chocolate to a small piping bag or zip-top bag and drizzle thin lines of dark chocolate over the chilled clusters. Add a few extra dark chocolate chips on top of several clusters for garnish and lightly sprinkle a pinch of sea salt on a few if desired.
- Return the trays to the refrigerator for another 5–10 minutes so the drizzle sets. Once the clusters are fully firm, transfer them to an airtight container with parchment layers between stacks and store in the refrigerator for up to two weeks or at room temperature for up to three days if cool.
Notes
If you prefer less sweetness, reduce the amount of white chocolate slightly and increase the cereal proportion, then taste for balance.
Gel food coloring provides saturated color without thinning the chocolate; avoid liquid colorants.
Adjust mint extract incrementally—mint flavors can quickly overpower if measured in large amounts.
Frequently Asked Questions
Can I use candy melts instead of white chocolate?
Yes. Candy melts are formulated to melt smoothly and remain workable at room temperature, so they’re a convenient choice for no-bake clusters. They tend to be sweeter and have a slightly waxier texture than real white chocolate. If you prefer a less sweet flavor and better mouthfeel, choose high-quality white chocolate with cocoa butter. Either option can be tinted with gel food coloring for the mint-green hue.
How do I stop the white chocolate from seizing when I add color or mint extract?
Add flavoring and color after the chocolate is fully melted and cooled slightly. Use gel or paste food coloring rather than liquid coloring to avoid adding water. If the chocolate begins to thicken or seize, add 1/2–1 teaspoon of neutral oil (coconut oil or vegetable oil) and warm in short bursts while stirring until smooth. Avoid overheating the chocolate and stir continuously during melting.
Can I make these clusters gluten-free or vegan?
Yes. For gluten-free clusters, use certified gluten-free crispy rice cereal or swap in gluten-free crushed cookies. For a vegan version, choose dairy-free white chocolate alternatives or vegan candy melts, use vegan mini marshmallows (many marshmallows contain gelatin), and ensure your dark chocolate is dairy-free. Keep in mind texture and setting properties can vary with these swaps, so chilling times might change slightly.
What can I use instead of crunchy cereal for the cluster base?
If you don’t have crispy rice cereal, crushed shortbread or cookie crumbs, crushed graham crackers, pretzel pieces, or chopped toasted nuts all work. Cookies make denser clusters, pretzels add a salty contrast, and nuts bring richness. Adjust the coating quantity as needed so your chosen base is fully coated and holds together.
Can I freeze these clusters for longer storage?
Yes, you can freeze them. Place clusters in a single layer on a baking sheet and freeze until firm, then transfer them to a freezer-safe container with parchment layers. They’ll keep well frozen for up to 2 months. Thaw in the refrigerator for a few hours or overnight before bringing to room temperature 10–15 minutes prior to serving. Avoid thawing at warm room temperature straight from the freezer to prevent condensation making the coating bloom (dull or streaky surface).