
Follow Me On Social Media!
The Ultimate Guide to Baked Caesar Chicken with Creamy Parmesan Sauce
In the world of weeknight dinners, finding a recipe that strikes the perfect balance between minimal effort and restaurant-quality flavor is akin to striking gold. Enter the Baked Caesar Chicken with Creamy Parmesan Sauce—a dish that has rapidly climbed the ranks to become a modern classic in home kitchens. This recipe isn’t just about coating chicken in dressing; it is a culinary technique that locks in moisture, ensuring that the often-maligned boneless, skinless chicken breast emerges from the oven juicy, tender, and bursting with savory depth.
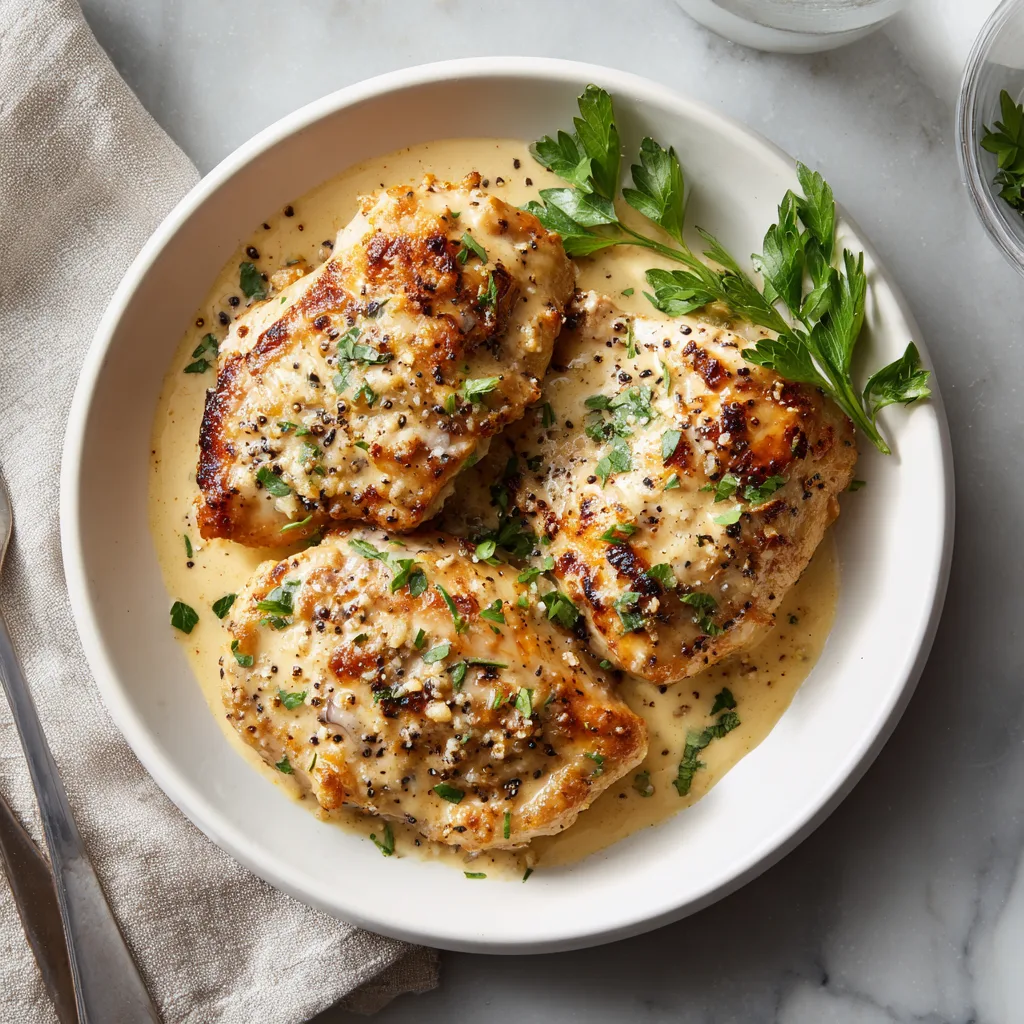
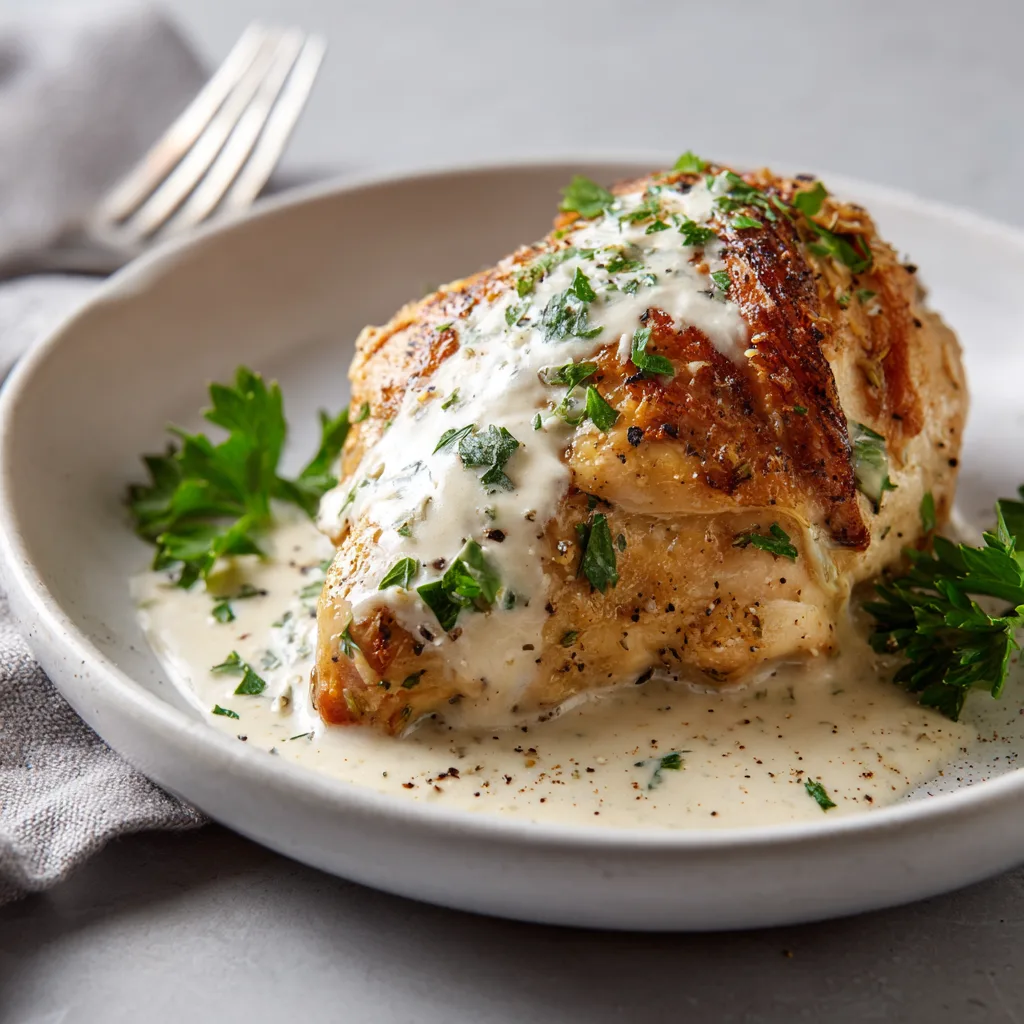
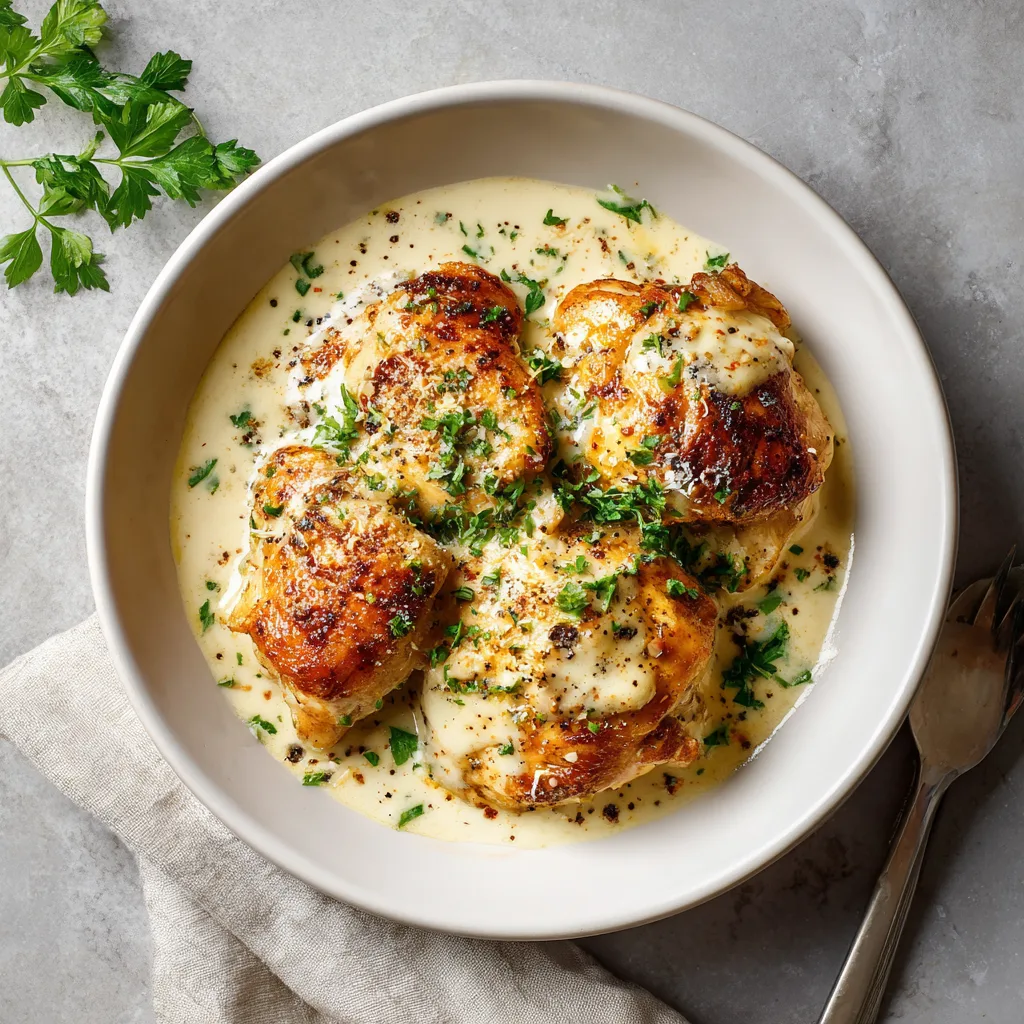
The magic lies in the dual-purpose “sauce.” By combining the tang of Caesar-style ingredients—garlic, lemon, anchovy notes, and parmesan—with a creamy base like mayonnaise or Greek yogurt, you create a barrier that protects the meat from the harsh heat of the oven. As it bakes, this coating caramelizes into a golden, bubbly crust while simultaneously melting down to bathe the chicken in a rich, velvety sauce. It is a sensory experience: the crunch of the parmesan top, the creaminess of the sauce, and the succulence of the meat.
Whether you are a busy parent looking for a “set it and forget it” meal, a fitness enthusiast seeking a high-protein keto-friendly option, or simply a food lover craving comfort, this guide will walk you through every nuance of creating the perfect Baked Caesar Chicken. We will explore the science behind the ingredients, the secrets to perfectly cooked poultry, and variations that can take this dish from a Tuesday night staple to a Saturday night showstopper.
The Ingredients: A Symphony of Savory Flavors
To create a dish that sings, you need to understand your orchestra. Here is a breakdown of what you will need and why each component matters.
- Boneless, Skinless Chicken Breasts: The canvas of the dish. While convenient, breasts are lean and prone to drying out. This recipe is specifically designed to mitigate that dryness through the high-fat, creamy coating.
- Mayonnaise or Greek Yogurt: This serves as the fat base. Mayonnaise offers a classic, rich mouthfeel and browns beautifully. Greek yogurt provides a tangy, lighter alternative that tenderizes the meat via its lactic acid content. A 50/50 split is often the secret to the best of both worlds.
- Parmesan Cheese: You will need this in two forms. Grated parmesan mixes into the sauce for saltiness and umami, while shredded parmesan goes on top to create that irresistible golden crust. Always aim for freshly grated off the block; pre-packaged cheese often contains anti-caking agents that prevent a smooth melt.
- Garlic: Fresh minced garlic is non-negotiable here. It provides the aromatic punch that cuts through the richness of the cream base.
- Lemon Juice: A splash of acidity is essential to brighten the flavors and balance the heavy dairy and mayonnaise elements.
- Worcestershire Sauce: This adds the depth and “meatiness” associated with traditional Caesar salad, mimicking the umami usually provided by anchovies.
- Dijon Mustard: A teaspoon of Dijon adds a sharp, vinegary kick and acts as an emulsifier, helping the sauce stay creamy during baking.
- Seasonings: Salt and freshly cracked black pepper are standard. Dried oregano or parsley can be added for an herbal note.
- Optional Crunch: Panko breadcrumbs or crushed pork rinds (for low carb) can be sprinkled on top for added texture.
Step-by-Step Instructions: Mastering the Bake
Follow these steps to ensure your chicken is cooked safely and delicious every time.
- Preparation: Preheat your oven to 375°F (190°C). Grease a 9×13 inch baking dish with olive oil or cooking spray. If your chicken breasts are uneven in thickness, pound them gently to an even thickness or slice them horizontally into cutlets. This ensures they cook at the same rate.
- Make the Sauce: In a medium mixing bowl, whisk together the mayonnaise (or yogurt), grated parmesan cheese, minced garlic, lemon juice, Worcestershire sauce, Dijon mustard, and black pepper. Taste the mixture. It should be punchy and slightly salty (remember, this seasoning has to flavor the entire piece of meat).
- Coat the Chicken: Pat the chicken breasts dry with paper towels. This removes excess moisture and helps the sauce adhere better. Place the chicken in the prepared baking dish. generously spoon the Caesar mixture over each breast, spreading it to cover the top and sides completely.
- Add the Texture: Sprinkle the shredded parmesan cheese over the top of the sauce-coated chicken. If you are using breadcrumbs for extra crunch, mix them with a little melted butter and parsley, then sprinkle them over the cheese layer.
- Bake: Place the dish in the oven and bake for 20–30 minutes. The exact time depends on the thickness of your chicken. You are looking for an internal temperature of 165°F (74°C).
- The Broil (Optional): If the chicken is cooked but the top isn’t quite as golden as you’d like, switch the oven to broil for 2–3 minutes. Watch it like a hawk—cheese burns in seconds!
- Rest: Remove the chicken from the oven and let it rest for 5–10 minutes. This allows the juices to redistribute throughout the meat. If you cut into it immediately, those juices will run out onto the plate, leaving you with dry chicken.
- Garnish and Serve: Sprinkle with fresh chopped parsley or basil for a pop of color and freshness. Serve hot with the pan juices spooned over the top.
Tips for Success
- Don’t Overcook: The number one crime against chicken breast is overcooking. Invest in an instant-read meat thermometer. Pull the chicken out when it hits 160°F; the residual heat during the resting period will carry it to the safe 165°F zone without drying it out.
- Room Temperature Meat: Let your chicken sit on the counter for 15 minutes before baking. Cooking ice-cold meat can lead to uneven cooking and tough fibers.
- Sauce Consistency: If you prefer a runnier sauce to pour over rice or pasta, mix a tablespoon of milk or cream into the sauce mixture before coating the chicken.
- Make Ahead: You can prepare the sauce up to 3 days in advance and store it in the fridge. You can even coat the chicken in the morning and leave it in the fridge to marinate until dinner time.
Variations to Suit Every Palate
One of the best things about this recipe is its versatility. Once you have the base technique down, you can experiment.
- The “Spicy Caesar”: Add a teaspoon of red pepper flakes or a dash of hot sauce to the creamy mixture. The heat cuts through the dairy beautifully.
- Bacon Lover’s Delight: Cook 2-3 strips of bacon until crispy, crumble them, and mix them into the shredded cheese topping before baking. Bacon and Caesar flavors are natural best friends.
- Vegetable Add-in: Surround the chicken with broccoli florets or asparagus spears in the baking dish. The veggies will roast in the chicken juices and creamy sauce, creating a complete one-pan meal.
- Spinach and Artichoke Style: Mix chopped spinach and canned artichoke hearts into the sauce for a dip-inspired dinner.
Serving Suggestions
Because the main dish is rich and creamy, it pairs best with sides that offer texture or acidity.
- Roasted Vegetables: Roasted asparagus, green beans, or Brussels sprouts provide a nice green contrast.
- Starch: Serve over a bed of angel hair pasta, mashed potatoes, or rice to soak up the extra sauce.
- Salad: Ironically, a crisp green salad with a vinaigrette (not Caesar!) works well to cleanse the palate between bites.
- Bread: Garlic bread is a must for scooping up the creamy parmesan remnants on the plate.
Baked Caesar Chicken with Creamy Parmesan Sauce
Juicy chicken breasts baked in a rich, creamy garlic-parmesan sauce with a golden cheese crust. A low-carb, high-protein dinner ready in under 40 minutes.
Ingredients
Equipment
Method
- Preheat oven to 375°F (190°C). Lightly grease a 9×13 inch baking dish with cooking spray.
- Pat the chicken breasts dry with a paper towel and season lightly with salt and pepper on both sides. Place them in the prepared baking dish.
- In a small bowl, whisk together the mayonnaise, grated parmesan cheese, minced garlic, lemon juice, Worcestershire sauce, and Dijon mustard until well combined.
- Spoon the creamy sauce mixture evenly over each chicken breast, ensuring the tops are completely covered.
- Sprinkle the shredded parmesan cheese generously over the top of the sauce-coated chicken.
- Bake for 20-30 minutes, or until the chicken is cooked through and reaches an internal temperature of 165°F (74°C).
- Optional: Turn the oven to broil for 2-3 minutes to brown the cheese topping until golden and bubbly. Watch closely to prevent burning.
- Remove from oven and let rest for 5 minutes. Garnish with fresh chopped parsley before serving.
Notes
For a crunchier topping, mix 1/4 cup Panko breadcrumbs with the shredded cheese before baking.
Cultural Context and Fun Facts
The Caesar salad, the inspiration for this dish, has a fascinating and debated history. It is generally attributed to Caesar Cardini, an Italian immigrant who operated restaurants in Mexico and the United States. Legend has it that he invented the salad at his restaurant in Tijuana, Mexico, on July 4, 1924, when a rush of holiday customers depleted his kitchen supplies. He threw together what he had left—lettuce, olive oil, raw egg, garlic, parmesan, and Worcestershire sauce—and prepared it tableside with flair.
This baked chicken version is a modern American evolution of that concept. It takes the flavor profile of Cardini’s improvisation and adapts it to the “casserole culture” of the mid-20th century, where mayonnaise-based baked dishes became a staple of suburban cooking. It represents the ultimate fusion of Italian flavor profiles with American convenience cooking.
Today, this dish is a superstar of the keto and low-carb communities. By omitting the croutons often found in the salad version, the dish becomes high in fat and protein while remaining virtually carb-free. This has propelled its popularity in recent years, proving that dietary restrictions do not have to mean restricting flavor.
Whether you are cooking for a dinner party or a quick Tuesday meal, this Baked Caesar Chicken promises to deliver comfort, nutrition, and bold flavor in every bite. It is a testament to how a few simple ingredients, when treated with care, can transform into something truly spectacular.